
Intermediate
Create an EVM Subnet on Fuji Testnet Using Subnet-CLI
This tutorial outlines the steps to create an EVM Subnet on the Fuji Testnet using Subnet-CLI. It covers the prerequisites of having 1+ nodes running on Fuji Testnet, subnet-cli installed, and subnet-cli private key with some AVAX on the Fuji Testnet. The tutorial explains how to create a virtual machine based on Subnet-EVM, add a node as a validator to the primary network, create a Subnet, add the same node to the newly created Subnet, and create a blockchain with the specified virtual machine. The tutorial also covers the steps to compile Subnet-EVM into a binary and how to fund the subnet-cli private key.
For the latest tool to deploy a Subnet on Fuji, please refer to this article. This article is still applicable for Mainnet deploy with a Ledger.
After trying out a Subnet on a local box by following this tutorial, next step is to try it out on Fuji Testnet.
In this article, we show how to do the following on Fuji Testnet.
-
Create a virtual machine based on Subnet-EVM.
-
Add a node as a validator to the primary network.
-
Create a Subnet.
-
Add the same node to the newly created Subnet.
-
Create a blockchain with the specified virtual machine.
The same steps can be applied on Mainnet, see here on how to switch to Mainnet when using subnet-cli. Furthermore, you should practice using Ledger by following this before deploying on Mainnet.
All IDs in this article are for illustration purpose. They can be different in your own run-through of this tutorial.
Prerequisites
-
1+ nodes running on Fuji Testnet (does not need to be a validator)
-
subnet-cliinstalled -
subnet-cliprivate key with some Fuji AVAX
Fuji Testnet
For this tutorial, we recommend that you follow Run an Avalanche Node Manually and this step particularly to start your node on Fuji:
To connect to the Fuji Testnet instead of the main net, use argument --network-id=fuji
To get the NodeID of this Fuji node, call the following curl command to info.getNodeID:
curl -X POST --data '{
    "jsonrpc":"2.0",
    "id"     :1,
    "method" :"info.getNodeID"
}' -H 'content-type:application/json;' 127.0.0.1:9650/ext/info
The response should look something like:
{
  "jsonrpc": "2.0",
  "result": {
    "nodeID": "NodeID-5mb46qkSBj81k9g9e4VFjGGSbaaSLFRzD"
  },
  "id": 1
}
That portion that says, NodeID-5mb46qkSBj81k9g9e4VFjGGSbaaSLFRzD is the NodeID, the entire thing. We will need this ID in the later section when calling Subnet-CLI wizard.
INFO
With more data on Fuji Testnet, it may take a while to bootstrap Fuji Testnet from scratch.
Subnet-CLI
git clone https://github.com/ava-labs/subnet-cli.git;
cd subnet-cli;
go install -v .;
Once you have installed it, run subnet-cli on your console to confirm it is working as expected (make sure your $GOBIN is in your $PATH):
Private Key
subnet-cli create key
This creates a file .subnet-cli.pk under the current directory with a private key. By default, subnet-cli uses the key specified in file .subnet-cli.pk on the P-Chain to pay for the transaction fee, unless --private-key-path is used to overwrite. Please make sure that you have enough fund on this P-Chain address to pay for transactions.
To get fund on this key on Fuji Testnet, follow these steps:
-
User your private key in the
.subnet-cli.pkfile on the web wallet to access this wallet. (Private Key is the first option on the web wallet). And pick Fuji on the top right corner as the network and locate your C-Chain address which starts with0x. -
Request funds from the faucet using your C-Chain address.
-
Move the test funds from the C-Chain to the P-Chain by clicking on the
Cross Chainon the left side of the web wallet (more details can be found on the tutorial between C/P chains).
After following these 3 steps, your test key should now have a balance on the P-Chain on Fuji Testnet.
Check here for more info.
Virtual Machine
Avalanche is a network composed of multiple blockchains. Each blockchain is an instance of a Virtual Machine (VM), much like an object in an object-oriented language is an instance of a class. That is, the VM defines the behavior of the blockchain.
Subnet-evm is the VM that defines the Subnet Contract Chains. Subnet-evm is a simplified version of Avalanche C-Chain.
This chain implements the Ethereum Virtual Machine and supports Solidity smart contracts as well as most other Ethereum client functionality.
Build Binary
First, you’ll need to compile the Subnet-EVM into a binary that AvalancheGo can interact with. To do this, first install Subnet-EVM (assumes you don’t yet have the Subnet-EVM repository downloaded):
git clone https://github.com/ava-labs/subnet-evm.git
cd subnet-evm
Create a VMID with string subnetevm which you can change to whatever you like. This command is used to generate a valid VMID based on some string to uniquely identify a VM. This should stay the same for all versions of the VM, so it should be based on a word rather than the hash of some code.
subnet-cli create VMID subnetevm
This will prints this output:
created a new VMID srEXiWaHuhNyGwPUi444Tu47ZEDwxTWrbQiuD7FmgSAQ6X7Dy from subnetevm
Now issue this command to build
./scripts/build.sh build/srEXiWaHuhNyGwPUi444Tu47ZEDwxTWrbQiuD7FmgSAQ6X7Dy
Move Binary
Once the subnet-evm binary is built, you’ll need to move it to AvalancheGo’s plugin directory (within the –build-dir) so it can be run by your node. When building avalanchego from source (see Run an Avalanche Node Manually), this defaults to avalanchego/build/plugins in which avalanchego is the directory where you have checked out AvalancheGo project. This build directory is structured as:
build-dir
|_avalanchego (note: this is the AvalancheGo binary, not a directory)
|_plugins
  |_evm
To put the subnet-evm binary in the right place, run the following command (assuming the avalanchego and subnet-evm repositories are in the same folder):
mv ./subnet-evm/build/srEXiWaHuhNyGwPUi444Tu47ZEDwxTWrbQiuD7FmgSAQ6X7Dy ./avalanchego/build/plugins;
Subnet-CLI Wizard
The easiest and fastest way to get your new Subnet off the ground is to use the subnet-cli. This powerful CLI can add validators, create Subnets, and create blockchains. Documentation of Subnet-CLI can be found here.
INFO
The subnet-cli DOES NOT need to be run on the same host where you are running your validator. By default, it interfaces exclusively with the public Avalanche API Endpoints.
To make it as easy as possible to get started, the subnet-cli also provides a wizard command that takes care of EVERYTHING for you. In summary, type one command and you’ll have a Subnet with a running subnet-evm instance a few minutes later.
Run the following command to:
-
Add
NodeID-5mb46qkSBj81k9g9e4VFjGGSbaaSLFRzD(which was created above) as a validator to the primary network (comma separated if multiple validators, and skipping any that already exist); -
Create a Subnet;
-
Add
NodeID-5mb46qkSBj81k9g9e4VFjGGSbaaSLFRzDto the Subnet; -
Create a new blockchain with a virtual machine whose ID is
srEXiWaHuhNyGwPUi444Tu47ZEDwxTWrbQiuD7FmgSAQ6X7Dy
subnet-cli wizard \
--node-ids=NodeID-5mb46qkSBj81k9g9e4VFjGGSbaaSLFRzD \
--vm-genesis-path=my-genesis.json \
--vm-id=srEXiWaHuhNyGwPUi444Tu47ZEDwxTWrbQiuD7FmgSAQ6X7Dy \
--chain-name=subnetevm
By default, the private key in .subnet-cli.pk file which was created from the step above is used to pay the cost of this transaction. You can use --private-key-path to specify a different file.
As mentioned before, the vm-id was generated by calling subnet-cli create VMID subnetevm. You can use any value here, the only important thing is to make sure the binary you have generated has the same name.
INFO
You can find an example of a genesis file to use when launching your own subnet-evm in the networks folder. Note: please remove airdropHash and airdropAmount fields if you want to start with it.
As part of the return of subnet-cli wizard, a Subnet ID value will be returned which will be needed in next step. See here for more detailed logs.
Add New Subnet to Node Whitelist
During the execution of the wizard command, you will be prompted to add your new SubnetID to your node. This is done using the whitelisted-subnets config. You can provide the whitelisted-subnets argument by modifying your config file (reference here) or providing an argument on startup.
Example Config File:
{
  "network-id": "fuji",
  "health-check-frequency": "2s",
  "log-display-level": "INFO",
  "log-level": "INFO",
  "whitelisted-subnets": "p433wpuXyJiDhyazPYyZMJeaoPSW76CBZ2x7wrVPLgvokotXz"
}
Example Node Arguments:
--whitelisted-subnets=p433wpuXyJiDhyazPYyZMJeaoPSW76CBZ2x7wrVPLgvokotXz --network-id=fuji
TIP
p433wpuXyJiDhyazPYyZMJeaoPSW76CBZ2x7wrVPLgvokotXz is an example of SubnetID, please replace it with your correct SubnetID.
Restart Node
Once you’ve updated your config, you’ll need to restart your AvalancheGo node for the changes to take effect.
If you completed the steps successfully, you’ll see the node print out something like these (ignore the exact value of all IDs, they are just for illustration purpose):
INFO [01-25|16:47:04] chains/manager.go#246: creating chain:
    ID: 2AM3vsuLoJdGBGqX2ibE8RGEq4Lg7g4bot6BT1Z7B9dH5corUD
    VMID:sqja3uK17MJxfC7AN8nGadBw9JK5BcrsNwNynsqP5Gih8M5Bm
INFO [01-25|16:47:04] api/server/server.go#203: adding route /ext/bc/2JVSBoinj9C2J33VntvzYtVJNZdN2NKiwwKjcumHUWEb5DbBrm/events
INFO [01-25|16:47:04] api/server/server.go#203: adding route /ext/bc/2JVSBoinj9C2J33VntvzYtVJNZdN2NKiwwKjcumHUWEb5DbBrm
INFO [01-25|16:47:04] api/server/server.go#203: adding route /ext/bc/2JVSBoinj9C2J33VntvzYtVJNZdN2NKiwwKjcumHUWEb5DbBrm/wallet
INFO [01-25|16:47:04] <2AM3vsuLoJdGBGqX2ibE8RGEq4Lg7g4bot6BT1Z7B9dH5corUD Chain> snow/engine/snowman/transitive.go#67: initializing consensus engine
INFO [01-25|16:47:04] <2AM3vsuLoJdGBGqX2ibE8RGEq4Lg7g4bot6BT1Z7B9dH5corUD Chain> snow/engine/snowman/bootstrap/bootstrapper.go#225: Starting bootstrap...
INFO [01-25|16:47:04] <P Chain> snow/engine/snowman/bootstrap/bootstrapper.go#458: waiting for the remaining chains in this subnet to finish syncing
INFO [01-25|16:47:04] api/server/server.go#203: adding route /ext/bc/2AM3vsuLoJdGBGqX2ibE8RGEq4Lg7g4bot6BT1Z7B9dH5corUD/public
INFO [01-25|16:47:04] <2AM3vsuLoJdGBGqX2ibE8RGEq4Lg7g4bot6BT1Z7B9dH5corUD Chain> snow/engine/common/bootstrapper.go#235: Bootstrapping started syncing with 2 vertices in the accepted frontier
INFO [01-25|16:47:05] <2AM3vsuLoJdGBGqX2ibE8RGEq4Lg7g4bot6BT1Z7B9dH5corUD Chain> snow/engine/snowman/bootstrap/bootstrapper.go#419: bootstrapping fetched 69 blocks. Executing state transitions...
INFO [01-25|16:47:06] <2AM3vsuLoJdGBGqX2ibE8RGEq4Lg7g4bot6BT1Z7B9dH5corUD Chain> snow/engine/common/queue/jobs.go#181: executed 69 operations
INFO [01-25|16:47:06] <2AM3vsuLoJdGBGqX2ibE8RGEq4Lg7g4bot6BT1Z7B9dH5corUD Chain> snow/engine/snowman/transitive.go#354: bootstrapping finished with 2DUxceCx71L5TLTeLpKUQxSBVm8vTKPmFs2usAyRnusUzs4Q4M as the last accepted block
If you didn’t put the subnet-evm binary in the right place, you’ll see something like:
INFO [01-26|05:54:19] chains/manager.go#246: creating chain:
    ID: 2AM3vsuLoJdGBGqX2ibE8RGEq4Lg7g4bot6BT1Z7B9dH5corUD
    VMID:sqja3uK17MJxfC7AN8nGadBw9JK5BcrsNwNynsqP5Gih8M5Bm
ERROR[01-26|05:54:19] chains/manager.go#270: error creating chain 2AM3vsuLoJdGBGqX2ibE8RGEq4Lg7g4bot6BT1Z7B9dH5corUD: error while looking up VM: there is no ID with alias sqja3uK17MJxfC7AN8nGadBw9JK5BcrsNwNynsqP5Gih8M5Bm
Next Step
Next step is to deploy the Subnet on to the Mainnet, see this using DeFi Kingdoms Subnet as an example.
Appendix
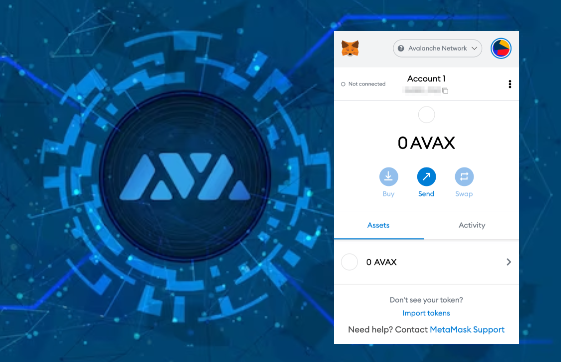
Connect with MetaMask
Subnet-evm supports almost every tool that C-Chain and EVM supports. For instance, let’s connect MetaMask with our Subnet-EVM.
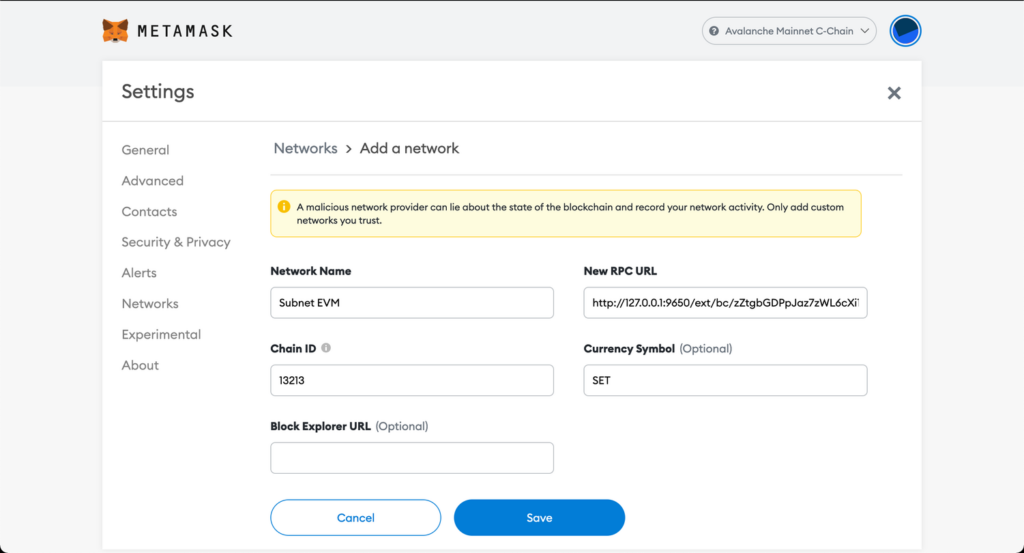
First we need to create a new network in MetaMask. It can be added in Settings > Networks > Add a network.
Network Name: Any name to indicate this network.
New RPC URL: This must be the RPC URL of our node. In this case it is http://127.0.0.1:9650/ext/bc/zZtgbGDPpJaz7zWL6cXi1sSJRW1sMQH4s119GURVYGPXkrUaE/rpc
Chain ID: The ChainID specified in genesis. In this case 13213.
Currency Symbol: Any symbol for this token.
It should look like:
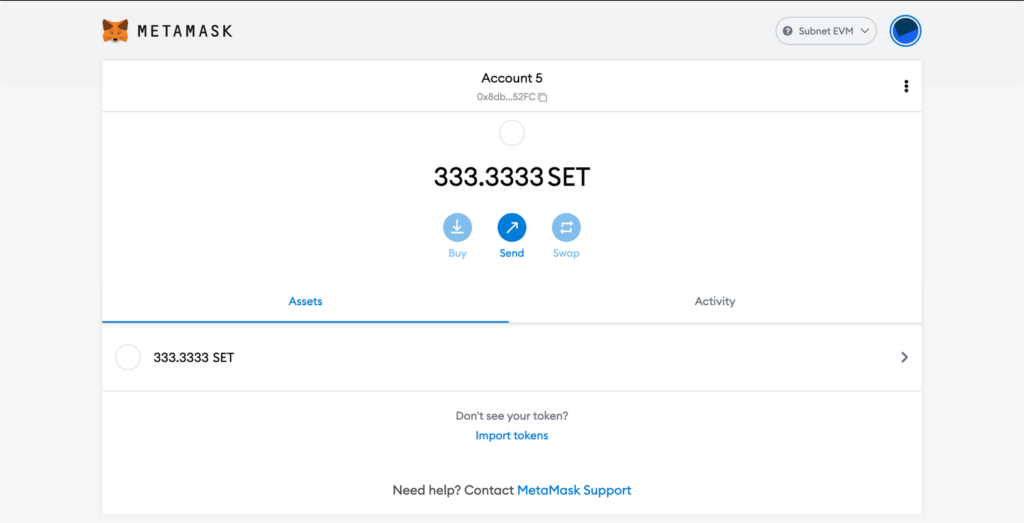
Now we can access our account with initial balance. We used 0x8db97C7cEcE249c2b98bDC0226Cc4C2A57BF52FC as our initial account. The private key of this account is 56289e99c94b6912bfc12adc093c9b51124f0dc54ac7a766b2bc5ccf558d8027. This private key is publicly shared, so don’t use this account in Mainnet or testnets. The genesis block allocates 333,333,333,333,333,333,333 coins to this account, which is equivalent to 333.3333 SET.
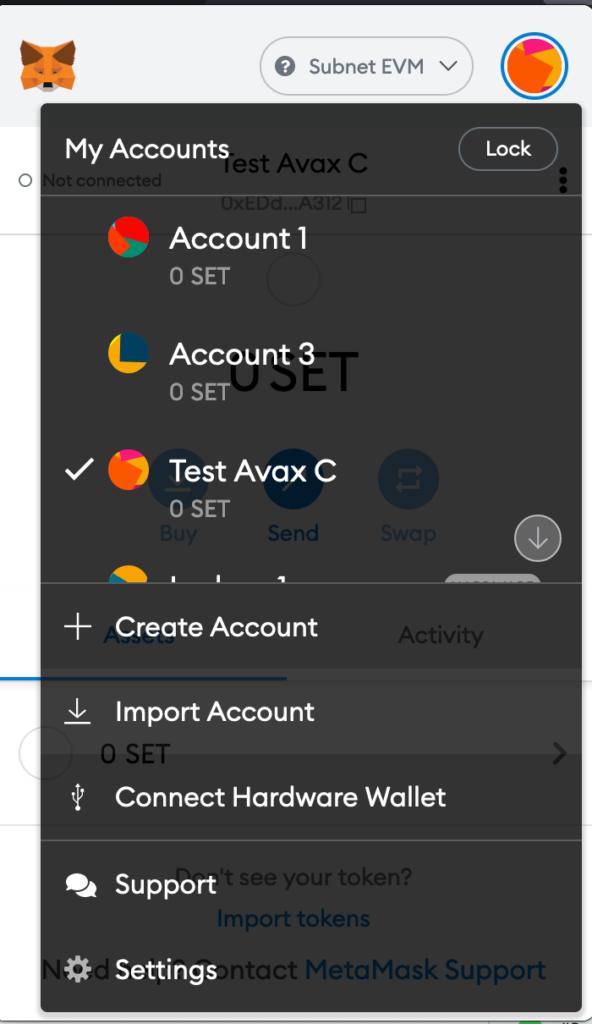
Let’s import this private key into MetaMask.
-
Click on MetaMask.
-
From “My Accounts” click on “Import Account”:
Now you can import your private key in this screen. When you pasted your private key, click on “Import.” You should be able to see your account with some balances in it. For example:
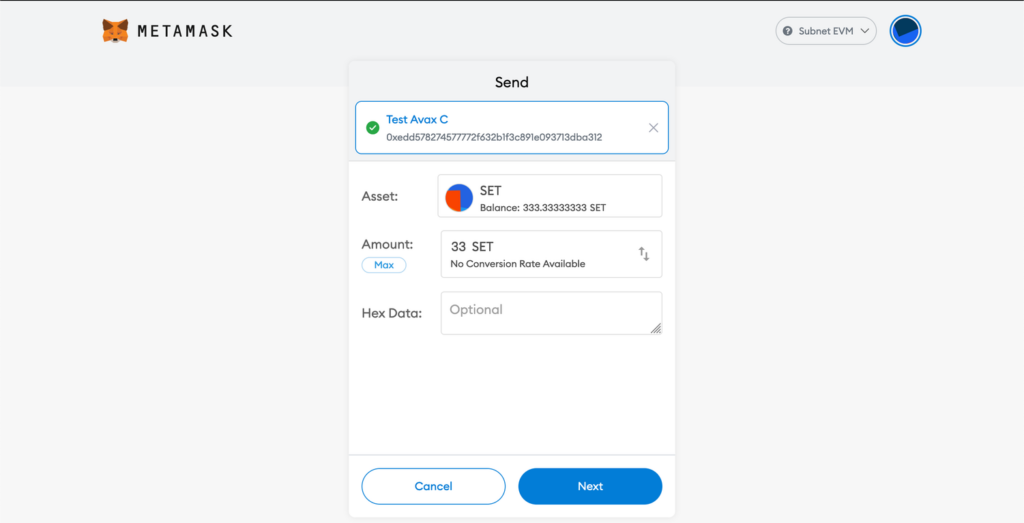
Now we can send funds to another account:
-
Click on “Send” in your MetaMask.
-
Input an address or select “Transfer between my accounts”
-
Select an address
-
Input your amount. It should be look like this
-
Click on Next
-
You can inspect your transaction in this screen:

For example let’s verify the base fee is indeed the configured one. Remind that in our genesis we specified minBaseFee as 13000000000 which is equivalent to 13 Gwei. Let’s click “Edit” above on the “Estimated gas fee” section.
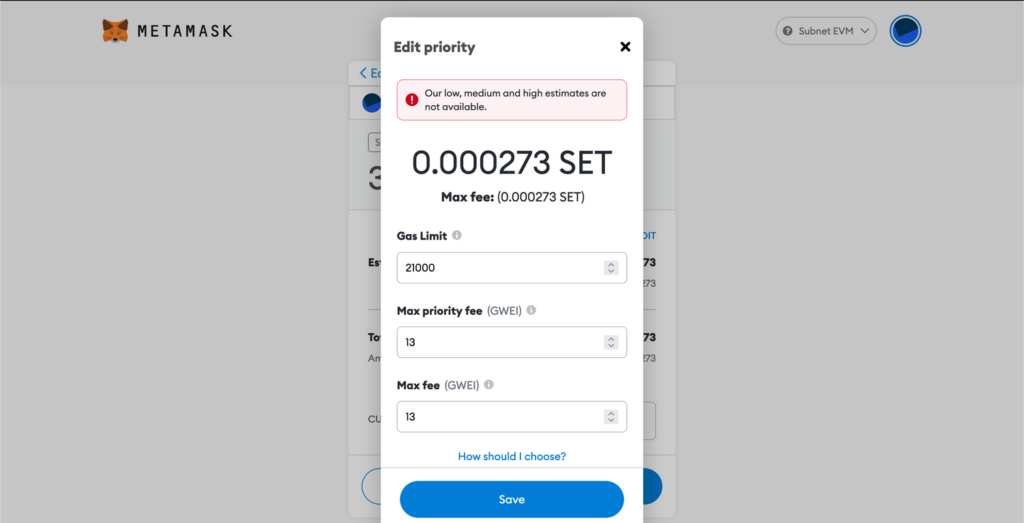
-
Click on “Save” in the “Edit priority” dialog when you’re done.
-
Now we can confirm our transaction. Click on “Confirm”
-
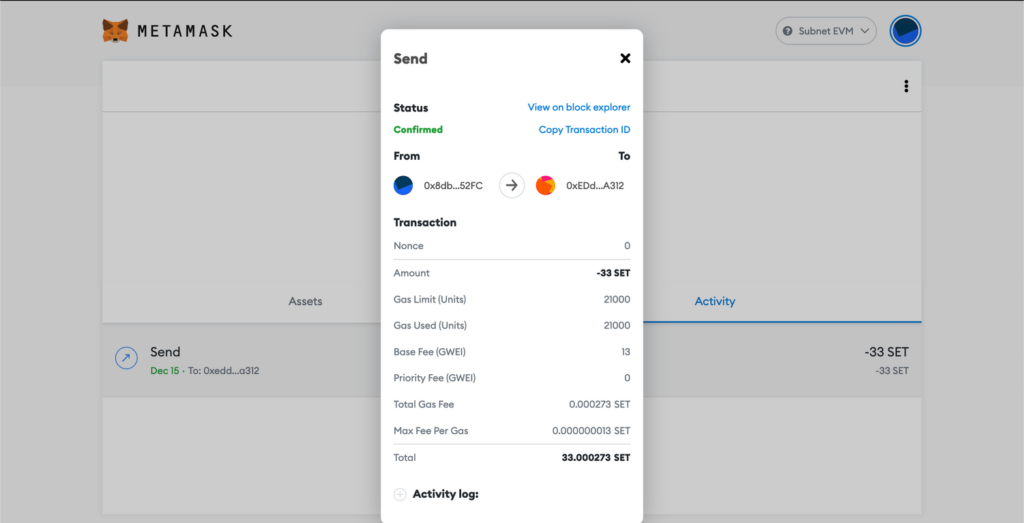
After a while your transaction will be confirmed. When confirmed it should look like this:
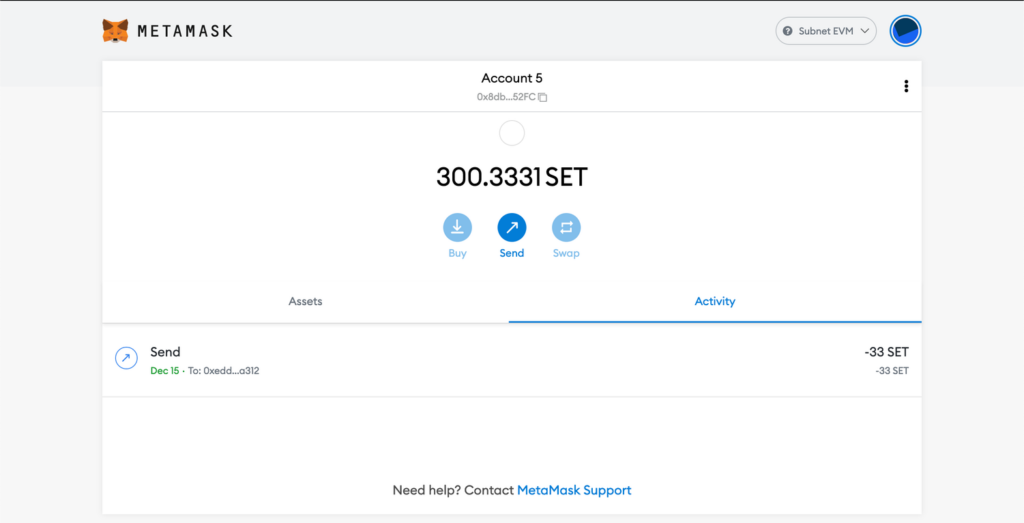
You can inspect your confirmed transaction.
Other Tools
You can use Subnet-EVM just like you use C-Chain and EVM tools. Only differences are ChainID and RPC URL. For example you can follow this article to Deploy a Smart Contract on Your Subnet-EVM Using Remix and MetaMask. Or you can deploy your contracts with hardhat quick start guide by changing url and chainId in the hardhat.config.ts.