

Intermediate
Deploy using Remix Online IDE
Welcome to our tutorial on deploying smart contracts on the Klaytn blockchain network using Remix, an online Integrated Development Environment (IDE). Remix is a browser-based IDE that allows developers to write, test, and deploy smart contracts on the Ethereum and Klaytn blockchain platforms. It provides a user-friendly interface, making it easy for developers of all skill levels to quickly write, test, and deploy smart contracts. In this tutorial, we will explore the process of deploying smart contracts on the Klaytn network using Remix, including the necessary software and configuration steps, and best practices for testing and debugging your contracts. Whether you are a developer, researcher, or simply a blockchain enthusiast, this tutorial will provide valuable insights and hands-on experience in deploying smart contracts on the Klaytn network using Remix online IDE.
Deploying smart contracts on the Klaytn blockchain network using Remix Online IDE involves several steps, including writing and testing the smart contract, and finally deploying it on the network.
Firstly, the smart contract code needs to be written in Solidity and uploaded to the Remix IDE. Once the code is uploaded, it can be tested and debugged using the various features provided by the IDE, such as the built-in compiler and the JavaScript VM.
Once the contract is written, tested, and is ready to be deployed on the Klaytn network, you need to connect the Remix to the Klaytn network by specifying the node and the network ID. You can use the “Deploy & Run Transactions” tab to deploy the smart contract on the network. You will have to provide the necessary inputs and the amount of KLAY and gas to deploy the contract.
It’s important to note that deploying a smart contract on the Klaytn network requires KLAY, the native token of the network. Additionally, deploying a smart contract on the Klaytn network costs a certain amount of gas, a unit of measurement for the amount of computational work required to execute a transaction or contract.
In summary, deploying a smart contract on the Klaytn blockchain network using Remix online IDE involves several steps like writing and testing the smart contract, and finally deploying it on the network, it requires KLAY and gas to deploy. Remix provides a user-friendly interface, making it easy for developers of all skill levels to quickly write, test, and deploy smart contracts. It also provides features such as a built-in compiler, JavaScript VM, and the ability to connect to the network, which can be used to test and debug the contract before deployment.
Open your internet browser and go to Klaytn Plugin for Remix.
-
Add a new file.
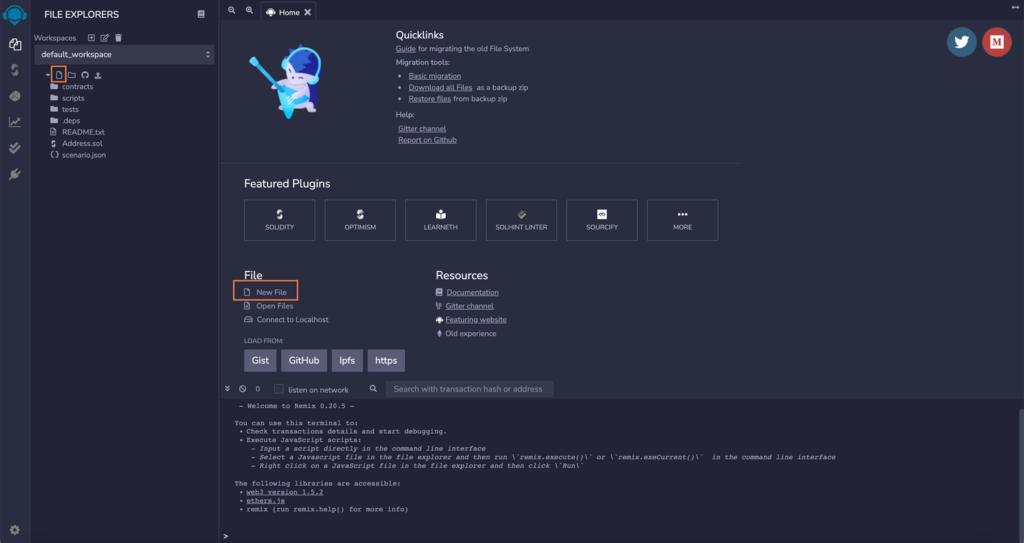
-
Copy and paste the following sample code (or any code you want to deploy) in the new file. The code consists of two contracts called Mortal and KlaytnGreeter, and it allows you to run a simple “Hello World!”.
pragma solidity 0.5.12;

contract Mortal {
    /* Define variable owner of the type address */
    address payable owner;
    /* This function is executed at initialization and sets the owner of the contract */
    constructor () public { owner = msg.sender; }
    /* Function to recover the funds on the contract */
    function kill() public payable { if (msg.sender == owner) selfdestruct(owner); }
}

contract KlaytnGreeter is Mortal {
    /* Define variable greeting of the type string */
    string greeting;
    /* This runs when the contract is executed */
    constructor (string memory _greeting) public {
        greeting = _greeting;
    }
    /* Main function */
    function greet() public view returns (string memory) {
        return greeting;
    }
}
-
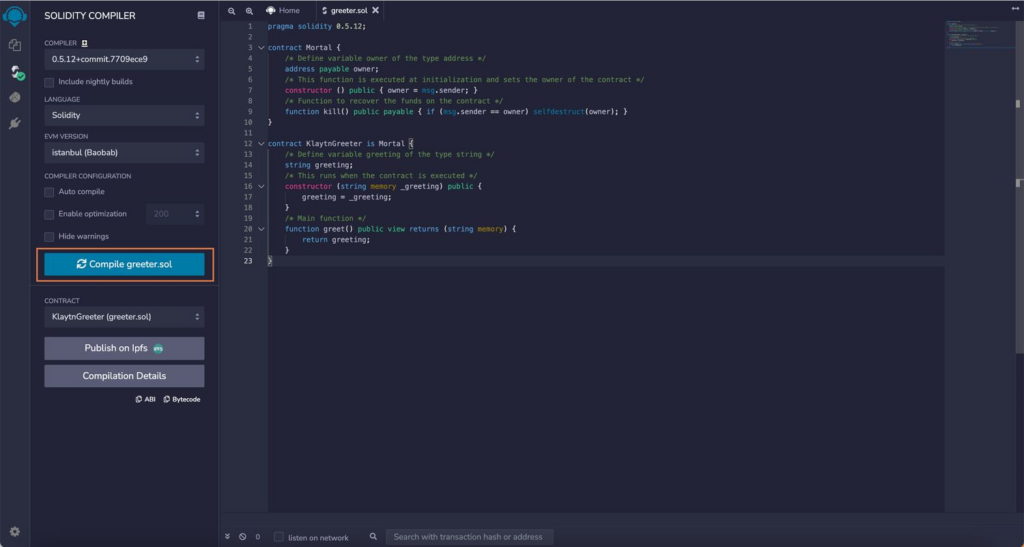
Select Compiler in the icon panel. Choose the desired EVM environment. For the Klaytn networks, you can choose between Baobab (testnet) and Cypress (mainnet). Click
Compilewhen the sample code is ready to be complied before actual deployment.
-
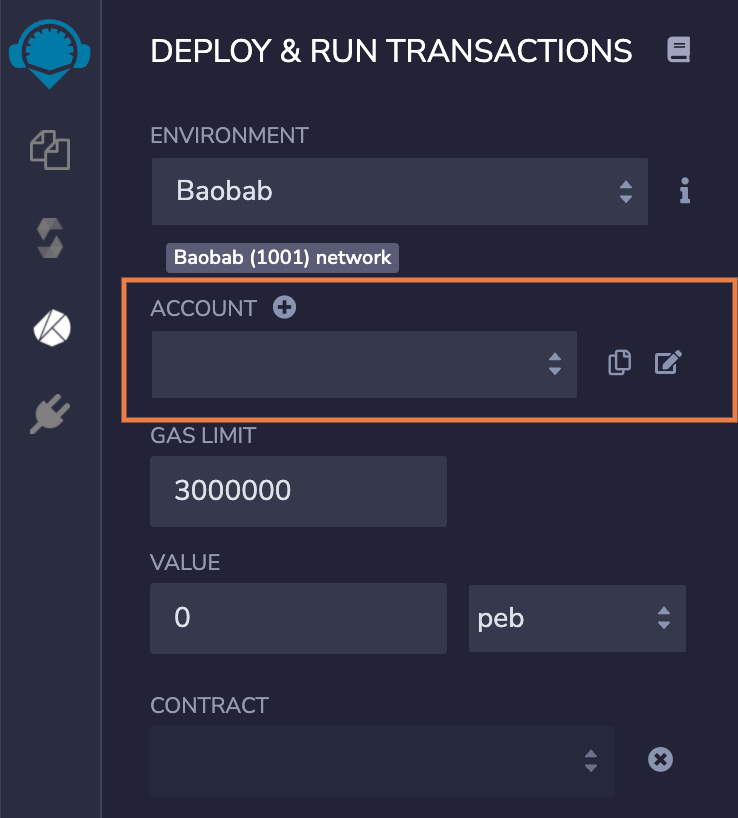
Now we can deploy the contract. Click on the Klaytn logo in the icon panel. Import an account by clicking the plus button next to
Account. Make sure that the account has sufficient KLAY to pay for the transaction of deploying the smart contracts required.
-
Set Gas limit and Value to send.
-
You may need to set higher Gas limit if you are deploying a more complicated contract. In this example, you can leave it as it is.
-
Set
Valueto 0 unless you want to sendKLAYto the contract at the time of deployment.
-
-
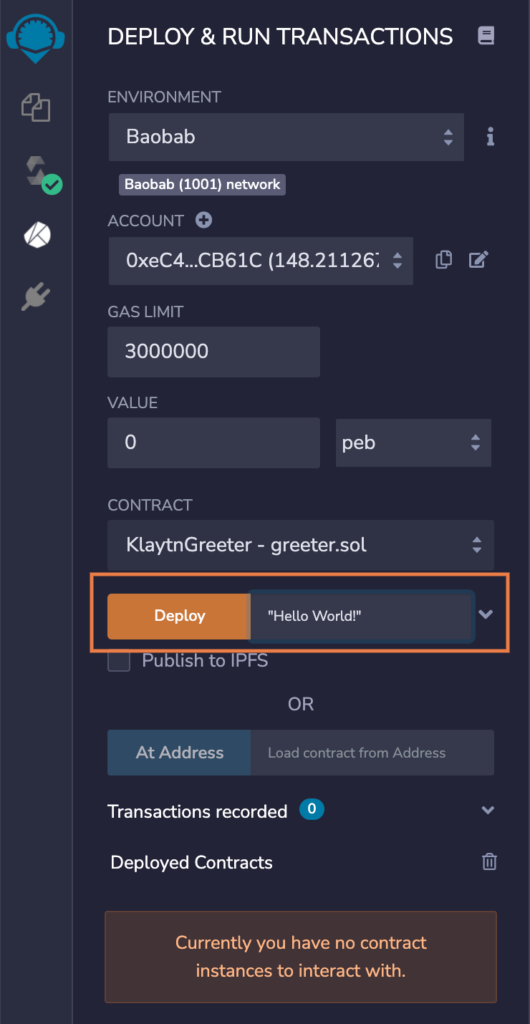
Enter “Hello World!” as an argument for constructor function and click on
Deploybutton.
-
If the contract is successfully deployed, you will see the corresponding transaction receipt and detailed result in the terminal.
-
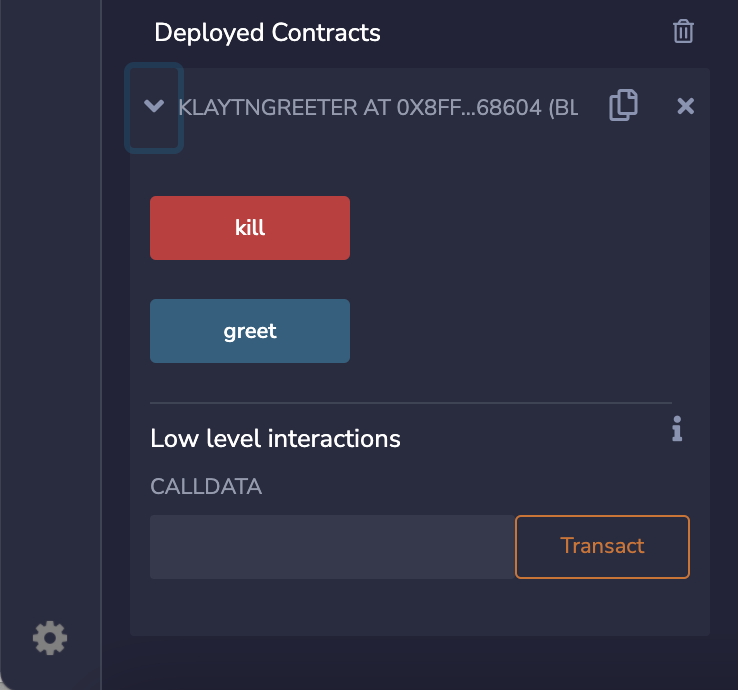
You can interact with the contract by clicking on the function buttons. The functions are represented in different colors.
constantorpurefunctions in Solidity have blue bottons (greetin the example) and do not create a new transaction, so they don’t cost any gas. Red buttons (killin the example) representpayablefunctions that change the state on the blockchain, consume gas and can accept value. Orange buttons are fornon-payablefunctions that change the contract state but do NOT accept a value.
With this, you complete this workshop successfully!!