Beginner
How to claim your DOT
This tutorial explains the steps to claim your DOT tokens using the Polkadot-JS Claims app and MyCrypto wallet. It involves navigating to the Claims app on Polkadot-JS, entering the Ethereum address associated with the DOT indicator tokens, and signing a message from MyCrypto wallet. The signed message is then pasted into the input box on the Polkadot-JS UI to complete the claim. The tutorial also cautions against using third-party apps or processes to claim DOT, and highlights the importance of manually specifying the transaction data. The tutorial concludes with instructions on accessing your account, and making an attestation if necessary.
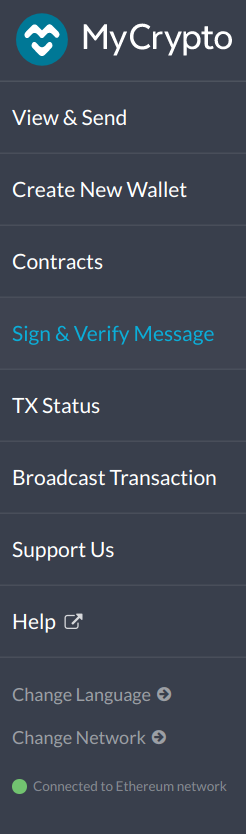
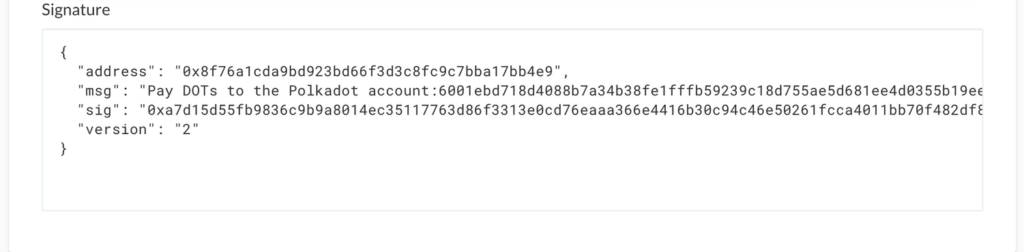
The Polkadot-JS Claims app will help you to sign a message from the MyCrypto wallet. MyCrypto is a good choice if you have stored the key to the Ethereum account holding your DOT indicator tokens on a hardware device like a Ledger Nano S or a Trezor. It also supports raw private keys, mnemonics, and Parity signer.
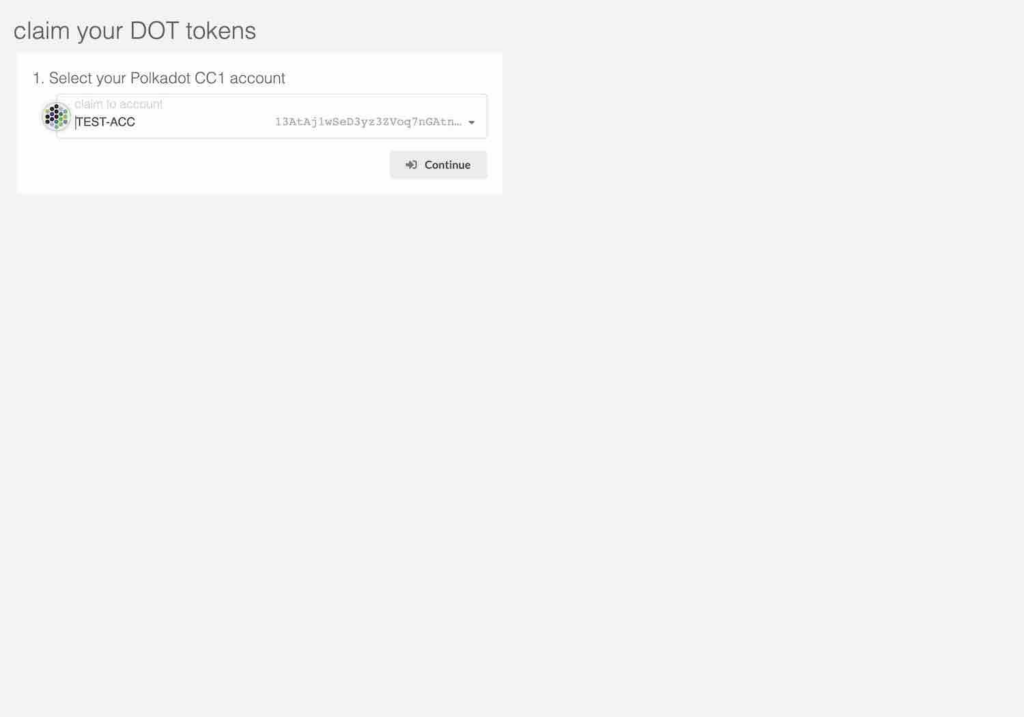
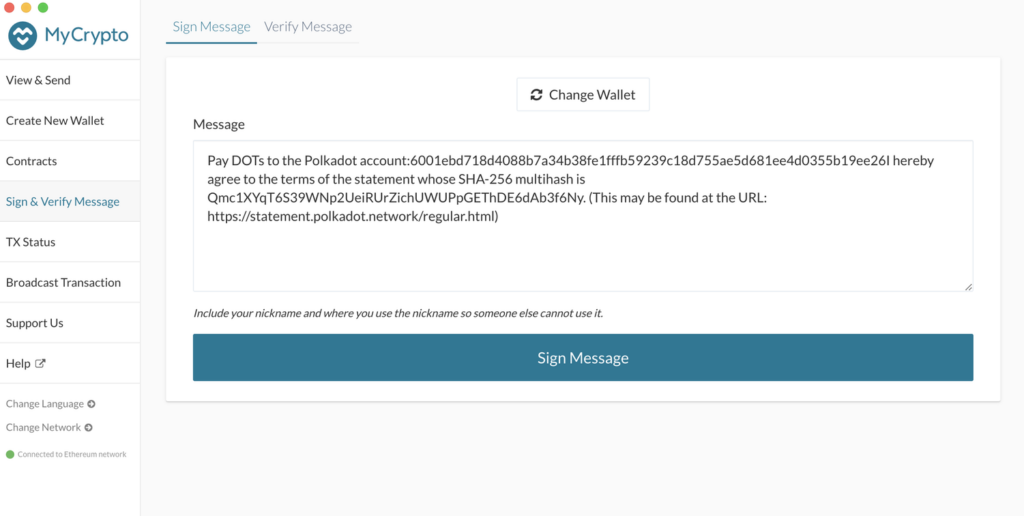
Once you’ve downloaded MyCrypto and have it running locally (we recommend an air-gapped computer for maximum security), you can start by navigating to the Claims app on Polkadot-JS Apps. Select the account you would like to claim the DOT into and click the blue “Continue” button to proceed. Your screen should look something like this:
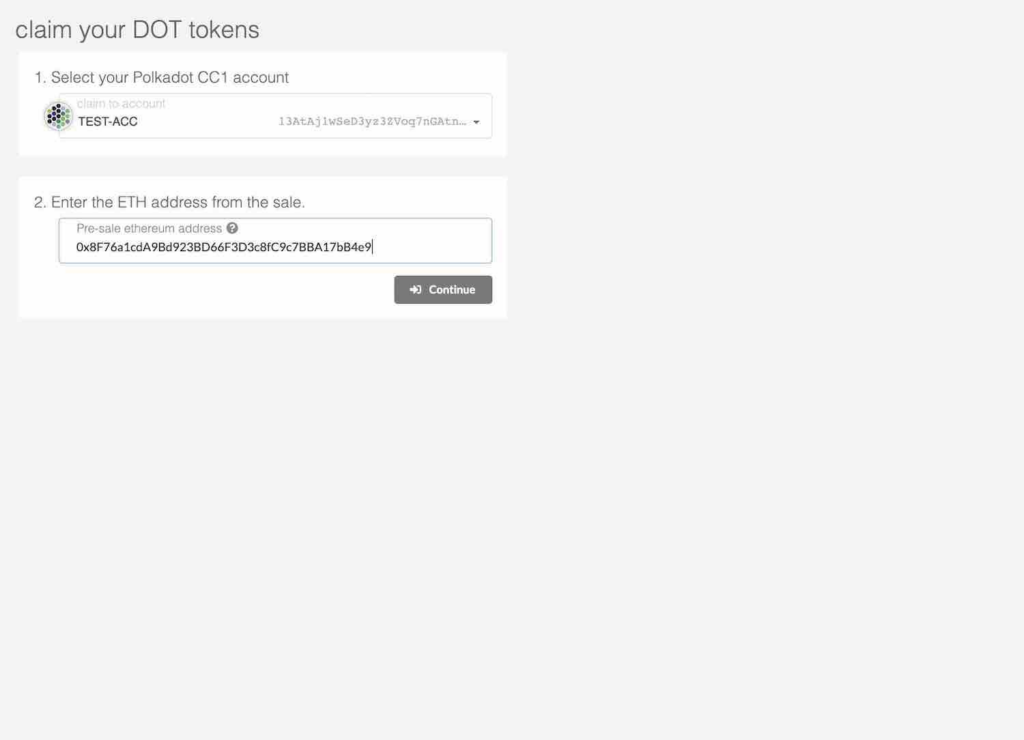
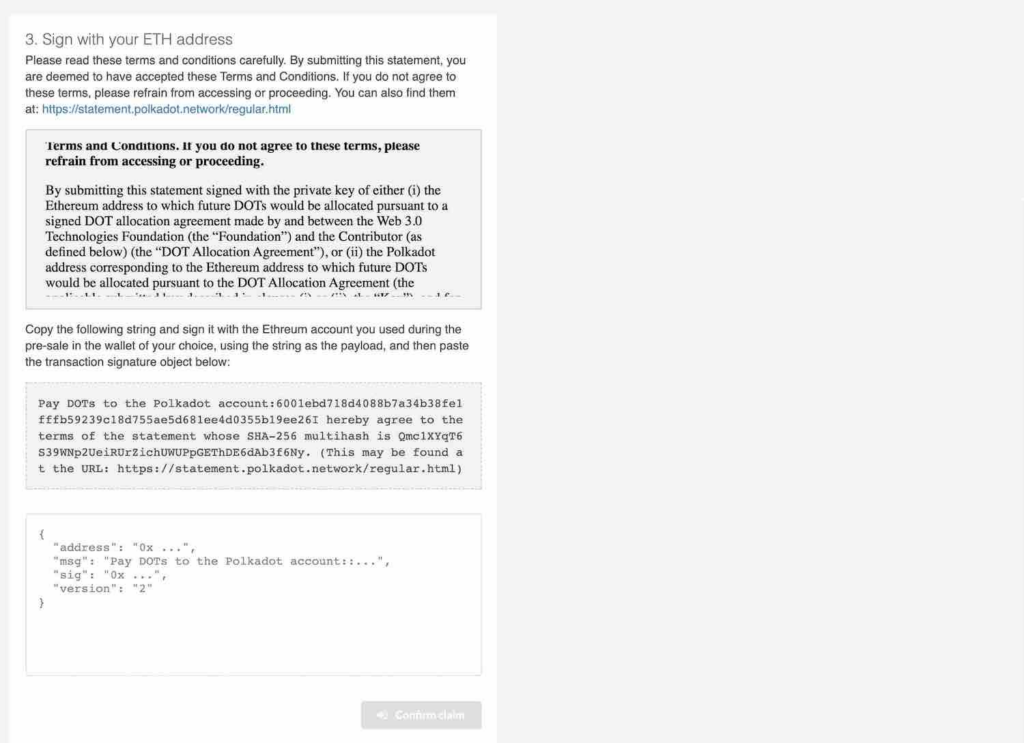
Now you will need to provide the Ethereum address that is associated with the DOT indicator tokens that you will claim. Enter the Ethereum address into the box and click “Continue”.
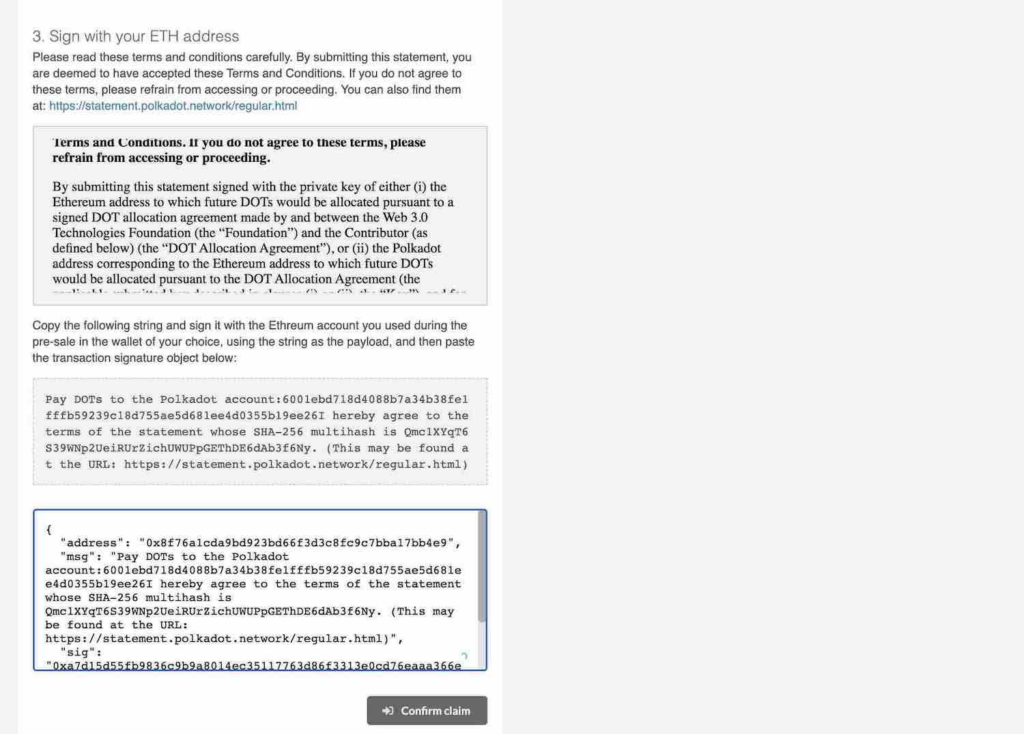
Next, your screens should look like the image below.
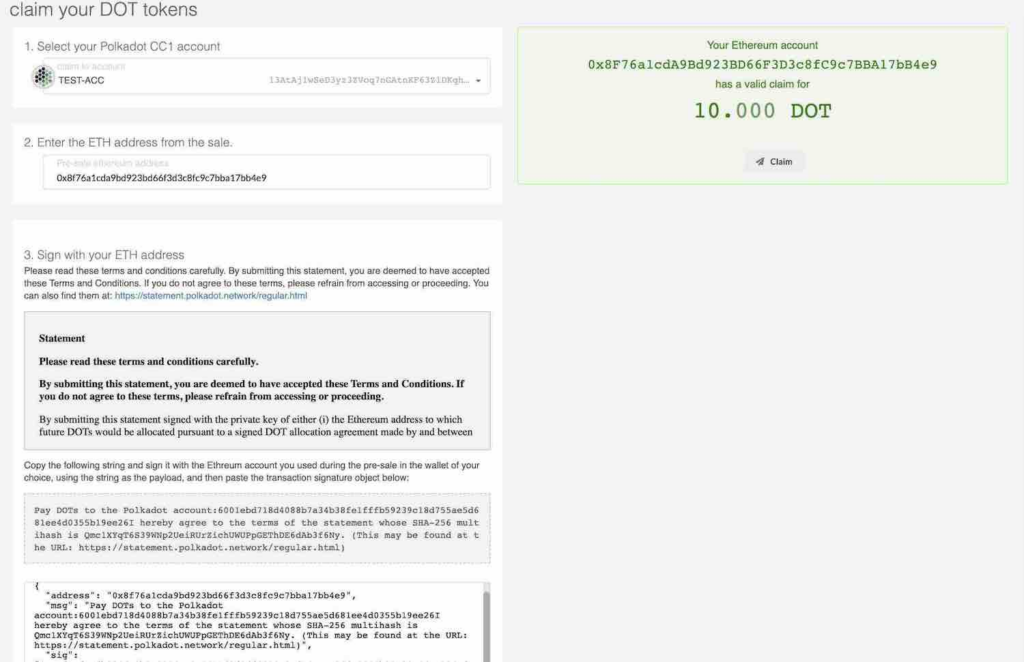
If this claim succeeded, then you will see a success message and your DOT will be in the account that you claimed to.
Third-Party Claims Processes
We don’t recommend using third-party apps or processes to perform your claim or acquire DOT. This can lead to a loss of your allocation. Manually specifying your transaction data, as specified in our claims process, is the only way to be certain you will receive your allocation.
Attesting
If you have already made a pre-genesis claim but still need to attest, please follow these instructions instead.
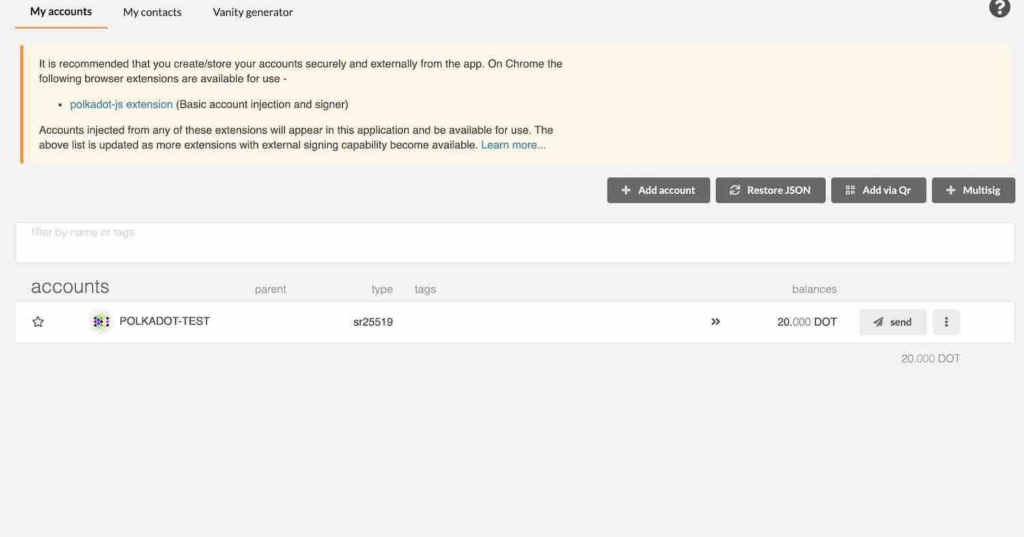
Accessing your Account
You will be sending a free transaction from your Polkadot browser extension account on the Polkadot-JS Apps UI. Once the transaction is complete, the tokens will be available in your account. You will first need to grant access to the site via a pop-up from the extension.
Make the Attestation
After entering your account, you should see a red counter appear on the “Claim Tokens” tab on the left navigation drawer.
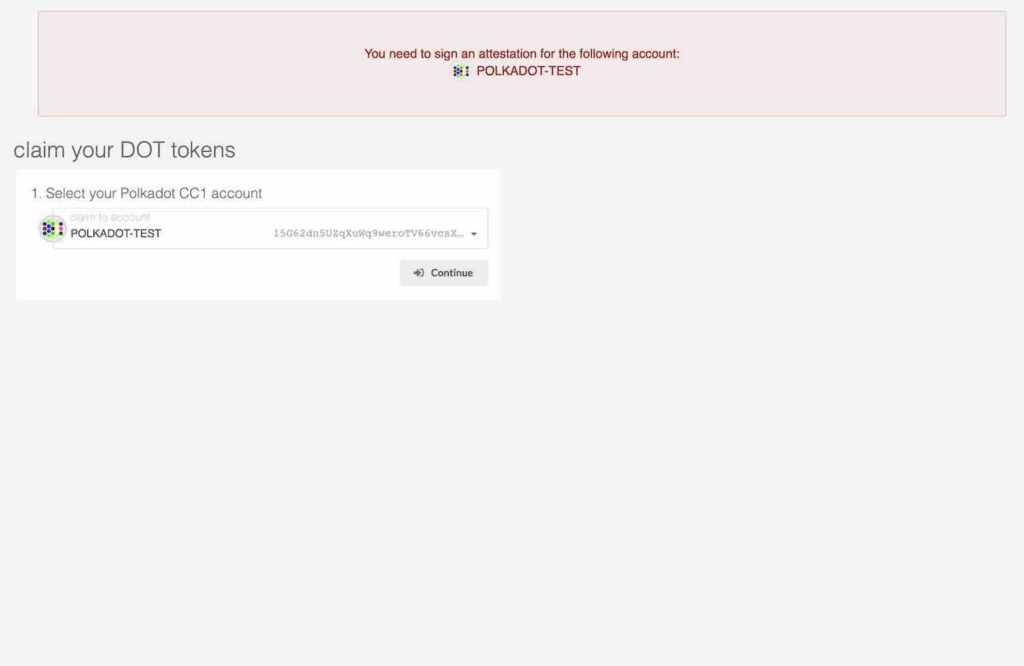
Click on the “Claim Tokens” tab and you will see a large notification at the top of the page that tells you an attestation needs to be signed.
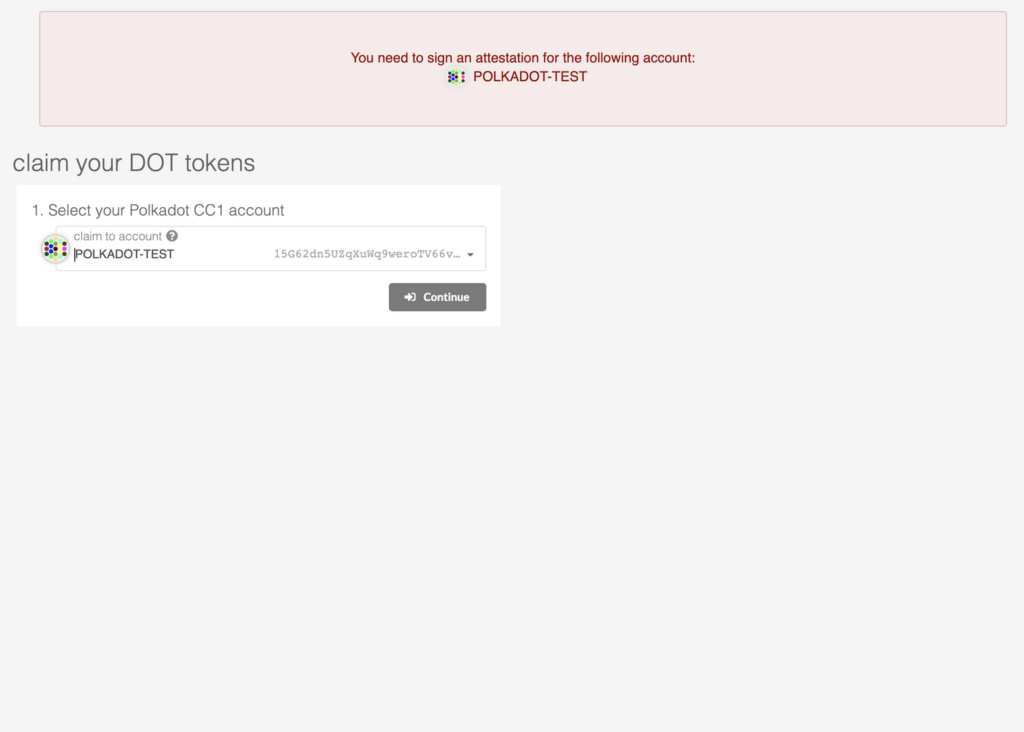
The notification will display one or more Polkadot addresses that you have loaded in Polkadot-JS that you need to sign. Select a Polkadot account with a claim using the drop down selection. If you don’t see a notification or don’t see the selector, please double check that the account has been loaded into Polkadot-JS and that it has already claimed during the preclaim period.
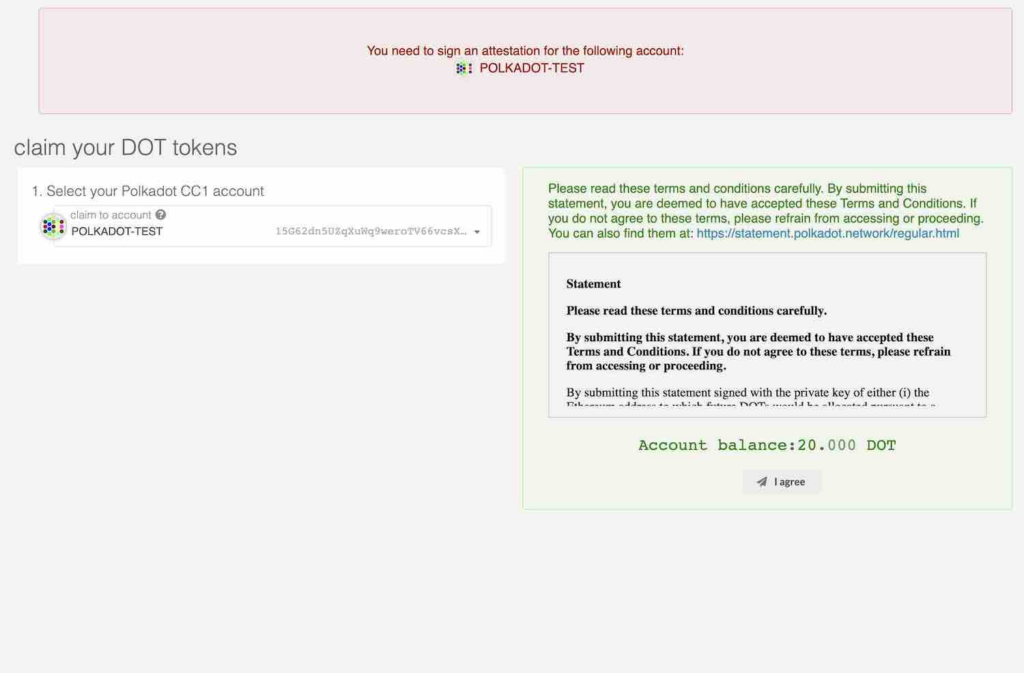
Click “Continue” and you will see a green box appear on the right.
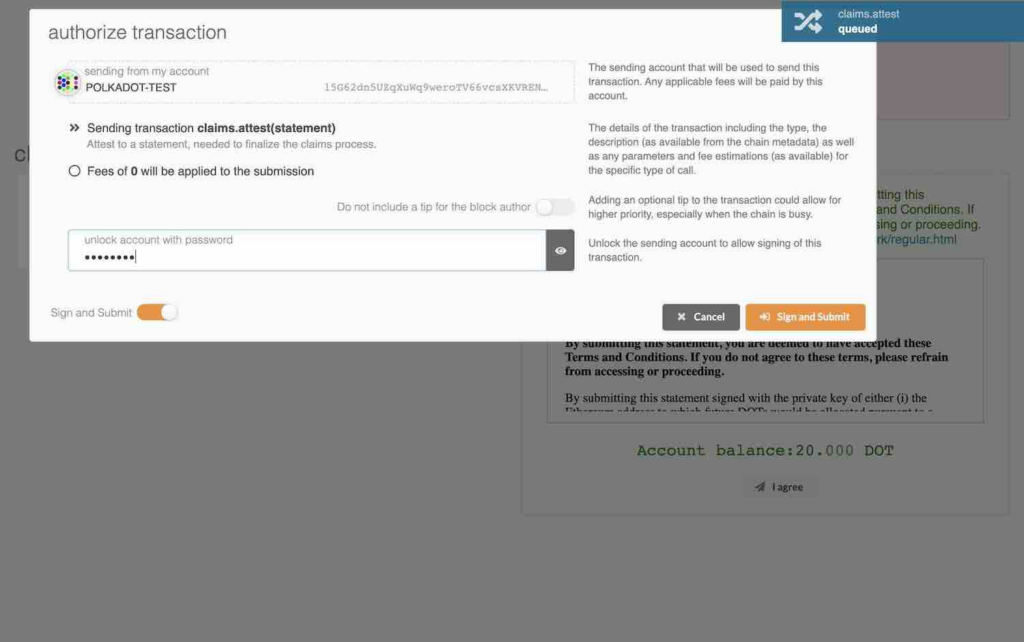
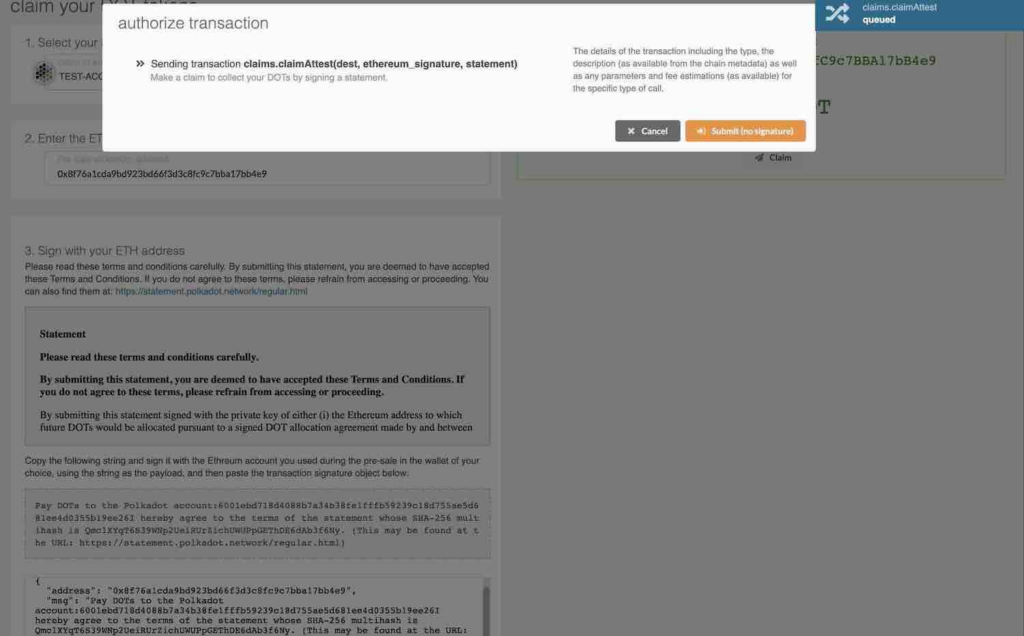
Click on “I Agree” and then “Sign and Submit” to make your free attest transaction. When the transaction is included in the block, you will see a green success box appear in the upper right corner and the DOT will be in your account.