
Intermediate
How to create and deploy a contract to the Binance Smart Chain Using Truffle?
Welcome to the tutorial on how to create and deploy a contract to the Binance Smart Chain using Truffle!
In this tutorial, we will be exploring the process of creating and deploying a contract on the Binance Smart Chain using the Truffle framework. This guide is suitable for both beginners and experienced developers who are looking to build their own decentralized applications on the Binance Smart Chain.
We will start by setting up a development environment, creating a contract, and deploying it to the Binance Smart Chain using Truffle. The tutorial will be step-by-step and will include code examples and explanations of the concepts involved.
By the end of this tutorial, you will have a solid understanding of how to create and deploy contracts on the Binance Smart Chain using Truffle. So, let’s get started!
Using truffle framework here to deploy our smart contract on BSC.
At the start, you need to have a smart contract on your truffle project. In our case, I have created a ‘HappyToken’. you can also clone from the HappyToken Git repo for a quick start.
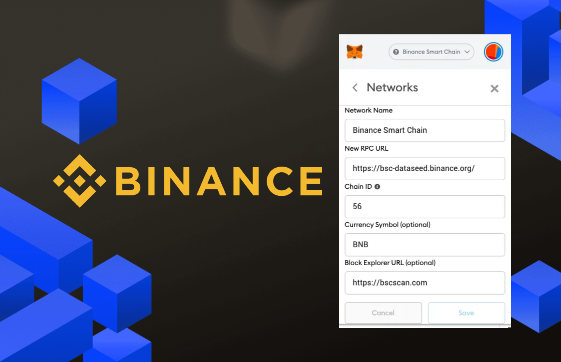
Now we need to create our account on meta mask that will be used to deploy our contracts. Once we have set up our meta mask with the BSC networks to be used. I’m going to use the BSC test network to deploy our contract, so, will select Smart Chain — Testnet from the network list on meta mask.
You need to have some BNB on your account to deploy a smart contract. for the test network you can transfer mock BNB from this address into your account:
Now come back to your truffle project and install these dependencies on it:
npm install @truffle/hdwallet-provider

npm install truffle-plugin-verify
you need to have/create truffle-config.js file in your project directory. Truffle uses this file to have plugins and network configurations.
We have created one like this
const HDWalletProvider = require('@truffle/hdwallet-provider');
const fs = require('fs');
const { mnemonic, BSCSCANAPIKEY} = require('./env.json');

module.exports = {
  plugins: [
    'truffle-plugin-verify'
  ],
  api_keys: {
    bscscan: BSCSCANAPIKEY
  },
  networks: {
    bscTestnet: {
      provider: () => new HDWalletProvider(mnemonic, `https://data-seed-prebsc-1-s1.binance.org:8545`),
      network_id: 97,
      confirmations: 10,
      timeoutBlocks: 200,
      skipDryRun: true
    },
    bsc: {
      provider: () => new HDWalletProvider(mnemonic, `https://bsc-dataseed1.binance.org`),
      network_id: 56,
      confirmations: 10,
      timeoutBlocks: 200,
      skipDryRun: true
    },
  },
  mocha: {
    timeout: 100000
  },
  compilers: {
    solc: {
      version: "0.6.12",
      settings: {          // See the solidity docs for advice about optimization and evmVersion
        optimizer: {
          enabled: false,
          runs: 200
        },
        evmVersion: "byzantium"
       }
    }
  }
};
Now in the above code snippet, we have imported our env.json file which contains a mnemonic (It’s a seed phrase of your meta mask account which we stored in a safe place at the time of creating an account) and a BSC API Key.
{
    "mnemonic": "{your account seed phrase}",
    "BSCSCANAPIKEY": "{your BSC API KEY}"
}
You can get your BSC API Key by registering yourself at https://bscscan.com.
once you have registered, Log into your account and navigate to https://bscscan.com/myapikey and click on Add key

name your key (I have named Happy in our case), and save it. Now you will have your BSC Key. replace your BSC key and seed phrase in env.json file.
Network Configuration
In truffle-config.js file, we have added our network configuration on which we want to deploy our contracts. I have added two networks here. 1st is the bsc which is the main network of BSC and the other is bscTestnet which is the test network to deploy our contract in the test environment.
in configurationnetwork_id is the same as chain ID we had in our meta mask account for smart chain networks. It tells us which blockchain we have connected.
I have used solidity compiler version 0.6.12 you can change this according to your requirement.
Compile
It’s time to compile our HappyToken Contract. Run the command to compile our created smart contract.
truffle compile — network bscTestnet
this will create a build folder and a compiled version of our smart contract. compiled file contains the contract ABI, which later we will be used to verify our deployed contract.
Deploy
Now the exciting part comes. we will deploy our compiled contract now on bscTestnet. run the migration on truffle to deploy our contract.
Truffle uses migrations to deploy smart contracts.
Run this command
truffle migrate — network bscTestnet
This will run the migration and deploy our smart contract into the network which we have provided in the command line argument.
If all goes well, it will show the summary of deployed code just like below
2_deploy_contracts.js
=====================

   Deploying 'HappyToken'
   ----------------------
   > transaction hash:    0x1eccf3c60bab7a237265d75d66c29c1dc7eb08211b1a28892aaa10beb50a5ed2
   > Blocks: 4            Seconds: 15
   > contract address:    0x304721B6489dd6b559D57EB33A4Df9636D784CD1
   > block number:        11727793
   > block timestamp:     1629717764
   > account:             0x942a478c4a9ggb38045E62604aa8d52b4Ce94a5b
   > balance:             0.92504168
   > gas used:            2801232 (0x2abe50)
   > gas price:           20 gwei
   > value sent:          0 ETH
   > total cost:          0.05602464 ETH

   Pausing for 10 confirmations...
   -------------------------------
   > confirmation number: 2 (block: 11727799)
   > confirmation number: 4 (block: 11727801)
   > confirmation number: 5 (block: 11727802)
   > confirmation number: 6 (block: 11727803)
   > confirmation number: 8 (block: 11727805)
   > confirmation number: 9 (block: 11727806)
   > confirmation number: 10 (block: 11727807)

   > Saving migration to chain.
   > Saving artifacts
   -------------------------------------
   > Total cost:          0.05602464 ETH


Summary
=======
> Total deployments:   2
> Final cost:          0.0592083 ETH
Remember address, transaction_hash and other details provided would differ, Above is just to provide an idea of structure.
Copy the contract address from the summary and go to https://testnet.bscscan.com/ and search there by pasting your copied address. you will see your contract deployed on explorer.
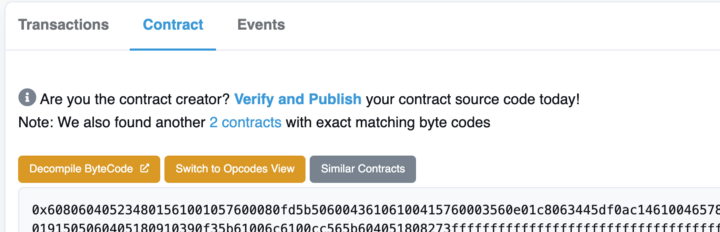
Blockchain requires verifying our contract for source code verification. It provides transparency for users interacting with smart contracts.
We are going to verify our contract using our generated contract on the truffle project.
run this command to verify your contract:
truffle run verify HappyToken@{your contract address} — network bscTestnet
Above HappyToken is the contract name(replace your contract name) which we deployed earlier and the second param is the contract address of our deployed smart contract.
After running the command we will get the success summary like below
Verifying HappyToken@0x304721B6489Gd6b259D57EB33A4Df9636D784CD1
Pass - Verified: https://testnet.bscscan.com/address/0x304721B6489Gd6b259D57EB33A4Df9636D784CD1#contracts
Successfully verified 1 contract(s).
✨  Done in 16.57s.
Now copy the link from the summary result and hit your browser. you will be redirected to your verified deployed contract.
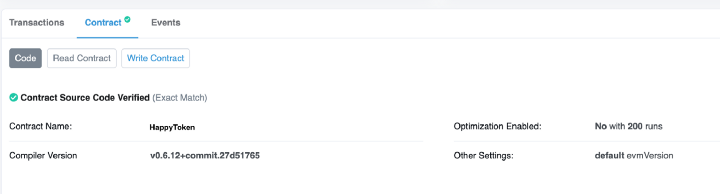
whoof, You have successfully deployed your first smart contract on Binance Smart Chain. Now you can read your contract and use it on your applications using web3.