
Intermediate
How to deploy a Smart Contract on Your Subnet-EVM Using Remix and MetaMask
This tutorial guides you on how to deploy a smart contract on your Subnet-EVM blockchain using Remix and MetaMask. Before starting the tutorial, ensure that:
-
An Subnet and EVM blockchain has been created.
-
Your node is validating the target Subnet.
-
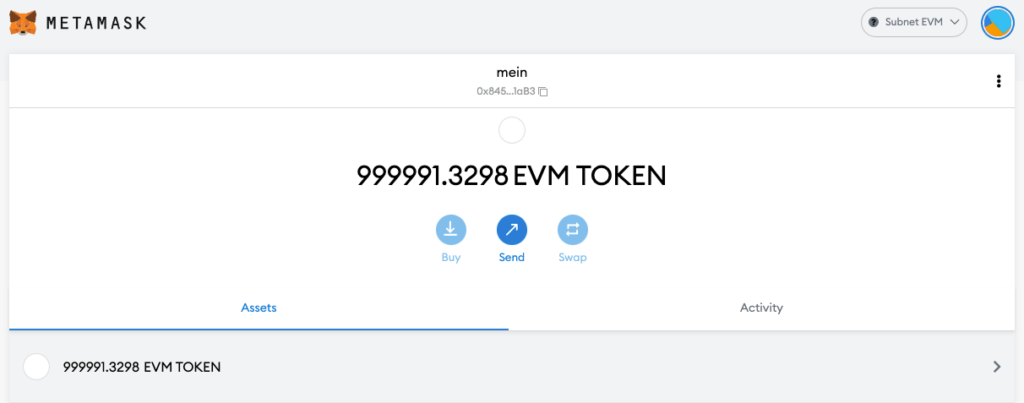
Your wallet has a balance of the Subnet Native Token (as specified in the genesis file).
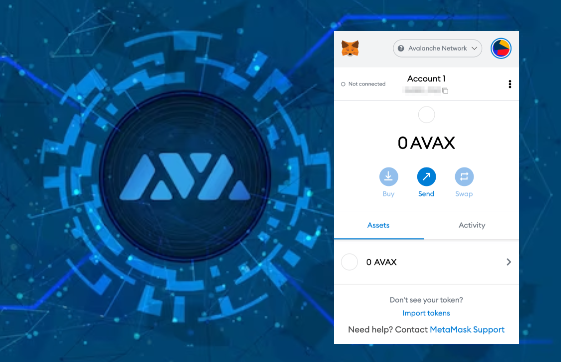
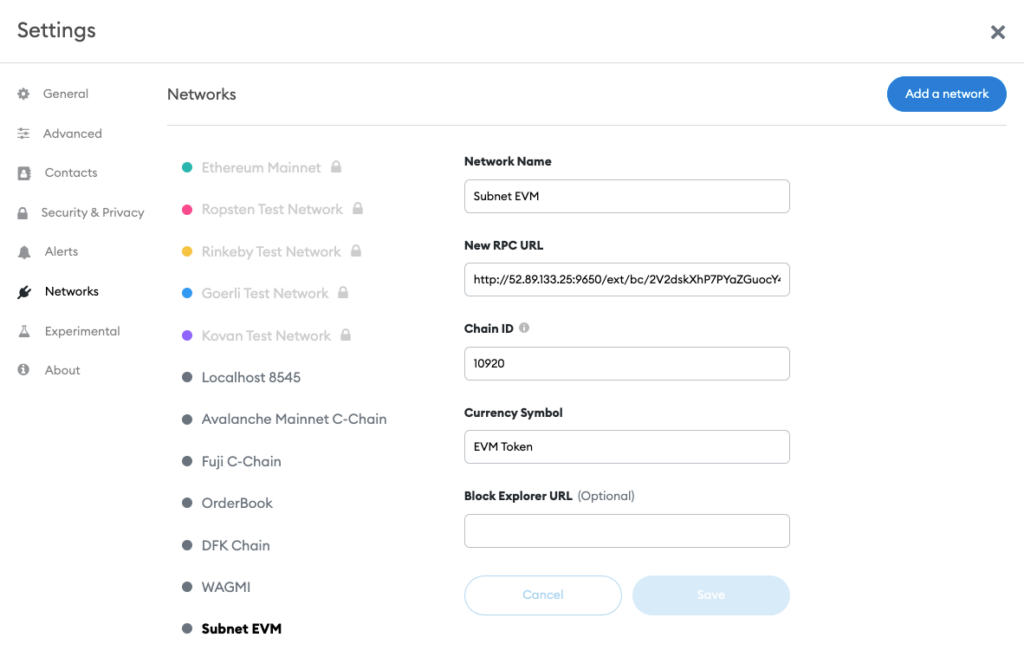
Step 1: Setting up MetaMask
-
Open MetaMask and create a custom network named “Subnet-EVM”.
-
Enter the RPC URL with the correct port number that matches your local setting.
-
Enter the ChainID and Token Symbol for Subnet-EVM.
Step 2: Connect MetaMask and Deploy a Smart Contract
-
Open Remix and select Solidity.
-
Either create the smart contract in Remix or import it from GitHub.
-
In Remix, navigate to the Deploy tab, select “Injected Web3” from the environment dropdown, and make sure MetaMask is loaded.
-
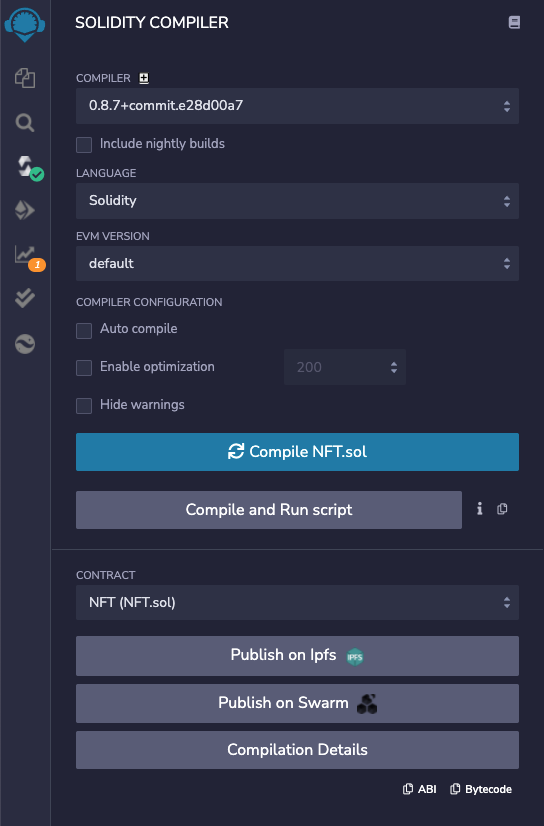
Compile the contract and click “Deploy”.
-
Confirm the transaction on the MetaMask popup.
-
The deployed contract can be tested and its ABI and bytecode are available on the compiler tab.
Join the Avalanche community at Discord for support or discussions. Note: The same process can be followed using other tools like Hardhat by adjusting the URL and ChainID in the Hardhat config file.
Introduction
This tutorial assumes that:
-
An Subnet and EVM blockchain has been created
-
Your Node is currently validating your target Subnet
-
Your wallet has a balance of the Subnet Native Token(Specified under alloc in your Genesis File).
Step 1: Setting up MetaMask
EVM Subnet Settings: (EVM MetaMask Tutorial)
-
Network Name: Custom Subnet-EVM -
New RPC URL: http://NodeIPAddress:9650/ext/bc/BlockchainID/rpc (Note: the port number should match your local setting which can be different from 9650.) -
ChainID: Subnet-EVM ChainID -
Symbol: Subnet-EVM Token Symbol -
Explorer: N/A
You should see a balance of your Subnet’s Native Token in MetaMask.
Step 2: Connect MetaMask and Deploy a Smart Contract
Using Remix
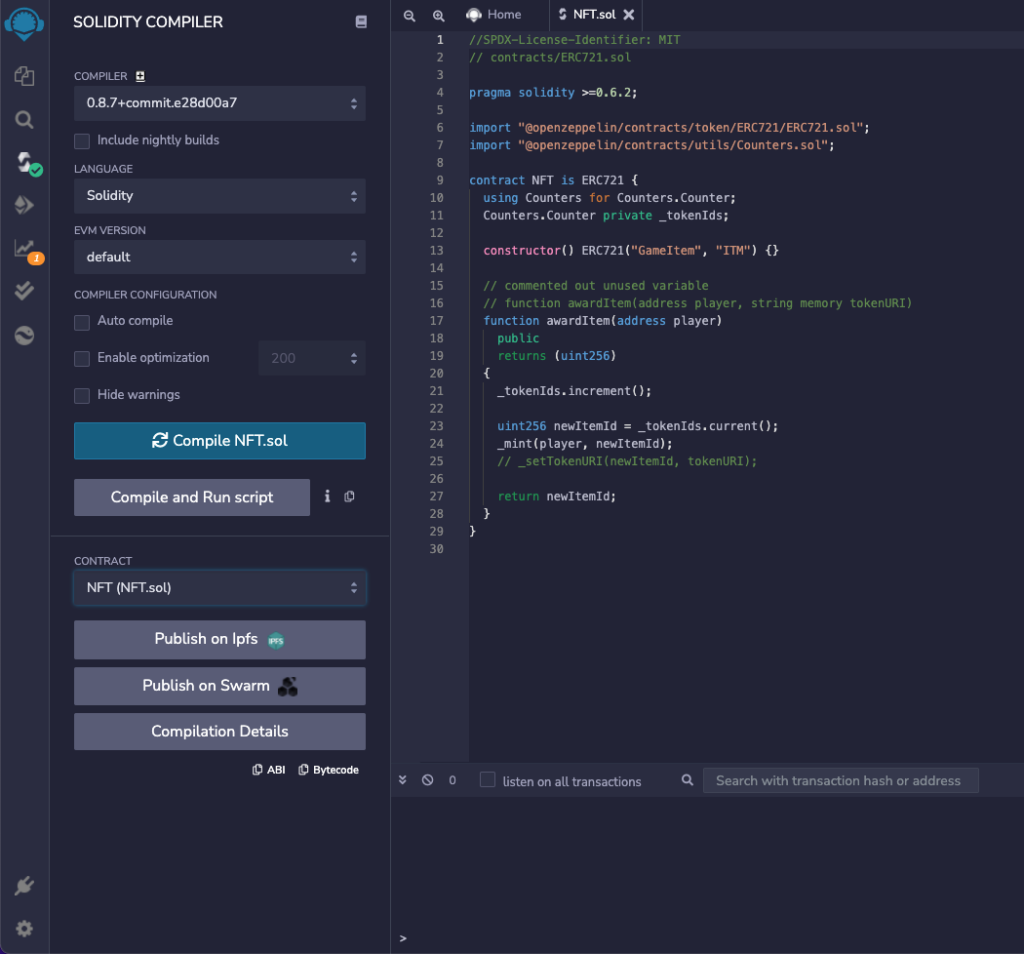
Open Remix -> Select Solidity.
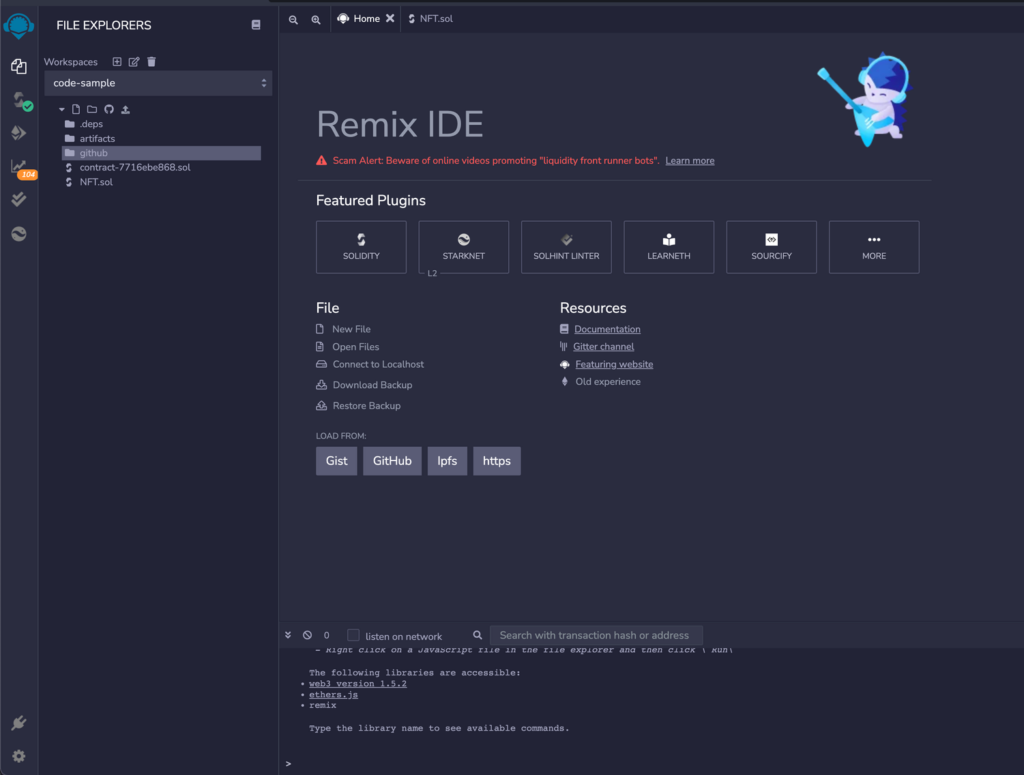
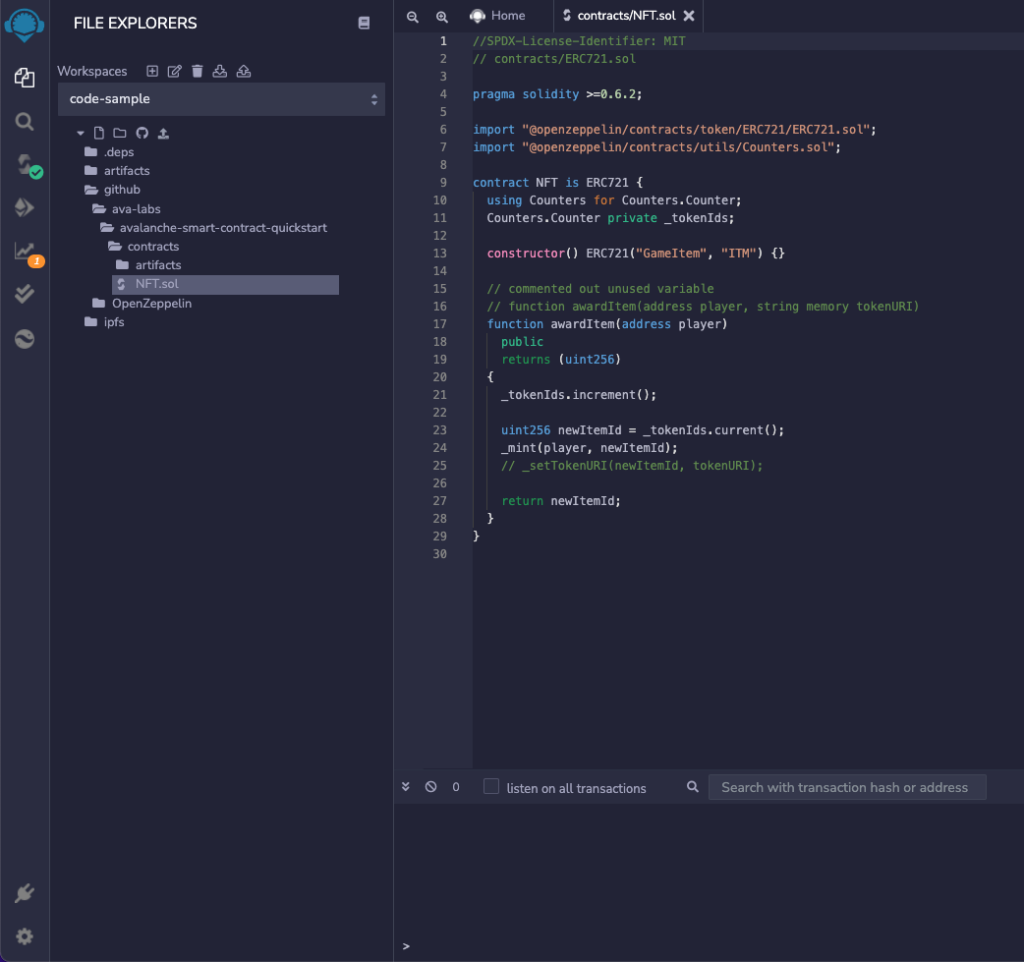
Create the smart contracts that we want to compile and deploy using Remix file explorer
Using GitHub
In Remix Home Click the GitHub button.
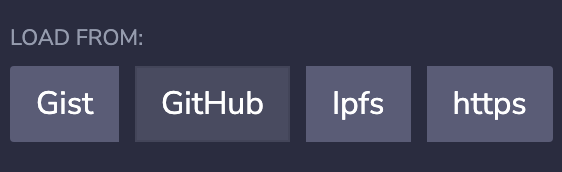
Paste the link to the Smart Contract into the popup and Click import.
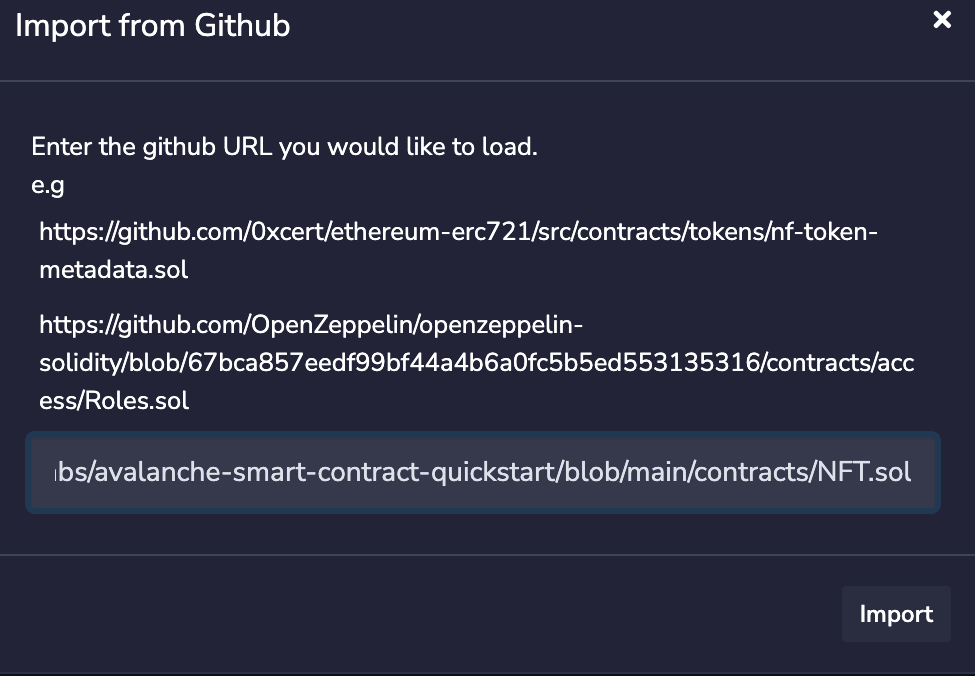
For this example, we will deploy an ERC721 contract from the Avalanche Smart Contract Quickstart Repository.
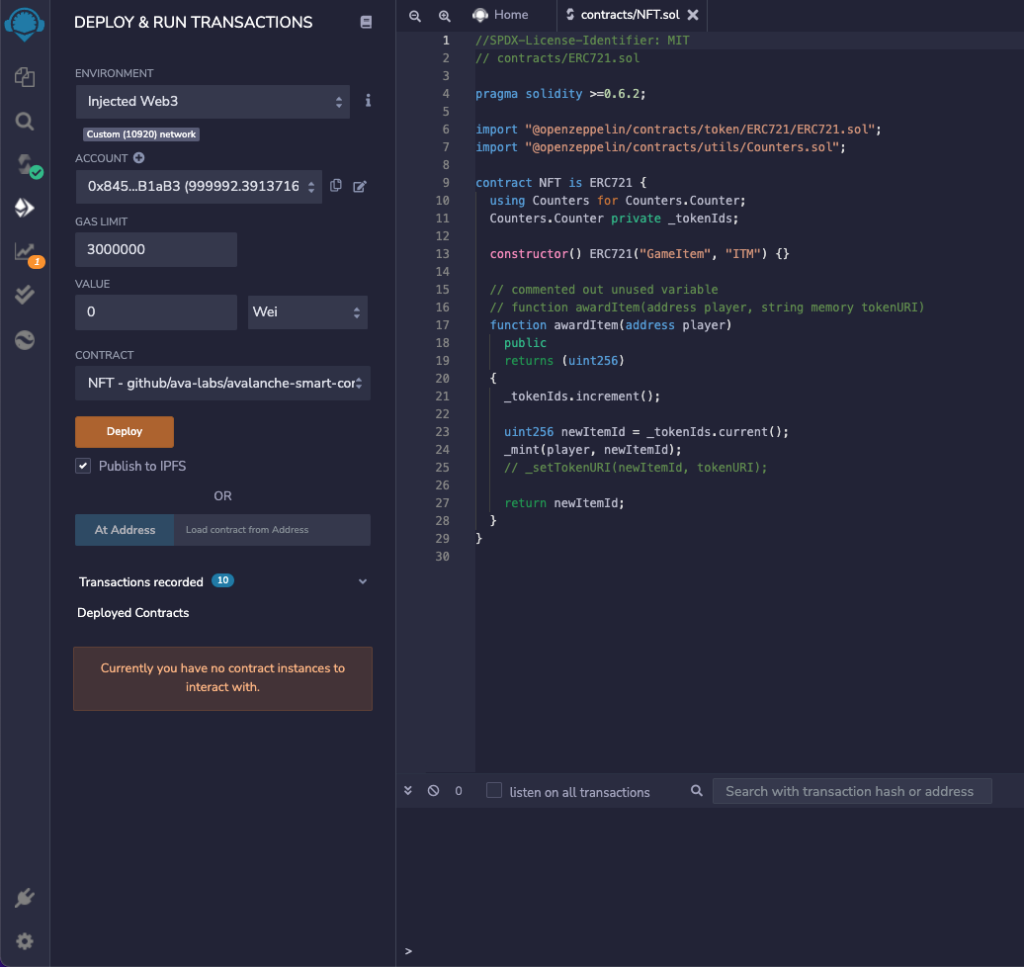
Navigate to Deploy Tab -> Open the “ENVIRONMENT” drop-down and select Injected Web3 (make sure MetaMask is loaded).
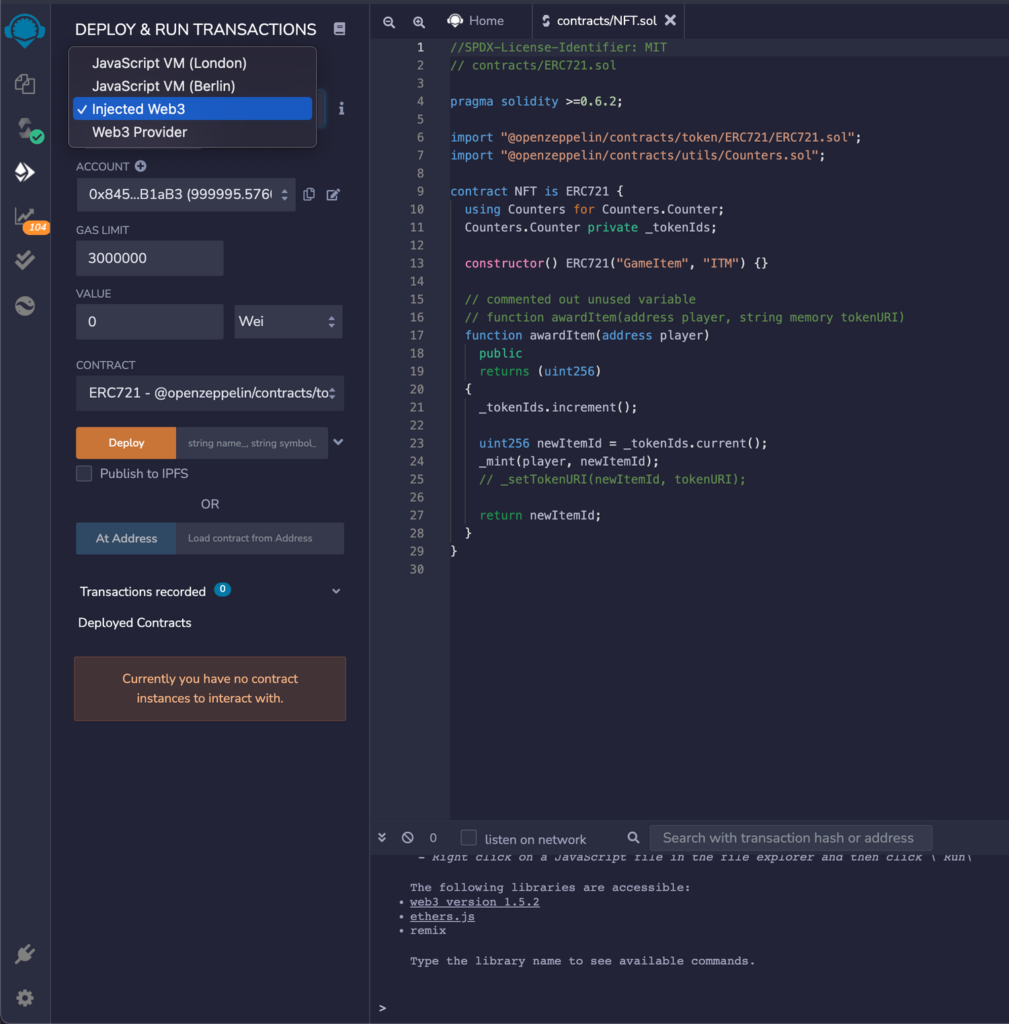
Once we injected the web3-> Go back to the compiler, and compile the selected contract -> Navigate to Deploy Tab.
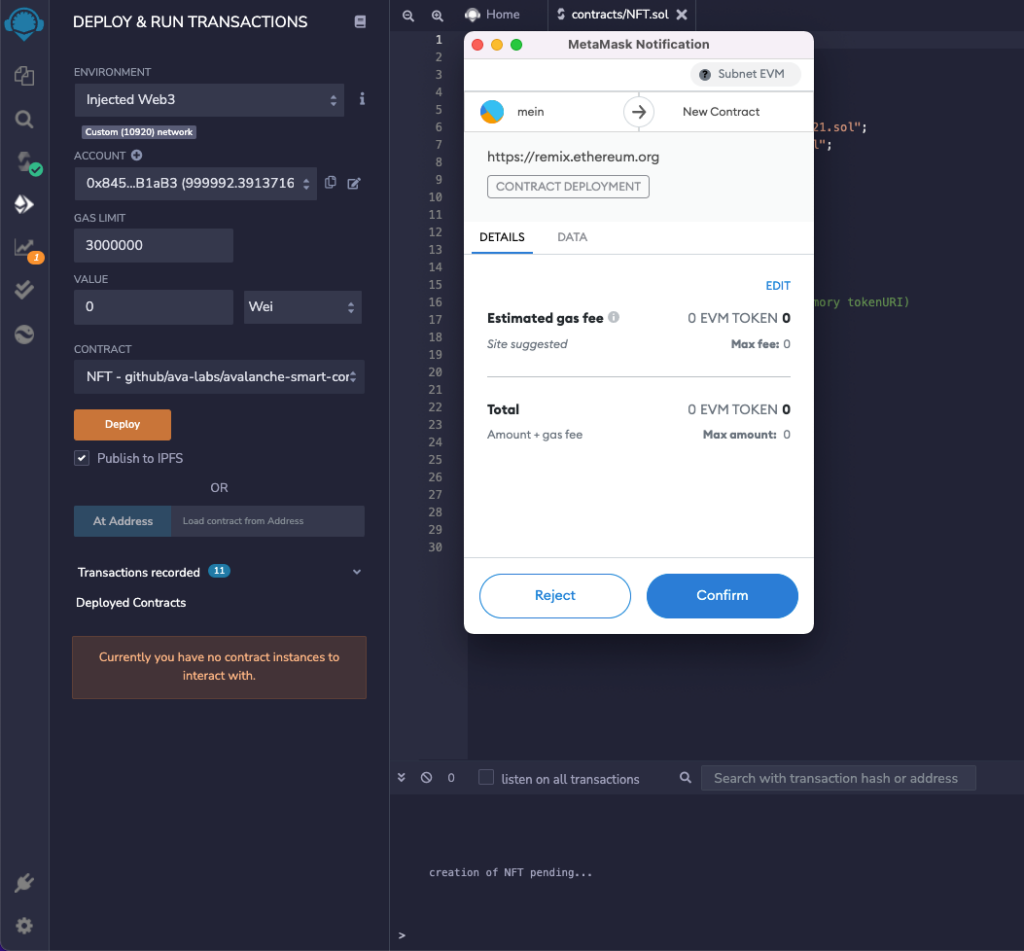
Now, the smart contract is compiled, MetaMask is injected, and we are ready to deploy our ERC721. Click “Deploy.”
Confirm the transaction on the MetaMask
Our contract is successfully deployed!
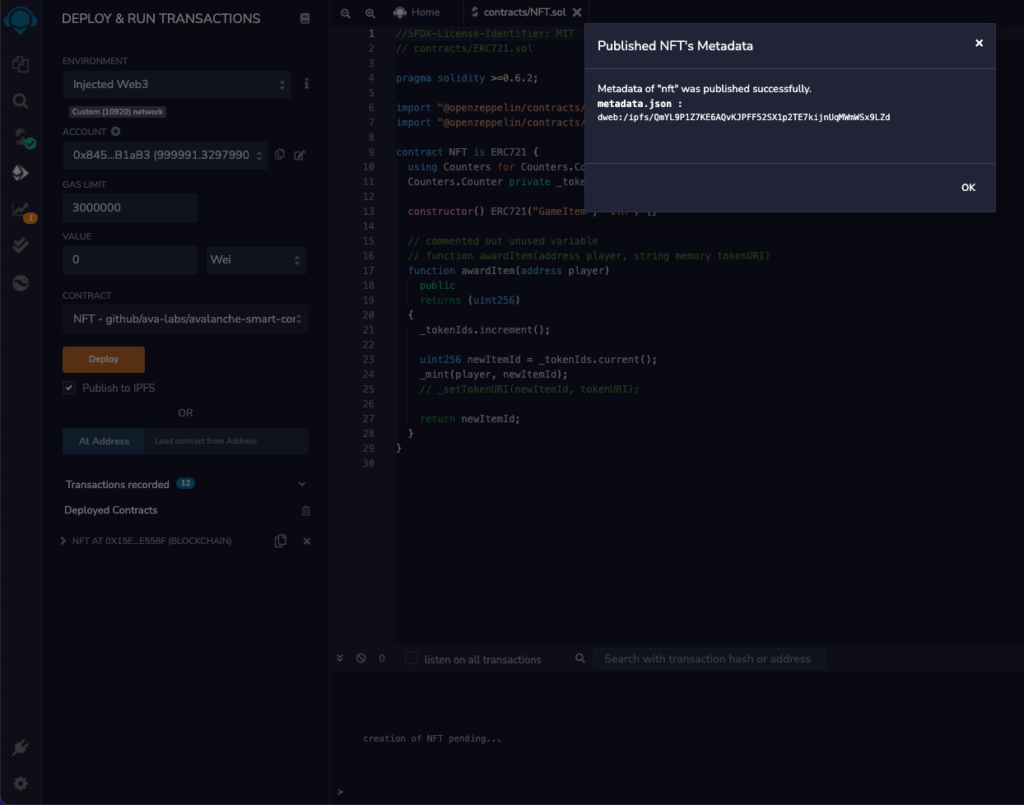
Now, we can expand it by selecting it from the “Deployed Contracts” tab and test it out.
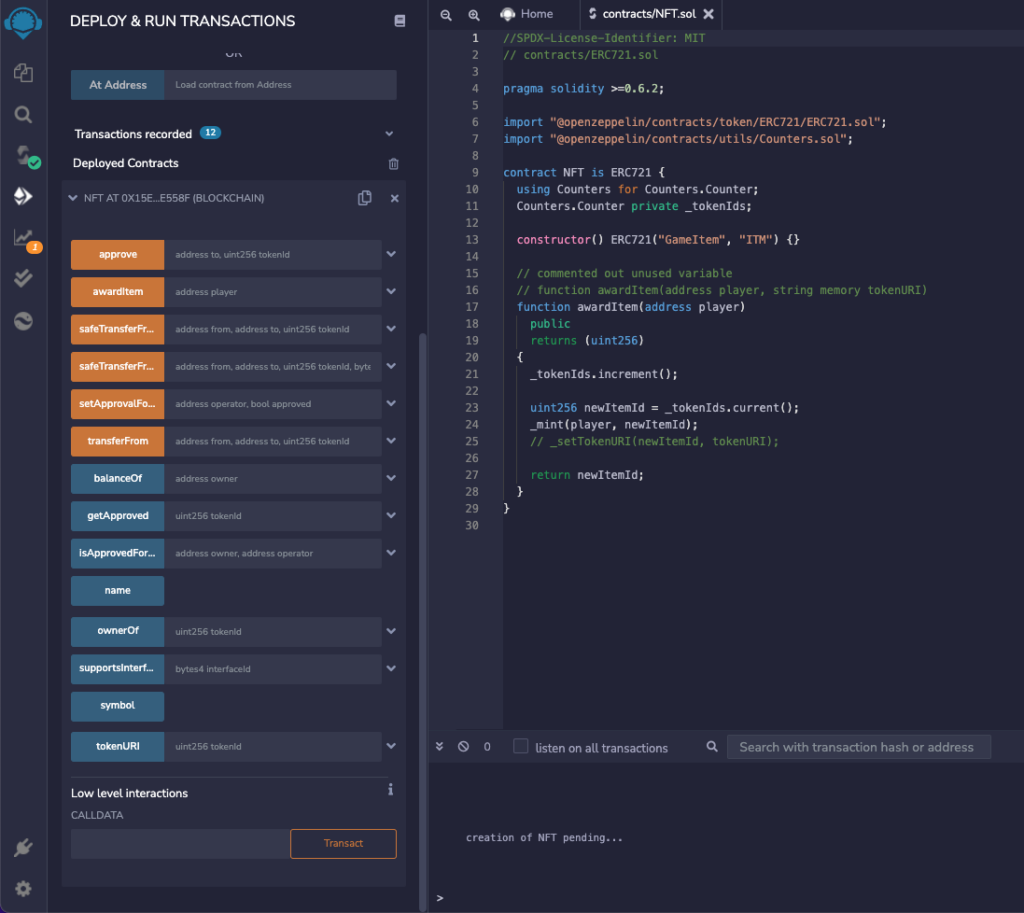
The contract ABI and Bytecode are available on the compiler tab.
If you had any difficulties following this tutorial or simply want to discuss Avalanche with us, you can join our community at Discord!
Other Tools
You can use Subnet-EVM just like you use C-Chain and EVM tools. Only differences are chainID and RPC URL. For example you can deploy your contracts with hardhat quick start guide by changing url and chainId in the hardhat.config.ts.