Intermediate
How to deploy ERC20 Contract using truffle
This tutorial provides step-by-step instructions for deploying an ERC20 token contract using Truffle and Hardhat on the Cronos network. It begins with instructions for setting up and modifying the required files, including the .env file and the migration script. It also includes information on setting the endpoints for the Cronos network in the configuration file. Finally, it provides the commands for deploying the contract and obtaining the contract address from the console, which can then be used in Metamask to view the correct balance. The tutorial includes separate sections for deploying the ERC20 contract using Truffle and using Hardhat.
Truffle: Deploy ERC20 Contract
Step 1. Enter smart-contract-example/truffle folder
$ cd cronos-smart-contract-example/truffle
Step 2. Run npm install inside the folder
$ npm install
Step 3. Make a copy of .env.example to .env
$ cp .env.example .env
Step 4. Modify .env and fill ONE of the field
MNEMONIC=goose easy ivory ...
PRIVATE_KEY=XXXXXXX
Step 5. Review Migration Script at migrations/2_deploy_cronos_token.js
const CronosToken = artifacts.require("CronosToken");

module.exports = function (deployer) {
    deployer.deploy(CronosToken, "Cronos Token", "CRT", "1000000000000000000000000");
};
Step 6. Endpoints setting
By default, the script will be using your local host "127.0.0.1" – If you are not running a localhost, you may leverage the public endpoint https://evm-t3.cronos.org/ by making changes to networks in truffle-config.js, for example:
networks: {
  development: {
    provider: new HDWalletProvider(getHDWallet(), "http://127.0.0.1:8545"), // TODO
    network_id: "*",       // Any network (default: none)
  },
  testnet: {
    provider: new HDWalletProvider(getHDWallet(), "https://evm-t3.cronos.org/"), // TODO
    network_id: "*",
    skipDryRun: true
  },
},
Step 7. Deploy Contract
npm run deploy-contract-cronos
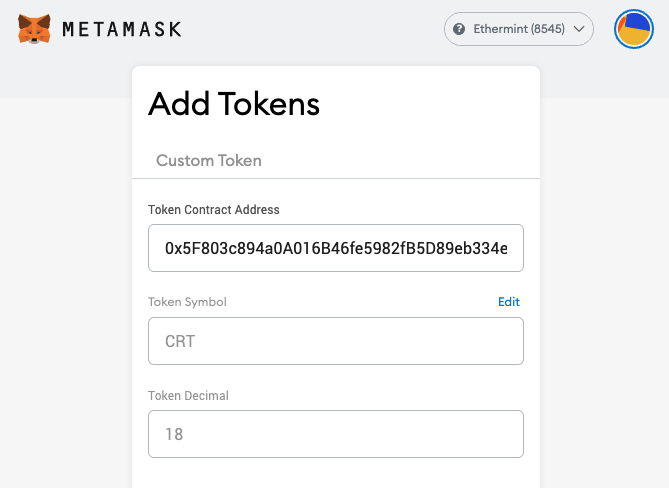
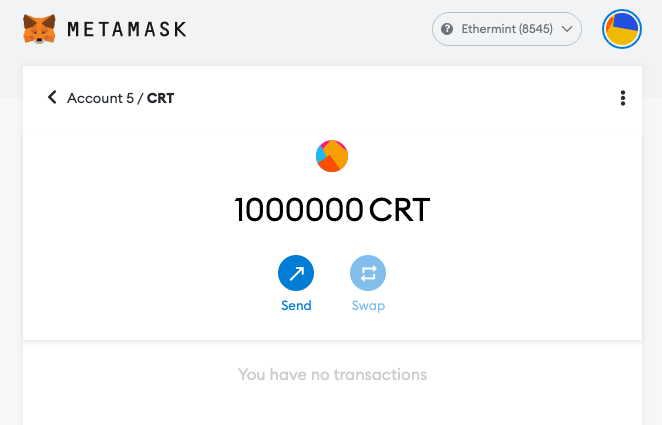
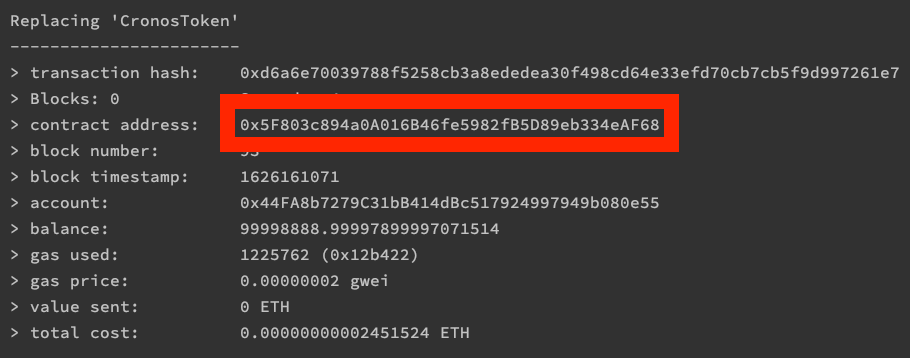
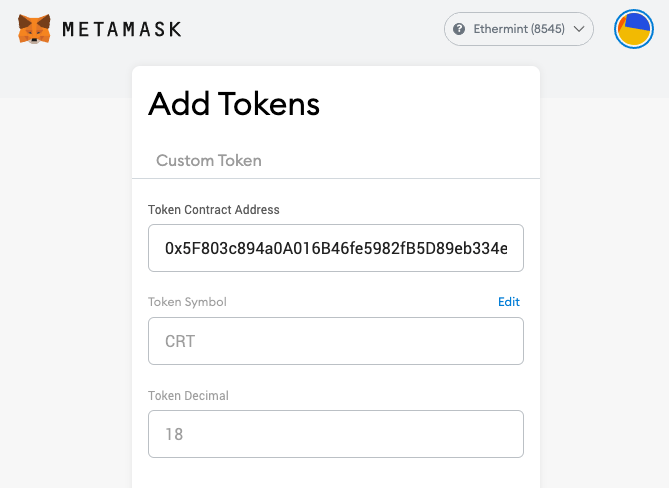
Step 8. Obtain Contract address from console and input to Metamask
Correct balance will be shown on Metamask page


Hardhat: Deploy ERC20 Contract
Step 1. Enter smart-contract-example/hardhat folder
$ cd smart-contract-example/hardhat
Step 2. Run npm install inside the folder
$ npm install
Step 3. Make a copy of .env.example to .env
$ cp .env.example .env
Step 4. Modify .env and fill ONE of the field
MNEMONIC=goose easy ivory ...
PRIVATE_KEY=XXXXXXX
Step 5. Review Migration Script at scripts/deploy-cronos-token.js
async function main() {
    const CronosToken = await hre.ethers.getContractFactory("CronosToken");
    const cronosToken = await CronosToken.deploy("Cronos Token", "CRT", "1000000000000000000000000");

    await cronosToken.deployed();

    console.log("CronosToken deployed to:", cronosToken.address);
}
Step 6. Endpoints setting
By default, the script will be using your local host "127.0.0.1" – If you are not running a localhost, you may leverage the public endpoint https://evm-t3.cronos.org/ by making changes to networks in hardhat.config.js, for example:
networks: {
  development: {
    url: "http://localhost:8545",
    accounts: getHDWallet(),
   },
  testnet: {
    url: "https://evm-t3.cronos.org/",
    accounts: getHDWallet(),
  },
},
Step 7. Deploy Contract
npm run deploy-contract-cronos
Step 8. Obtain Contract address from console and input to Metamask
Correct balance will be shown on Metamask page
CronosToken deployed to: 0x5F803c894a0A16B46fe5982fB5D89eb334eAF68