
Intermediate
How to deploying Subnet with EVM Based Blockchain using AvalancheJS
Introduction
A blockchain is a virtual machine (VM) that executes transactions to modify its base state and subsequent states. The state, transactions, state transition function, and user interface of a blockchain are determined by its VM. In Avalanche, VMs act as templates for creating various, independent blockchains that share the same protocols.
Validators must approve all transactions on a blockchain. On Avalanche, validators are grouped into Subnets, which can validate one or multiple chains. The primary Subnet currently validates three chains, each serving a different purpose. Users can easily create their own Subnet and invite other validators to participate. A validator can belong to multiple Subnets but must validate the primary Subnet.
In Avalanche, the Platform Chain (P-Chain) manages Subnets, validators, and blockchains. This tutorial teaches you how to create a Subnet and deploy an Ethereum Virtual Machine (EVM) based blockchain on that Subnet through a Node.js app with the help of AvalancheJS. AvalancheJS is a JavaScript library that facilitates communication with the Avalanche node API, handling transaction serialization and key signing. The Subnet tutorial series provides various articles covering topics such as Subnets, custom VM building, and more.
Requirements
Project Structure
Open the terminal and make a new directory at your desired location. We will keep all the binaries and other codes in this folder.
mkdir subnet-evm-demo
cd subnet-evm-demo
Setting up AvalancheGo and Subnet-EVM Binaries
Clients interact with Avalanche blockchain by issuing API calls to the nodes running AvalancheGo. We have to clone the repository, build its binary, and run it. If we want to deploy our blockchain, we have to put the blockchain’s VM binary inside the build/plugins directory. Here we will also clone the subnet-evm repository, build the VM’s binary, and copy it to the AvalancheGo’s build/plugins directory. Follow the steps below –
Clone AvalancheGo Repository
git clone https://github.com/ava-labs/avalanchego
cd avalanchego
Build Binary
Running the below command will create an avalanchego binary inside the build/ directory and will install the Coreth evm binary inside the build/plugins directory. For more information on running a node, please refer this.
./scripts/build.sh
Clone Subnet-EVM Repository
Move to the subnet-evm-demo directory, and clone the repository.
git clone https://github.com/ava-labs/subnet-evm
cd subnet-evm
Build Binary and Copy it to AvalancheGo Plugins
Now run the following command to build the VM’s binary inside the build/ directory, named as srEXiWaHuhNyGwPUi444Tu47ZEDwxTWrbQiuD7FmgSAQ6X7Dy. It is the ID for this VM and corresponds to the string “Subnet-EVM” zero-extended in a 32-byte array and encoded in CB58. Then copy it to AvalancheGo’s build/plugins directory.
./scripts/build.sh build/srEXiWaHuhNyGwPUi444Tu47ZEDwxTWrbQiuD7FmgSAQ6X7Dy

cp build/srEXiWaHuhNyGwPUi444Tu47ZEDwxTWrbQiuD7FmgSAQ6X7Dy ../avalanchego/build/plugins
You can directly build the subnet-evm binary inside the plugins folder as well, by passing its location as the argument.
Setting up Local Avalanche Network
For the development purpose, we can use Avalanche Network Runner (ANR). It helps us in simulating the actual network. For this tutorial, we will be installing ANR binary and will interact with the network through RPCs.
Install ANR Binary
The following command will install the ANR binary inside ~/bin. Please make sure that you have the ~/bin path set in the $PATH environment variable, otherwise, you will not be able to run the binary unless you specify its location in each command.
curl -sSfL https://raw.githubusercontent.com/ava-labs/avalanche-network-runner/main/scripts/install.sh | sh -s
Start RPC Server
Run the following command to start the RPC server. This will help us in deploying our local cluster of validating nodes. Keep this tab open and run the subsequent commands in the new terminal (or tab).
avalanche-network-runner server \
--port=":8080" \
--grpc-gateway-port=":8081"
Start 5 Node Cluster
Run the following command to start a network cluster of 5 validating nodes, all running the AvalancheGo’s binary and have the plugins of the subnet-evm VM. Put the avalanchego binary location as per your requirement.
avalanche-network-runner control start \
--endpoint="0.0.0.0:8080" \
--avalanchego-path ${HOME}/subnet-evm-demo/avalanchego/build/avalanchego
You can see how the network is set up, and finally the node information at last (within 10-15 seconds), by viewing the logs in the previous tab. Now you have the local simulation of the Avalanche network, with 5 validating nodes.
node1: node ID "NodeID-7Xhw2mDxuDS44j42TCB6U5579esbSt3Lg", URI "http://localhost:48607"
node2: node ID "NodeID-MFrZFVCXPv5iCn6M9K6XduxGTYp891xXZ", URI "http://localhost:27236"
node3: node ID "NodeID-NFBbbJ4qCmNaCzeW7sxErhvWqvEQMnYcN", URI "http://localhost:58800"
node4: node ID "NodeID-GWPcbFJZFfZreETSoWjPimr846mXEKCtu", URI "http://localhost:65011"
node5: node ID "NodeID-P7oB2McjBGgW2NXXWVYjV8JEDFoW9xDE5", URI "http://localhost:12023"
You can view the URIs of the nodes using the following command.
avalanche-network-runner control uris \
--endpoint="0.0.0.0:8080"
For the demonstration purpose, let us choose node1 as our subject node for making requests and finally making it a validator on our Subnet. Make sure to copy its URI and PORT, as we will need that later.
ANR also provides us with the funded account with the following credentials.
P-Chain Address 1:     P-custom18jma8ppw3nhx5r4ap8clazz0dps7rv5u9xde7p
P-Chain Address 1 Key: PrivateKey-ewoqjP7PxY4yr3iLTpLisriqt94hdyDFNgchSxGGztUrTXtNN
We will be using these keys for signing transactions and as the controller of Subnets.
Setting up Node.js Project
Make a new folder for the Node.js project inside the subnet-evm-demo directory, so that, the project structure would look like this.
$HOME
|_subnet-evm-demo
    |_avalanchego
    |_subnet-evm
    |_avalanche-network-runner
    |_subnet-evm-js
There is no hard and fast rule to have the same project structure as demonstrated above. You can clone these repositories anywhere you want. You just have to run the commands accordingly to build binaries, copy VMs to avalanchego/build/plugins/, run Avalanche Network Runner with AvalancheGo’s binary etc.
Installing Dependencies
Here, subnet-evm-js is our Node.js project folder. Move to the project directory and install the following dependencies.
-
avalanche (3.13.3 or above)
-
dotenv
-
yargs
npm install --save avalanche dotenv yargs
Configuration and Other Details
Make a config.js file and store the following information, about the node and its respective URI.
require("dotenv").config()

module.exports = {
  protocol: "http",
  ip: "0.0.0.0",
  port: 14760,
  networkID: 1337,
  privKey: process.env.PRIVATEKEY,
}
We have networkID: 1337 for the local network. Mainnet has 43114, and Fuji has 43113. Put the port here, that you have copied earlier from the ANR’s output. Rest all should remain the same. Here we are also accessing PRIVATEKEY from the .env file. So make sure to include your funded private key in the .env file which was provided by ANR.
PRIVATEKEY="PrivateKey-ewoqjP7PxY4yr3iLTpLisriqt94hdyDFNgchSxGGztUrTXtNN"
Always put secret information like the .env file restricted to yourself only and refrain from committing it to git by including it in the .gitignore file.
Import Libraries and Setup Instances for Avalanche APIs
This code will serve as the helper function for all other functions spread over different files. It will instantiate all the necessary Avalanche APIs using AvalancheJS and export them for other files to use it. Other files can simply import and re-use. Make a new file importAPI.js and paste the following code inside it.
const { Avalanche, BinTools, BN } = require("avalanche")

// Importing node details and Private key from the config file.
const { ip, port, protocol, networkID, privKey } = require("./config.js")

// For encoding and decoding to CB58 and buffers.
const bintools = BinTools.getInstance()

// Avalanche instance
const avalanche = new Avalanche(ip, port, protocol, networkID)

// Platform and Info API
const platform = avalanche.PChain()
const info = avalanche.Info()

// Keychain for signing transactions
const pKeyChain = platform.keyChain()
pKeyChain.importKey(privKey)
const pAddressStrings = pKeyChain.getAddressStrings()

// UTXOs for spending unspent outputs
const utxoSet = async () => {
  const platformUTXOs = await platform.getUTXOs(pAddressStrings)
  return platformUTXOs.utxos
}

// Exporting these for other files to use
module.exports = {
  platform,
  info,
  pKeyChain,
  pAddressStrings,
  bintools,
  utxoSet,
  BN,
}
Genesis Data
Each blockchain has some genesis state when it’s created. Each VM defines the format and semantics of its genesis data. We will be using the default genesis data provided by subnet-evm. You can also find it inside the networks/11111/ folder of the subnet-evm repository or simply copy and paste the following data inside the genesis.json file of the project folder. (Note that fields airdropHash and airdropAmount have been removed.)
{
  "config": {
    "chainId": 11111,
    "homesteadBlock": 0,
    "eip150Block": 0,
    "eip150Hash": "0x2086799aeebeae135c246c65021c82b4e15a2c451340993aacfd2751886514f0",
    "eip155Block": 0,
    "eip158Block": 0,
    "byzantiumBlock": 0,
    "constantinopleBlock": 0,
    "petersburgBlock": 0,
    "istanbulBlock": 0,
    "muirGlacierBlock": 0,
    "subnetEVMTimestamp": 0,
    "feeConfig": {
      "gasLimit": 20000000,
      "minBaseFee": 1000000000,
      "targetGas": 100000000,
      "baseFeeChangeDenominator": 48,
      "minBlockGasCost": 0,
      "maxBlockGasCost": 10000000,
      "targetBlockRate": 2,
      "blockGasCostStep": 500000
    }
  },
  "alloc": {
    "d109c2fCfc7fE7AE9ccdE37529E50772053Eb7EE": {
      "balance": "0x52B7D2DCC80CD2E4000000"
    }
  },
  "nonce": "0x0",
  "timestamp": "0x0",
  "extraData": "0x00",
  "gasLimit": "0x1312D00",
  "difficulty": "0x0",
  "mixHash": "0x0000000000000000000000000000000000000000000000000000000000000000",
  "coinbase": "0x0000000000000000000000000000000000000000",
  "number": "0x0",
  "gasUsed": "0x0",
  "parentHash": "0x0000000000000000000000000000000000000000000000000000000000000000"
}
This file will be responsible for setting up of origin state of the chain, like initial balance allocations of the native asset, transaction fees, restricting smart contract access, etc. You should look into 2 major parameters here in the genesis file
"alloc": {
    "d109c2fCfc7fE7AE9ccdE37529E50772053Eb7EE": {
        "balance": "0x52B7D2DCC80CD2E4000000"
    }
}
Put your Ethereum derived hexadecimal address (without 0x) like what you have on the C-Chain. This address will receive the associated balance. Make sure to put your controlled address here, as without this you cannot distribute tokens to users for interacting with your chain (tokens are required for paying fees for the transactions). For development purposes, you can create a new address on MetaMask and use that here.
"chainId": 11111
Put a unique number as ChainID for your chain. Conflicting ChainIDs can cause problems. You can read more about all of these parameters here.
Creating Subnet
Let’s make a file for creating a new Subnet by issuing buildCreateSubnetTx on AvalancheJS’ platform API. Two of the interesting arguments of this function are subnet-owner and threshold.
Subnet owners control the Subnets by creating signed transactions for adding validators, creating new chains, etc. Whereas the threshold defines the minimum signature required for approving on behalf of all Subnet owners. By default it is 1, so will not pass any argument for that, as we have only one Subnet owner. Code is well commented for you to understand.
const {
  platform,
  pKeyChain,
  pAddressStrings,
  utxoSet,
} = require("./importAPI.js")

async function createSubnet() {
  // Creating unsgined tx
  const unsignedTx = await platform.buildCreateSubnetTx(
    await utxoSet(), // set of utxos this tx will consume
    pAddressStrings, // from
    pAddressStrings, // change address
    pAddressStrings // Subnet owners' address array
  )

  // signing unsgined tx with pKeyChain
  const tx = unsignedTx.sign(pKeyChain)

  // issuing tx
  const txId = await platform.issueTx(tx)
  console.log("Tx ID: ", txId)
}

createSubnet()
Make sure to keep the txID you received for this transaction. Once this transaction is accepted, a new Subnet with the same ID will be created. You can run this program now with the following command.
node createSubnet.js
Adding Subnet Validator
The newly created Subnet requires validators to validate the transactions on the Subnet’s every blockchain. Now we will write the code in addSubnetValidator.js to add validators to the Subnet. Only transactions signed by the threshold (here 1) number of Subnet owners will be accepted to add validators. The Subnet owners which will sign this transaction is passed as the subnetAuth parameter. It is an array of indices, representing the Subnet owners from the array of addresses that we passed earlier in the createSubnetTx().
The arguments for the AvalancheJS API call for buildAddSubnetValidatorTx() is explained with the help of comments. All the transaction calls of AvalancheJS starting with build will return an unsigned transaction. We then have to sign it with our key chain and issue the signed transaction to the network.
const args = require("yargs").argv
const {
  platform,
  info,
  pKeyChain,
  pAddressStrings,
  utxoSet,
  BN,
} = require("./importAPI.js")

async function addSubnetValidator() {
  let {
    nodeID = await info.getNodeID(),
    startTime,
    endTime,
    weight = 20,
    subnetID,
  } = args

  const pAddresses = pKeyChain.getAddresses()

  // Creating Subnet auth
  const subnetAuth = [[0, pAddresses[0]]]

  // Creating unsgined tx
  const unsignedTx = await platform.buildAddSubnetValidatorTx(
    await utxoSet(), // set of utxos this tx will consume
    pAddressStrings, // from
    pAddressStrings, // change
    nodeID, // node id of the validator
    new BN(startTime), // timestamp after which validation starts
    new BN(endTime), // timestamp after which validation ends
    new BN(weight), // weight of the validator
    subnetID, // Subnet id for validation
    undefined, // memo
    undefined, // asOf
    subnetAuth // Subnet owners' address indices signing this tx
  )

  // signing unsgined tx with pKeyChain
  const tx = unsignedTx.sign(pKeyChain)

  // issuing tx
  const txId = await platform.issueTx(tx)
  console.log("Tx ID: ", txId)
}

addSubnetValidator()
We have to pass command-line arguments like nodeID, startTime, endTime, weight and subnetID while calling the command. If we do not pass any NodeID, then by default it will use ID corresponding to the URI in the config.js by calling the info.getNodeID() API from AvalancheJS. Similarly, the default weight will be 20, if not passed. You can run this program now with the following command.
node addSubnetValidator.js \
--subnetID <YOUR_SUBNET_ID> \
--startTime $(date -v +5M +%s) \
--endTime $(date -v +14d +%s)
We will keep the start time 5 minutes later than the current time. This $(date -v +5M +%s) will help to achieve the same. But you can put any timestamp in seconds there, given it is 20s later than the current time.
Whitelisting Subnet from the Node
Subnet owners can add any node to their Subnet. That doesn’t mean the nodes start validating their Subnet without any consent. If a node wants to validate the newly added Subnet, then it must restart its avalanchego binary with the new Subnet being whitelisted.
avalanche-network-runner control restart-node \
--request-timeout=3m \
--endpoint="0.0.0.0:8080" \
--node-name node1 \
--avalanchego-path ${HOME}/subnet-evm-demo/avalanchego/build/avalanchego \
--whitelisted-subnets="<SUBNET_ID>"
Once the node has restarted, it will again be re-assigned to a random API port. We have to update the config.js file with the new port.
Creating Blockchain
Once the Subnet setup is complete, Subnet owners can deploy any number of blockchains by building their own VMs or reusing the existing ones. If the VM for the new blockchain is not being used by the Subnet validators, then each node has to place the new VM binary in their avalanchego/build/plugins/ folder.
Let’s write functions to build a new blockchain using the already created genesis.json and subnet-evm as a blueprint (VM) for this chain. We will write the code in steps. Go through the steps by understanding each function and pasting it in your createBlockchain.js file.
Importing Dependencies
Let’s import the dependencies by using the following snippet. We are importing yargs for reading command-line flags.
const args = require("yargs").argv

const genesisJSON = require("./genesis.json")
const {
  platform,
  pKeyChain,
  pAddressStrings,
  bintools,
  utxoSet,
} = require("./importAPI")
Decoding CB58 vmID to String
We have used the utility function for decoding vmName from the vmID. vmID is zero-extended in a 32-byte array and encoded in CB58 from a string. Paste the function shown below.
// Returns string representing vmName of the provided vmID
function convertCB58ToString(cb58Str) {
  const buff = bintools.cb58Decode(cb58Str)
  return buff.toString()
}
Create the Blockchain
Now we will work upon the createBlockchain() function. This function takes 3-4 command-line flags as its input. The user must provide subnetID and chainName flag. The third argument could be either vmID or vmName. Either one of them must be provided with the flags. Chain name is the name of blockchain you want to create with the provided vmID or vmName. The vmID must be the same as what we have created the subnet-evm binary with.
// Creating blockchain with the subnetID, chain name and vmID (CB58 encoded VM name)
async function createBlockchain() {
  const { subnetID, chainName } = args

  // Generating vmName if only vmID is provied, else assigning args.vmID
  const vmName =
    typeof args.vmName !== "undefined"
      ? args.vmName
      : convertCB58ToString(args.vmID)

  // Getting CB58 encoded bytes of genesis
  genesisBytes = JSON.stringify(genesisJSON)

  const pAddresses = pKeyChain.getAddresses()

  // Creating Subnet auth
  const subnetAuth = [[0, pAddresses[0]]]

  // Creating unsgined tx
  const unsignedTx = await platform.buildCreateChainTx(
    await utxoSet(), // set of utxos this tx is consuming
    pAddressStrings, // from
    pAddressStrings, // change
    subnetID, // id of Subnet on which chain is being created
    chainName, // Name of blockchain
    vmName, // Name of the VM this chain is referencing
    [], // Array of feature extensions
    genesisBytes, // Stringified geneis JSON file
    undefined, // memo
    undefined, // asOf
    subnetAuth // Subnet owners' address indices signing this tx
  )

  // signing unsgined tx with pKeyChain
  const tx = unsignedTx.sign(pKeyChain)

  // issuing tx
  const txId = await platform.issueTx(tx)
  console.log("Create chain transaction ID: ", txId)
}
The code above is self-explanatory –
-
Processing command-line flags to constants –
subnetID,chainNameandvmID. -
Building stringified JSON from genesis.json
-
Creating Subnet auth array.
-
Creating unsigned TX by calling
platform.buildCreateChainTx. -
Signing and issuing the signed TXs.
Make sure to keep txID received by running this code. Once the transaction is committed, the txID will be the blockchainID or identifier for the newly created chain. You can run this program now with the following command.
node createBlockchain.js \
--subnetID <YOUR_SUBNET_ID> \
--chainName <CUSTOM_CHAIN_NAME> \
--vmName subnetevm
Creating a new chain will take few seconds. You can also view the logs on the Avalanche Network Runner tab of the terminal.
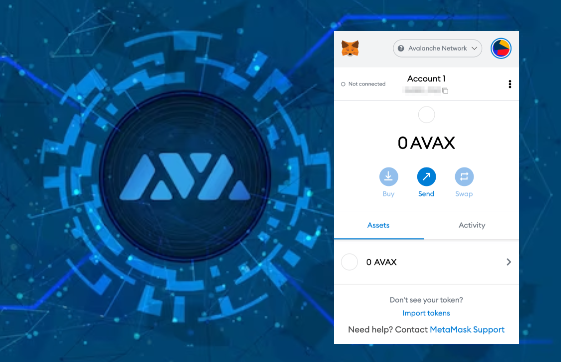
Interacting with the New Blockchain with MetaMask
We have created the new Subnet, deployed a new blockchain using the subnet-evm, and finally added a validator to this Subnet, for validating different chains. Now it’s time to interact with the new chain. You can follow this part in our docs, to learn, how you can set up your MetaMask to interact with this chain. You can send tokens, create smart contracts, and do everything that you can do on C-Chain.