
Beginner
How to install Temple Tezos Wallet
Welcome to this tutorial on how to install the Temple Tezos Wallet. The Temple Tezos Wallet is a user-friendly, non-custodial wallet for storing and managing your Tezos tokens and smart contracts. It is available for desktop and mobile devices and offers a range of features for managing your Tezos assets and interacting with the Tezos blockchain. In this tutorial, you will learn how to install and set up the Temple Tezos Wallet on your desktop or mobile device. We will walk you through the steps needed to download and install the wallet, create a new wallet or restore an existing one, and secure your wallet with a password. Let’s get started!
What Tezos wallet to use?
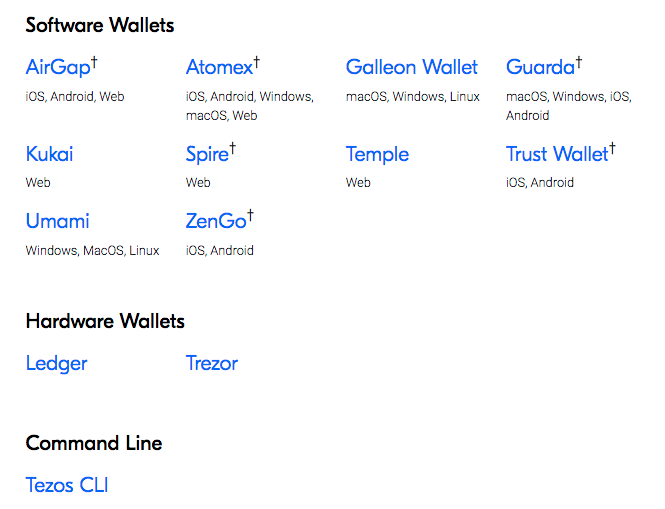
There are many wallets available to interact with the Tezos blockchain. You can find a complete list on the Tezos website with many Desktop, Web, and Hardware wallets.
We’ve chosen to go with Temple Wallet, like most crypto users, being familiar with Metamask and using browser extensions for day-to-day activities is efficient. Here is a step-by-step to install it in your web browser. Here we are using Chrome, but the extension is available for many more (Brave, Firefox, Opera…) and the process is the same with all of them.
How to install Temple Wallet for Tezos blockchain
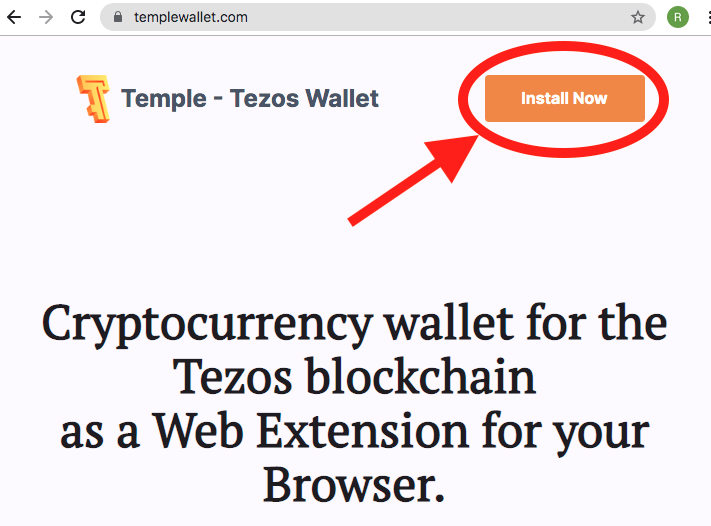
- Install the extension from the official Temple Wallet website: go to
Temple Wallet – Cryptocurrency wallet for the Tezos blockchain | Temple – Tezos Wallet and click on the “Install Now” button. A screen with a browser list will appear, select yours. In this tutorial, we choose Chrome.
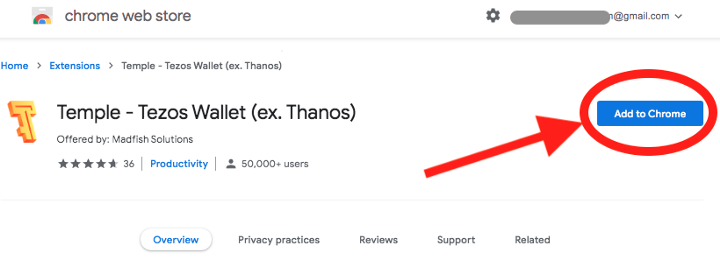
- You will be forwarded to the extension page on the chrome web store. Once there, click the “add to chrome” button. A pop-up window will appear asking you to confirm you wish to install the extension.
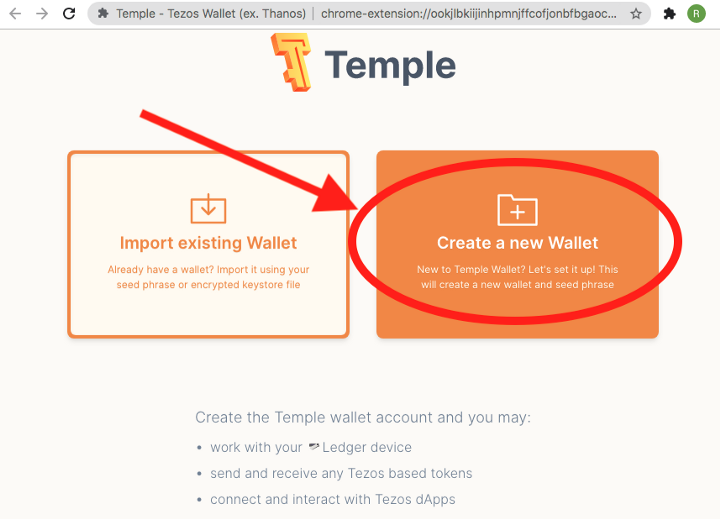
- Once the installation is complete, after a few seconds, you will be automatically forwarded to the Temple extension page in your browser. There, click on “Create a new wallet”.
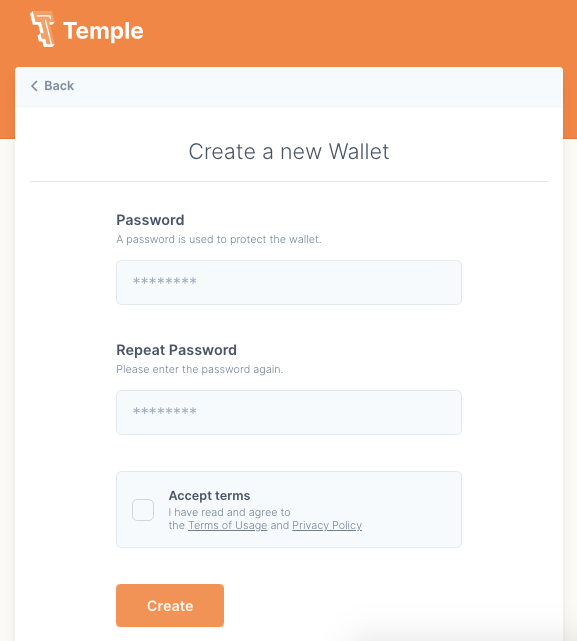
- Choose a password, accept the terms and click on “Create”.
- The next screen is the “Backup new Seed Phrase” one. You have to click on the protected field and a list of 12 words will appear. You must store them in a secure place.
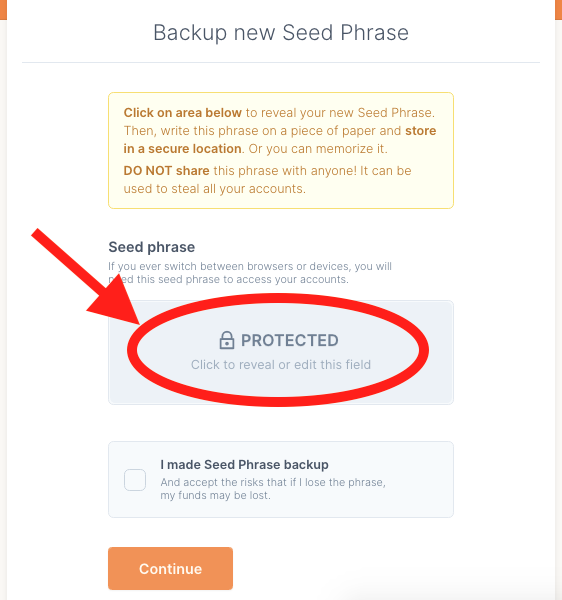 Let me emphasize this again: your seed phrase gives access to your wallet. With it, anyone can take your funds away from it. Never share it with anyone you don’t trust with the entirety of your funds and prefer offline solutions for storage.
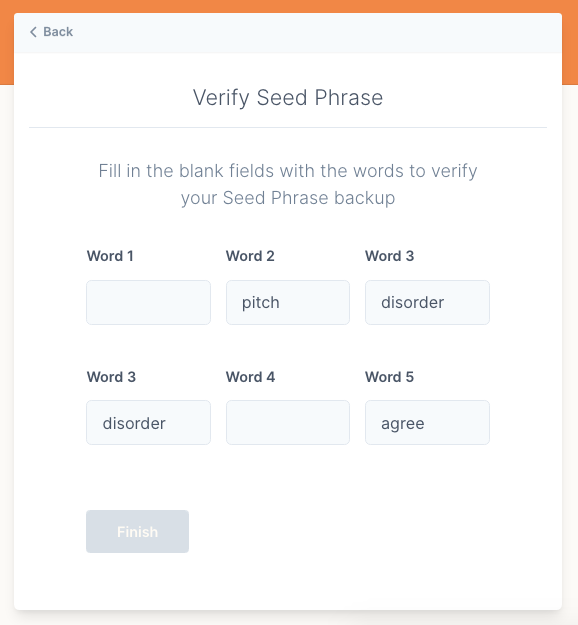
- The next screen verifies you have indeed written down your seed phrase. Once you filled in the missing words, click on “Finish” and your wallet will be generated.
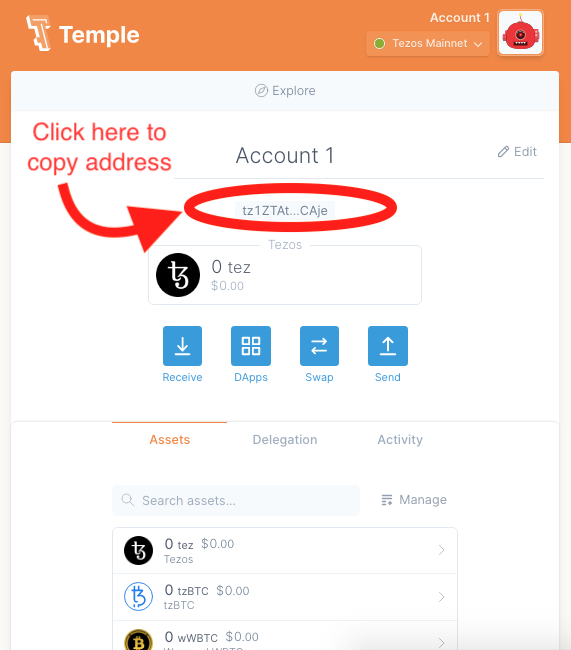
- Et voila! Your wallet is ready. It is named “Account 1” by default but you can edit this name if you need to. You can also copy your public address by clicking on its display zone. You will need it right now as you need to send some XTZ to your wallet for it to be usable.
How to send XTZ to your wallet
If you just created your wallet, it is empty and you cannot use it yet as any interaction with the Tezos blockchain requires gas in the form of XTZ, the native blockchain token. This is the same situation you found yourself in when you created your first Metamask address and needed to send it some Ethereum before using the wallet.
You have two ways to get some XTZ:
-
Buy some from an exchange and withdraw it to your wallet. Here is a list of exchanges to buy XTZ from:
 Tezos Price: XTZ Live Price Chart & News | CoinGecko
At the time of writing, withdrawing XTZ on the Tezos network costs a fee of 0.1 XTZ (approximately Rs. 40 ) both on Binance and Ascendex. -
Have a friend send some to you. Maybe the author of this article can help 😉
The good news is that the Tezos blockchain is very fast and cheap to interact with. You will need the equivalent of a few rupees to transact on it, so putting a few rupees worth of XTZ will take you a long way.