

Intermediate
How to run a full node with Ansible on Polygon network
This tutorial guides you through starting and running a full node on the Polygon network using Ansible. Before starting, ensure that you have installed Ansible on your local machine with Python3.x and Go is not installed in your environment. You will also need to make sure that your VM or machine does not have any previous setups for Polygon Validator, Heimdall or Bor. The process of syncing the Heimdall and Bor services can take several days, but you can also use a maintained snapshot to reduce the sync time to a few hours. Follow the steps in the guide, including cloning the Polygon PoS Ansible repository and editing the inventory.yml file, to set up your full node
Technical Requirements
Minimum Hardware Configuration
This is the minimum hardware configuration required to setup a full node:
RAM: 16-32 GB
CPU: 4-8 core CPU (For AWS: t3.2xlarge)
Storage: 2.5TB to 5TB SSD (make sure it is extendable)
TIP
The minimum storage requirements will change over time as the network grows. It is recommended to use more than the minimum requirements to run a robust full node.
While we do not favor any operating system, more secure and stable Linux server distributions (like CentOS) should be preferred over desktop operating systems (like Mac OS and Windows).
Run a full node with Ansible
This tutorial guides you through starting and running a full node using Ansible.
An Ansible playbook is used to configure and manage a full node. See the Minimum Technical Requirements guide for the system requirements.
TIP
Steps in this guide involve waiting for the Heimdall and Bor services to sync fully. This process takes several days to complete.
Alternatively, you can use a maintained snapshot, reducing the sync time to a few hours. For detailed instructions, see Snapshot Instructions for Heimdall and Bor.
For snapshot download links, see the Polygon Chains Snapshots page.
Prerequisites
-
Install Ansible on your local machine with Python3.x. The setup will not work if you have Python2.x.
-
To install Ansible with Python 3.x, you can use pip. If you do not have pip on your machine, follow the steps outlined here. Run
pip3 install ansibleto install Ansible. -
Check the Polygon PoS Ansible repository for requirements.
-
You will also need to ensure that Go is not installed in your environment. You will run into issues if you attempt to set up your full node through Ansible with Go installed as Ansible requires specific packages of Go to be installed.
-
You will also need to make sure that your VM / Machine does not have any previous setups for Polygon Validator or Heimdall or Bor. You will need to delete them as your setup will run into issues.
HEIMDALL SOURCE ENHANCEMENTS
The latest Heimdall version, v.0.3.0, contains a few enhancements. The delay time between the contract events of different validators has been increased to ensure that the mempool doesn’t get filled quickly in case of a burst of events that could hamper the chain’s progress.
Additionally, the data size has been restricted in state sync txs to 30Kb (when represented in bytes) and 60Kb (when defined as string). For example:
Data - "abcd1234"
Length in string format - 8
Hex Byte representation - [171 205 18 52]
Length in byte format - 4
Full node setup
-
Ensure you have access to the remote machine or VM on which the full node is being set up.
-
Refer to GitHub – maticnetwork/node-ansible: Ansible scripts to setup Matic validator node for more details.
-
Clone the GitHub – maticnetwork/node-ansible: Ansible scripts to setup Matic validator node repository.
-
Navigate into the node-ansible folder:
cd node-ansible -
Edit the
inventory.ymlfile and insert your IP(s) in thesentry->hostssection. -
Refer to GitHub – maticnetwork/node-ansible: Ansible scripts to setup Matic validator node for more details.
-
Check if the remote machine is reachable by running:
ansible sentry -m ping -
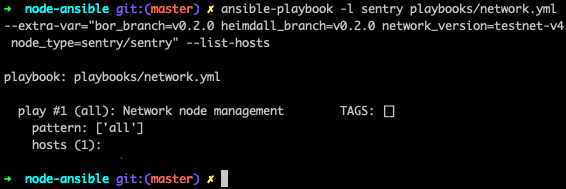
To test if the correct machine is configured, run the following command:
# Mainnet:
ansible-playbook playbooks/network.yml --extra-var="bor_version=v0.3.3 heimdall_version=v0.3.0 network=mainnet node_type=sentry" --list-hosts

# Testnet:
ansible-playbook playbooks/network.yml --extra-var="bor_version=v0.3.3 heimdall_version=v0.3.0 network=mumbai node_type=sentry" --list-hosts
- Next, set up the full node with this command:
# Mainnet:
ansible-playbook playbooks/network.yml --extra-var="bor_version=v0.3.3 heimdall_version=v0.3.0 network=mainnet node_type=sentry"

# Testnet:
ansible-playbook playbooks/network.yml --extra-var="bor_version=v0.3.3 heimdall_version=v0.3.0 network=mumbai node_type=sentry"
- In case you run into any issues, delete and clean the whole setup using:
ansible-playbook playbooks/clean.yml
- Once you initiate the Ansible playbook, log in to the remote machine.
-
Heimdall seed nodes:
moniker=<enter unique identifier>

# Mainnet:
seeds="d3a8990f61bb3657da1664fe437d4993c4599a7e@3.211.248.31:26656,d3d7d397339c9126235dfab11bf925e269776f4f@3.212.183.151:26656,68254d33685fad151e45bfe1ed33d538ba6ec8cb@3.93.224.197:26656,d26c54ebbf274896f12977bb13d83ac1237a8226@184.73.124.158:26656,f4f605d60b8ffaaf15240564e58a81103510631c@159.203.9.164:26656,4fb1bc820088764a564d4f66bba1963d47d82329@44.232.55.71:26656,2eadba4be3ce47ac8db0a3538cb923b57b41c927@35.199.4.13:26656,25f5f65a09c56e9f1d2d90618aa70cd358aa68da@35.230.116.151:26656,3b23b20017a6f348d329c102ddc0088f0a10a444@35.221.13.28:26656"

# Testnet:
seeds="b18bbe1f3d8576f4b73d9b18976e71c65e839149@34.226.134.117:26656,4cd60c1d76e44b05f7dfd8bab3f447b119e87042@54.147.31.250:26656,7a6c7b5d25b13ce3448b047dbebeb1a19cc2e092@18.213.200.99:26656"
Bootnodes:
# Mainnet:
bootnode ["enode://0cb82b395094ee4a2915e9714894627de9ed8498fb881cec6db7c65e8b9a5bd7f2f25cc84e71e89d0947e51c76e85d0847de848c7782b13c0255247a6758178c@44.232.55.71:30303,enode://88116f4295f5a31538ae409e4d44ad40d22e44ee9342869e7d68bdec55b0f83c1530355ce8b41fbec0928a7d75a5745d528450d30aec92066ab6ba1ee351d710@159.203.9.164:30303","enode://4be7248c3a12c5f95d4ef5fff37f7c44ad1072fdb59701b2e5987c5f3846ef448ce7eabc941c5575b13db0fb016552c1fa5cca0dda1a8008cf6d63874c0f3eb7@3.93.224.197:30303","enode://32dd20eaf75513cf84ffc9940972ab17a62e88ea753b0780ea5eca9f40f9254064dacb99508337043d944c2a41b561a17deaad45c53ea0be02663e55e6a302b2@3.212.183.151:30303"]

# Testnet:
bootnodes ["enode://320553cda00dfc003f499a3ce9598029f364fbb3ed1222fdc20a94d97dcc4d8ba0cd0bfa996579dcc6d17a534741fb0a5da303a90579431259150de66b597251@54.147.31.250:30303","enode://f0f48a8781629f95ff02606081e6e43e4aebd503f3d07fc931fad7dd5ca1ba52bd849a6f6c3be0e375cf13c9ae04d859c4a9ae3546dc8ed4f10aa5dbb47d4998@34.226.134.117:30303"]
-
To check if Heimdall is synced
-
On the remote machine/VM, run
curl localhost:26657/status -
In the output,
catching_upvalue should befalse
-
-
Once Heimdall is synced, run
-
sudo service bor start
-
You have successfully set up a full node with Ansible.
If Bor presents an error of permission to data, run this command to make the Bor user the owner of the Bor files:
sudo chown bor /var/lib/bor
Logs
Logs can be managed by the journalctl linux tool. Here is a tutorial for advanced usage: How To Use Journalctl to View and Manipulate Systemd Logs.
Check Heimdall node logs
journalctl -u heimdalld.service -f
Check Bor Rest-server logs
journalctl -u bor.service -f
Ports and Firewall Setup
Open ports 22, 26656 and 30303 to world (0.0.0.0/0) on sentry node firewall.
You can use VPN to restrict access for port 22 as per your requirement and security guidelines.