
Intermediate
How to run an Avalanche Node with Google Cloud Platform
This tutorial provides an overview on how to run an Avalanche Node using Google Cloud Platform (GCP). It covers the creation of a GCP project, authentication from Terraform, cloning of a GitHub repository, Terraform configuration, deployment of the node and firewall rules. The architecture includes a single GCP project, Compute Engine, IAP, networking, compute network, public IP, subnets, a single 400GB PD-SSD disk attached to a Compute Instance of size e2-standard-8 deployed in US-EAST1-B Zone, and firewall rules for IAP INGRESS for SSH and P2P INGRESS for AVAX Peers. The setup requires a GCP account, Terraform state stored in GCP storage and proper authentication to GCP from Terraform.
Introduction
Google’s Cloud Platform (GCP) is a scalable, trusted and reliable hosting platform. Google operates a significant amount of it’s own global networking infrastructure. It’s fiber network is huge and it can provide highly stable and consistent global connectivity. In this article we will leverage GCP to deploy a node on which Avalanche can installed via terraform. Leveraging terraform may seem like overkill, but speaking as someone who has managed extremely large compute estates for over a decade I believe it will set you apart as an operator and administrator as it will enable you greater flexibility and provide the basis on which you can easily build further automation.
Conventions
-
Itemshighlighted in this manor are GCP parlance and can be searched for further reference in the Google documentation for their cloud products.
Important Notes
-
The machine type used in this documentation is for reference only and the actual sizing you use will depend entirely upon the amount that is staked and delegated to the node.
Architectural Description
This section aims to describe the architecture of the system that the steps in the Setup Instructions section deploy when enacted. This is done so that the executor can not only deploy the reference architecture, but also understand and potentially optimize it for their needs.
Project
We will create and utilize a single GCP Project for deployment of all resources.
Service Enablement
Within our GCP project we will need to enable the following Cloud Services:
-
Compute Engine -
IAP
Networking
Compute Network
We will deploy a single Compute Network object. This unit is where we will deploy all subsequent networking objects. It provides a logical boundary and securitization context should you wish to deploy other chain stacks or other infrastructure in GCP.
Public IP
Avalanche requires that a validator communicate outbound on the same public IP address that it advertises for other peers to connect to it on. Within GCP this precludes the possibility of us using a Cloud NAT Router for the outbound communications and requires us to bind the public IP that we provision to the interface of the machine. We will provision a single EXTERNAL static IPv4 Compute Address.
Subnets
For the purposes of this documentation we will deploy a single Compute Subnetwork in the US-EAST1 Region with a /24 address range giving us 254 IP addresses (not all usable but for the sake of generalized documentation).
Compute
Disk
We will provision a single 400GB PD-SSD disk that will be attached to our VM.
Instance
We will deploy a single Compute Instance of size e2-standard-8. Observations of operations using this machine specification suggest it is memory over provisioned and could be brought down to 16GB using custom machine specification; but please review and adjust as needed (the beauty of compute virtualization!!).
Zone
We will deploy our instance into the US-EAST1-B Zone
Firewall
We will provision the following Compute Firewall rules:
-
IAP INGRESS for SSH (TCP 22) – this only allows GCP IAP sources inbound on SSH.
-
P2P INGRESS for AVAX Peers (TCP 9651)
These are obviously just default ports and can be tailored to your needs as you desire.
Setup Instructions
GCP Account
-
If you don’t already have a GCP account go create one here
You will get some free bucks to run a trial, the trial is feature complete but your usage will start to deplete your free bucks so turn off anything you don’t need and/or add a credit card to your account if you intend to run things long term to avoid service shutdowns.
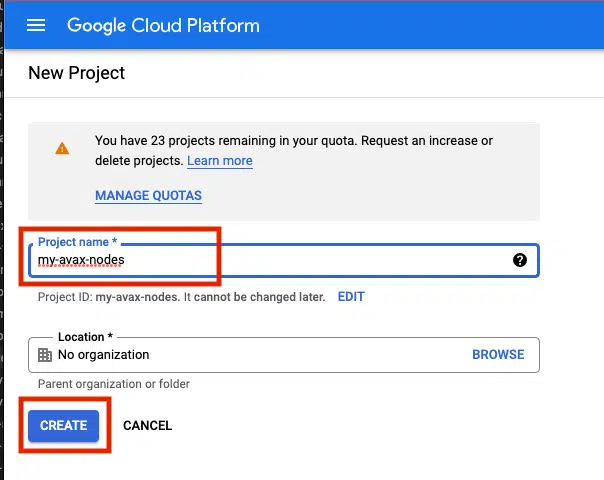
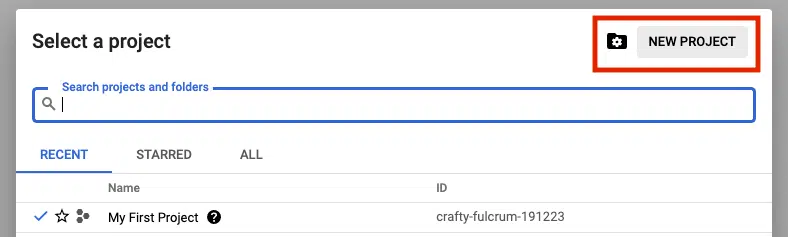
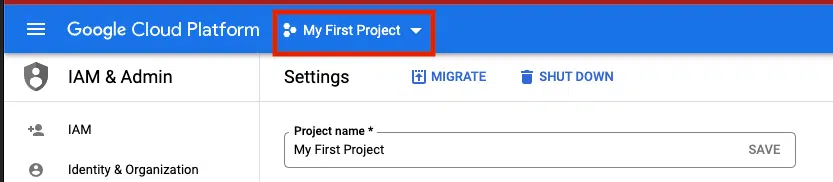
Project
Login to the GCP Cloud Console and create a new Project in your organization. Let’s use the name my-avax-nodes for the sake of this setup.
Terraform State
Terraform uses a state files to compose a differential between current infrastructure configuration and the proposed plan. You can store this state in a variety of different places, but using GCP storage is a reasonable approach given where we are deploying so we will stick with that.
Authentication to GCP from terraform has a few different options which are laid out here. Please chose the option that aligns with your context and ensure those steps are completed before continuing.
NOTE
Depending upon how you intend to execute your terraform operations you may or may not need to enable public access to the bucket. Obviously, not exposing the bucket for public access (even if authenticated) is preferable. If you intend to simply run terraform commands from your local machine then you will need to open the access up. I recommend to employ a full CI/CD pipeline using GCP Cloud Build which if utilized will mean the bucket can be marked as private. A full walk through of Cloud Build setup in this context can be found here
Clone GitHub Repository
I have provided a rudimentary terraform construct to provision a node on which to run Avalanche which can be found here. Documentation below assumes you are using this repository but if you have another terraform skeleton similar steps will apply.
Terraform Configuration
-
If running terraform locally, please install it.
-
In this repository, navigate to the
terraformdirectory. -
Under the
projectsdirectory, rename themy-avax-projectdirectory to match your GCP project name that you created (not required, but nice to be consistent) -
Under the folder you just renamed locate the
terraform.tfvarsfile. -
Edit this file and populate it with the values which make sense for your context and save it.
-
Locate the
backend.tffile in the same directory. -
Edit this file ensuring to replace the
bucketproperty with the GCS bucket name that you created earlier.
If you do not with to use cloud storage to persist terraform state then simply switch the backend to some other desirable provider.
Terraform Execution
Terraform enables us to see what it would do if we were to run it without actually applying any changes… this is called a plan operation. This plan is then enacted (optionally) by an apply.
Plan
-
In a terminal which is able to execute the
tfbinary,cdto the ~my-avax-projectdirectory that you renamed in step 3 ofTerraform Configuration. -
Execute the command
tf plan -
You should see a JSON output to the stdout of the terminal which lays out the operations that terraform will execute to apply the intended state.
Apply
-
In a terminal which is able to execute the
tfbinary,cdto the ~my-avax-projectdirectory that you renamed in step 3 ofTerraform Configuration. -
Execute the command
tf apply
If you want to ensure that terraform does exactly what you saw in the apply output, you can optionally request for the plan output to be saved to a file to feed to apply. This is generally considered best practice in highly fluid environments where rapid change is occurring from multiple sources.
Conclusion
Establishing CI/CD practices using tools such as GitHub and Terraform to manage your infrastructure assets is a great way to ensure base disaster recovery capabilities and to ensure you have a place to embed any ~tweaks you have to make operationally removing the potential to miss them when you have to scale from 1 node to 10. Having an automated pipeline also gives you a place to build a bigger house… what starts as your interest in building and managing a single AVAX node today can quickly change into you building an infrastructure operation for many different chains working with multiple different team members. I hope this may have inspired you to take a leap into automation in this context!