Intermediate
How to run an Avalanche Node with Microsoft Azure
This tutorial guides you on how to run an Avalanche Node using Microsoft Azure. The author explains the benefits of running a validator node in the Avalanche network and what hardware requirements are needed to run one. The tutorial covers the steps for setting up the Avalanche Node using the Set Up Avalanche Node With Installer tutorial. The tutorial also covers how to retrieve the NodeID, which is crucial for validating on the node, and how to back up the staking keys in case of corruption or termination of the instance. The steps in the tutorial include running a command to check the status of the node and another to retrieve the NodeID using curl requests to the local RPC. Finally, the tutorial covers how to back up the staking keys using a secure copy (scp) command.
This document was written by a community member, some information may be out of dated.
Running a validator and staking with Avalanche provides extremely competitive rewards of between 9.69% and 11.54% depending on the length you stake for. The maximum rate is earned by staking for a year, whilst the lowest rate for 14 days. There is also no slashing, so you don’t need to worry about a hardware failure or bug in the client which causes you to lose part or all of your stake. Instead with Avalanche you only need to currently maintain at least 80% uptime to ] rewards. If you fail to meet this requirement you don’t get slashed, but you don’t receive the rewards. You also do not need to put your private keys onto a node to begin validating on that node. Even if someone breaks into your cloud environment and gains access to the node, the worst they can do is turn off the node.
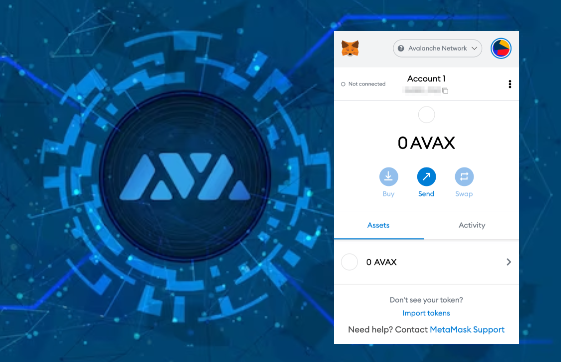
Not only does running a validator node enable you to receive rewards in AVAX, but later you will also be able to validate other Subnets in the ecosystem as well and receive rewards in the token native to their Subnets.
Hardware requirements to run a validator are relatively modest: 8 CPU cores, 16 GB of RAM and 1 TB SSD. It also doesn’t use enormous amounts of energy. Avalanche’s revolutionary consensus mechanism is able to scale to millions of validators participating in consensus at once, offering unparalleled decentralisation.
Currently the minimum amount required to stake to become a validator is 2,000 AVAX (which can be reduced over time as price increases). Alternatively, validators can also charge a small fee to enable users to delegate their stake with them to help towards running costs. You can use a calculator here to see how much rewards you would earn when running a node, compared to delegating.
I encourage everyone to run their own validators where possible, but for those that don’t meet the minimum staking requirements and want to delegate I am currently running a node which you can find here.
In this article we will step through the process of configuring a node on Microsoft Azure. This tutorial assumes no prior experience with Microsoft Azure and will go through each step with as few assumptions possible.
At the time of this article, spot pricing for a virtual machine with 2 Cores and 8 GB memory costs as little as $0.01060 per hour which works out at about $113.44 a year, a saving of 83.76%! compared to normal pay as you go prices. In comparison a virtual machine in AWS with 2 Cores and 4 GB Memory with spot pricing is around $462 a year.
Initial Subscription Configuration
Set up 2 Factor
First you will need a Microsoft Account, if you don’t have one already you will see an option to create one at the following link. If you already have one, make sure to set up 2 Factor authentication to secure your node by going to the following link and then selecting “Two-step verification” and following the steps provided.

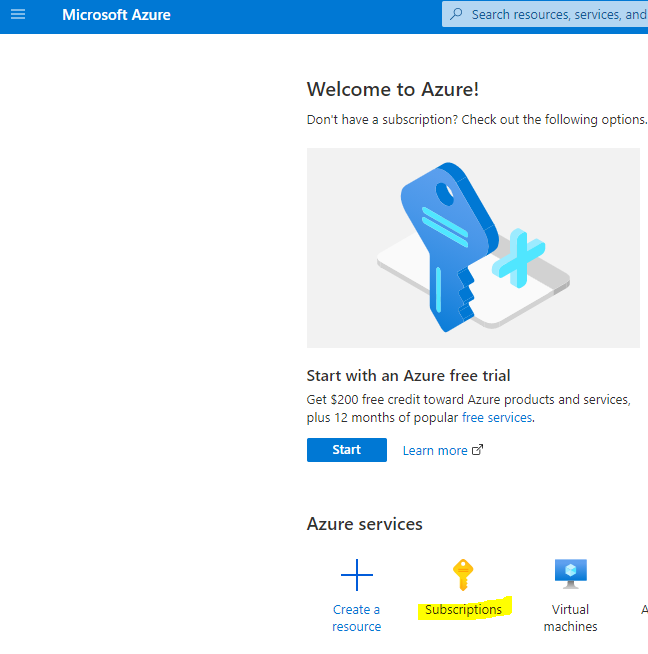
Once two factor has been configured log into the Azure portal by going to https://portal.azure.com and signing in with your Microsoft account. When you login you won’t have a subscription, so we need to create one first. Select “Subscriptions” as highlighted below:
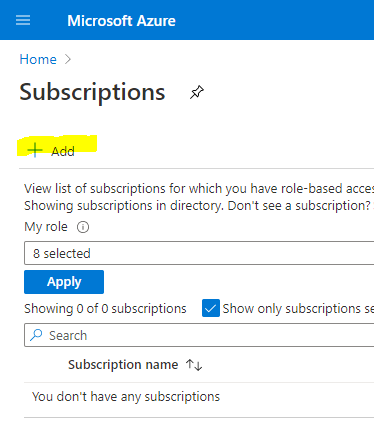
Then select “+ Add” to add a new subscription
If you want to use Spot Instance VM Pricing (which will be considerably cheaper) you can’t use a Free Trial account (and you will receive an error upon validation), so make sure to select Pay-As-You-Go.

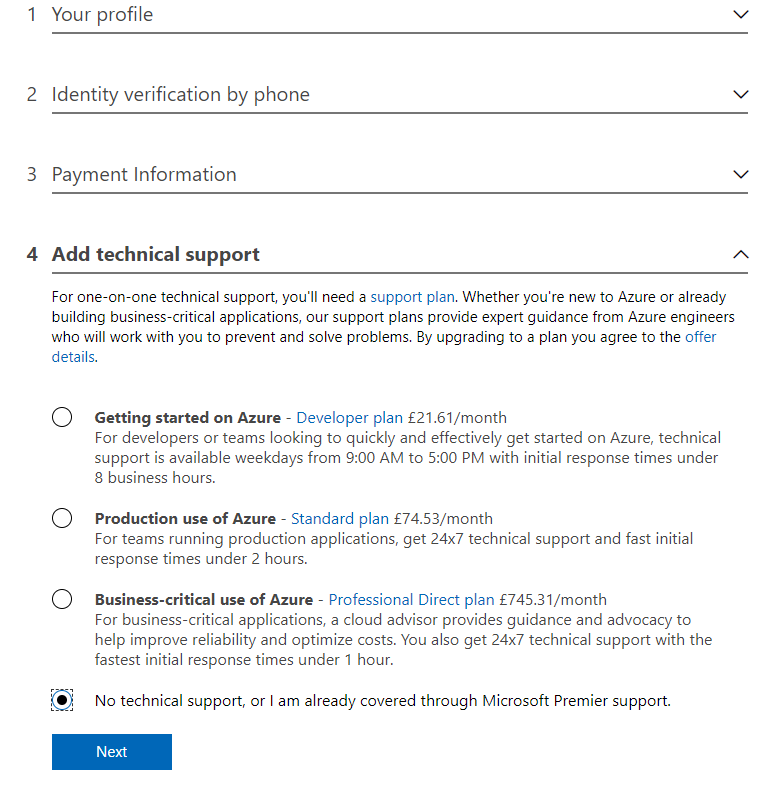
Enter your billing details and confirm identity as part of the sign-up process, when you get to Add technical support select the without support option (unless you want to pay extra for support) and press Next.
Create a Virtual Machine
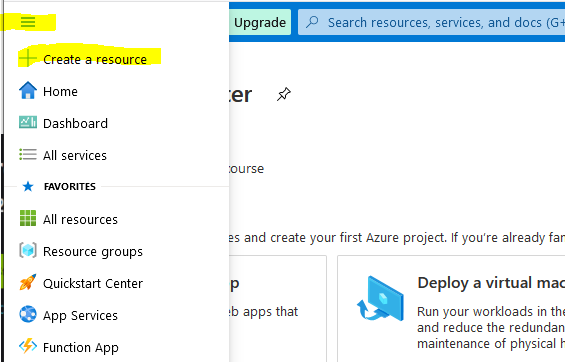
Now that we have a subscription, we can create the Ubuntu Virtual Machine for our Avalanche Node. Select the Icon in the top left for the Menu and choose “+ Create a resource”
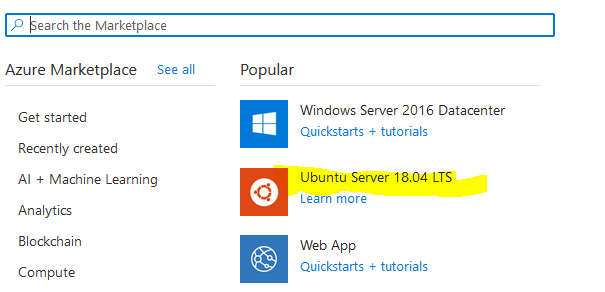
Select Ubuntu Server 18.04 LTS (this will normally be under the popular section or alternatively search for it in the marketplace)
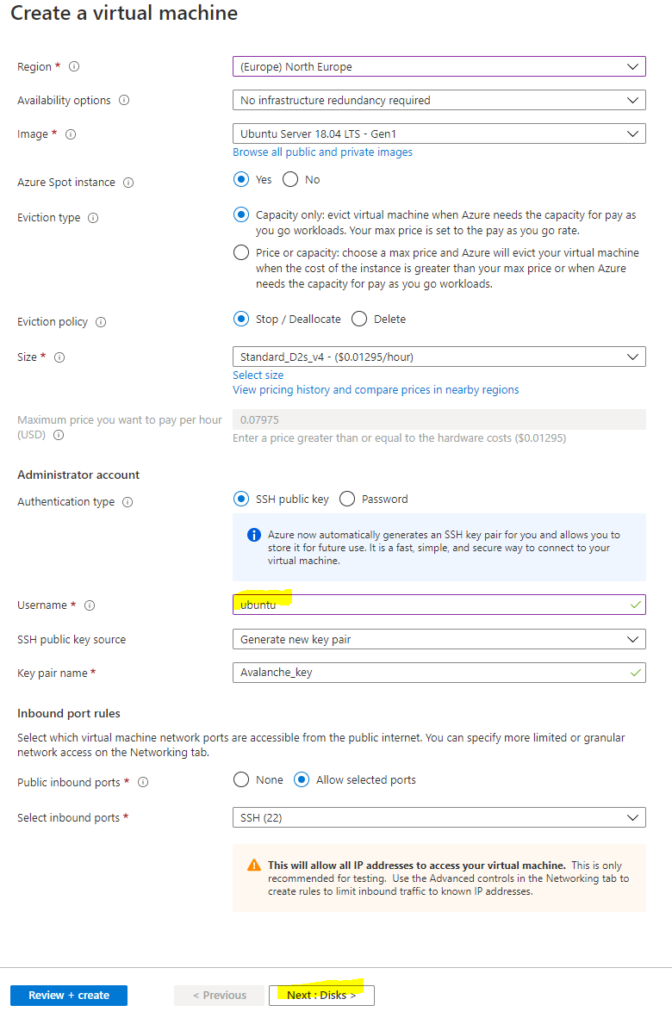
This will take you to the Create a virtual machine page as shown below:
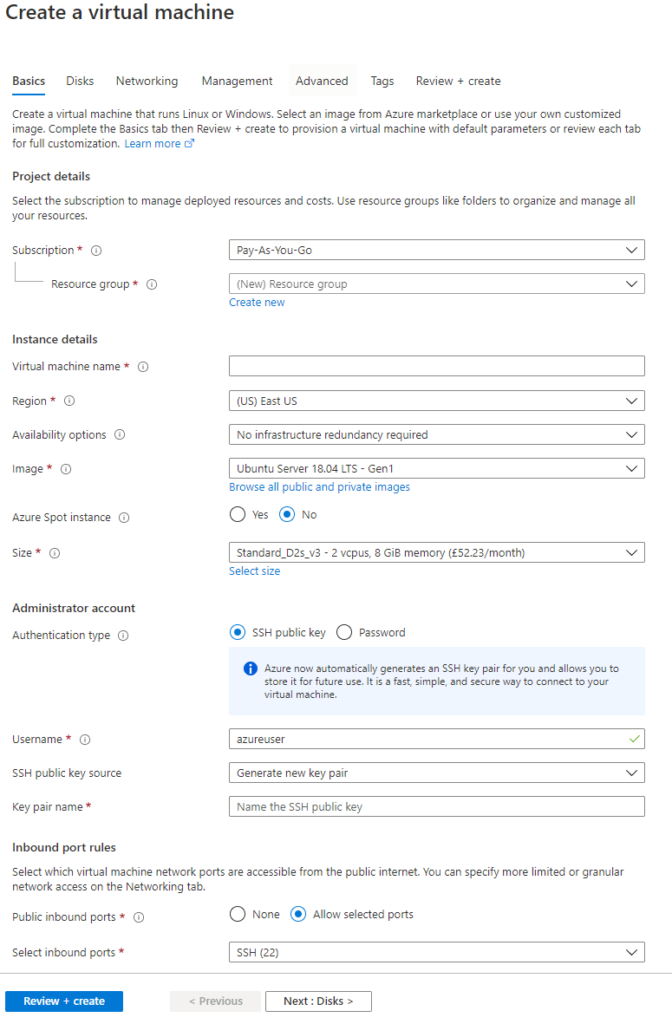
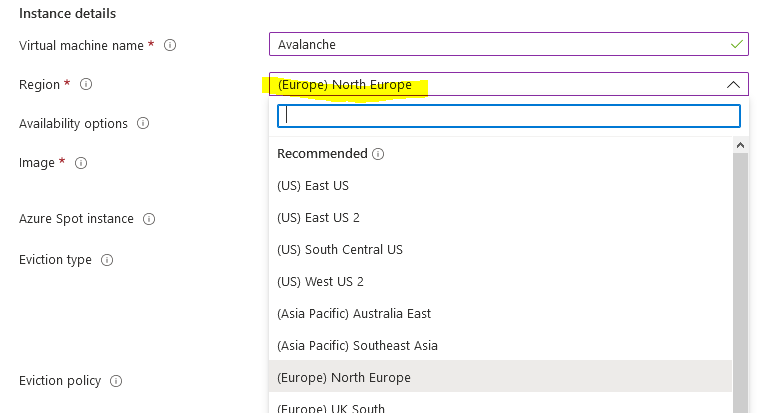
First, enter a virtual machine a name, this can be anything but in my example, I have called it Avalanche (This will also automatically change the resource group name to match)
Then select a region from the drop-down list. Select one of the recommended ones in a region that you prefer as these tend to be the larger ones with most features enabled and cheaper prices. In this example I have selected North Europe.
You have the option of using spot pricing to save significant amounts on running costs. Spot instances use a supply and demand market price structure. As demand for instances goes up, the price for the spot instance goes up. If there is insufficient capacity, then your VM will be turned off. The chances of this happening are incredibly low though, especially if you select the Capacity only option. Even in the unlikely event it does get turned off temporarily you only need to maintain at least 80% up time to receive the staking rewards and there is no slashing implemented in Avalanche.
Select Yes for Azure Spot instance, select Eviction type to Capacity Only and make sure to set the eviction policy to Stop / Deallocate. This is very important otherwise the VM will be deleted
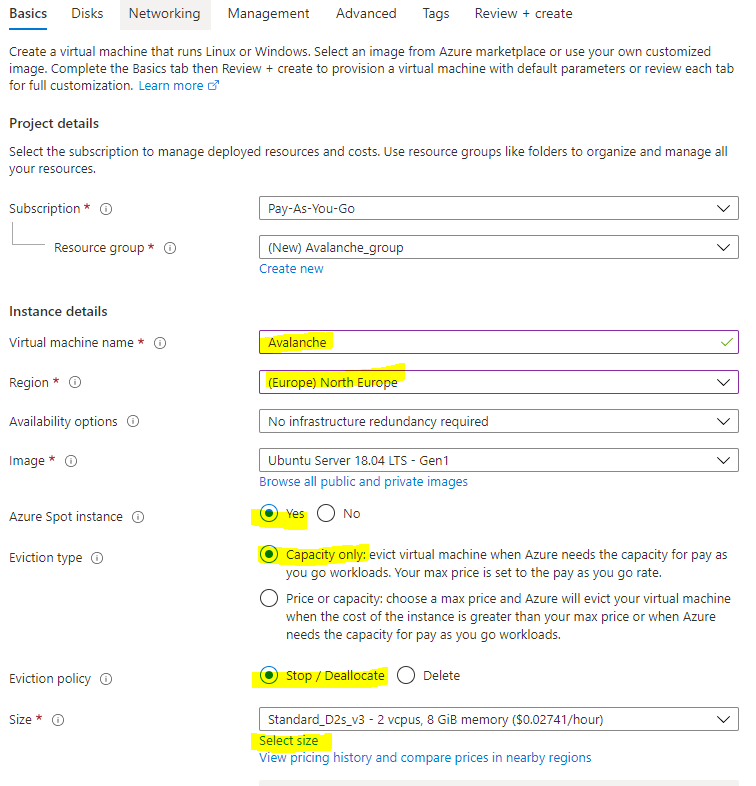
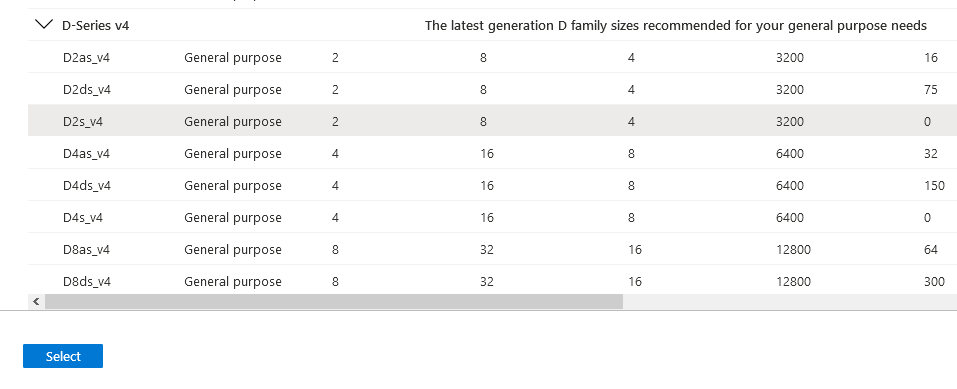
Choose “Select size” to change the Virtual Machine size, and from the menu select D2s_v4 under the D-Series v4 selection (This size has 2 Cores, 8 GB Memory and enables Premium SSDs). You can use F2s_v2 instances instead, with are 2 Cores, 4 GB Memory and enables Premium SSDs) but the spot price actually works out cheaper for the larger VM currently with spot instance prices. You can use this link to view the prices across the different regions.
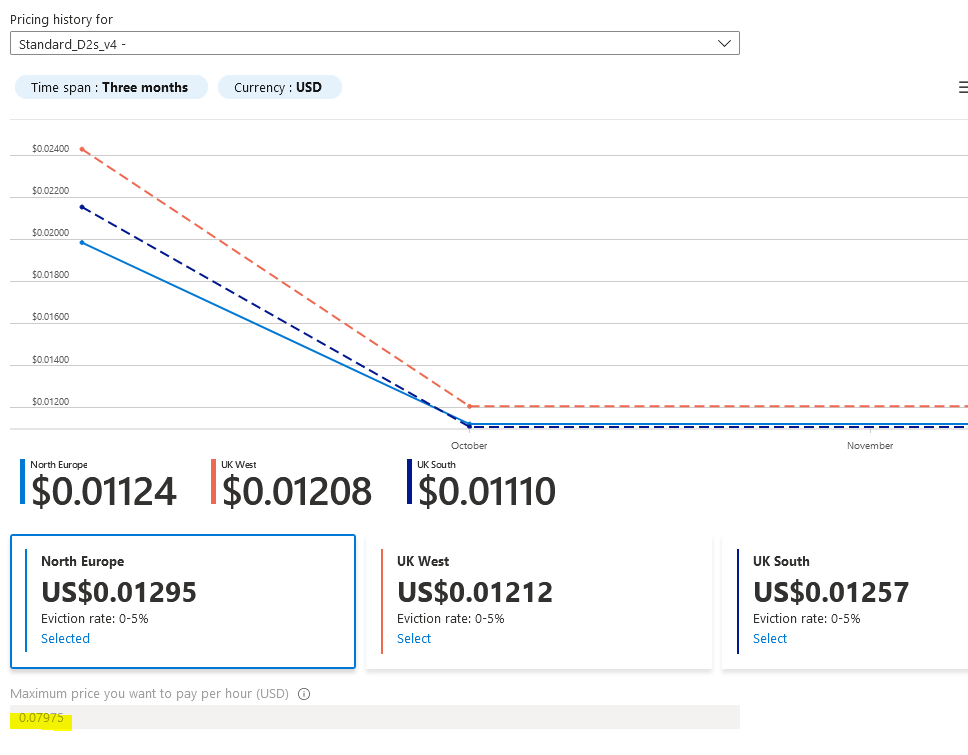
Once you have selected the size of the Virtual Machine, select “View pricing history and compare prices in nearby regions” to see how the spot price has changed over the last 3 months, and whether it’s cheaper to use a nearby region which may have more spare capacity.

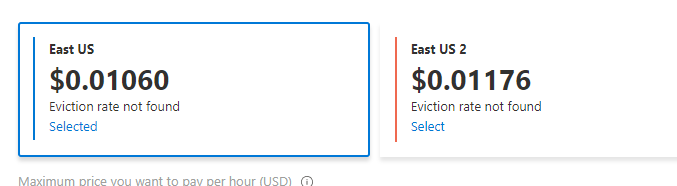
At the time of this article, spot pricing for D2s_v4 in North Europe costs $0.07975 per hour, or around $698.61 a year. With spot pricing, the price falls to $0.01295 per hour, which works out at about $113.44 a year, a saving of 83.76%!
There are some regions which are even cheaper, East US for example is $0.01060 per hour or around $92.86 a year!
Below you can see the price history of the VM over the last 3 months for North Europe and regions nearby.
Cheaper Than Amazon AWS
As a comparison a c5.large instance costs $0.085 USD per hour on AWS. This totals ~$745 USD per year. Spot instances can save 62%, bringing that total down to $462.
The next step is to change the username for the VM, to align with other Avalanche tutorials change the username to Ubuntu. Otherwise you will need to change several commands later in this article and swap out Ubuntu with your new username.
Disks
Select Next: Disks to then configure the disks for the instance. There are 2 choices for disks, either Premium SSD which offer greater performance with a 64 GB disk costs around $10 a month, or there is the standard SSD which offers lower performance and is around $5 a month. You also have to pay $0.002 per 10,000 transaction units (reads / writes and deletes) with the Standard SSD, whereas with Premium SSDs everything is included. Personally, I chose the Premium SSD for greater performance, but also because the disks are likely to be heavily used and so may even work out cheaper in the long run.
Select Next: Networking to move onto the network configuration
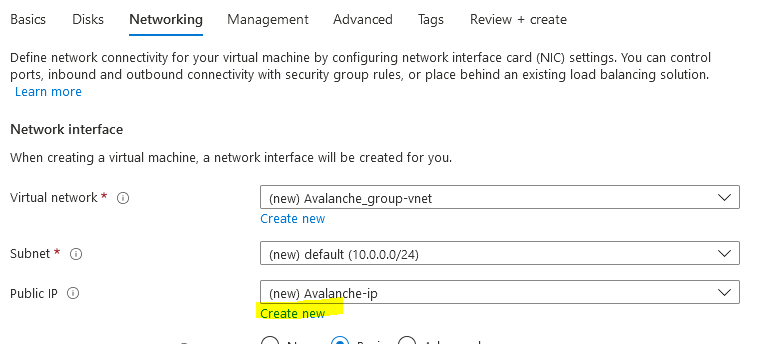
Network Config
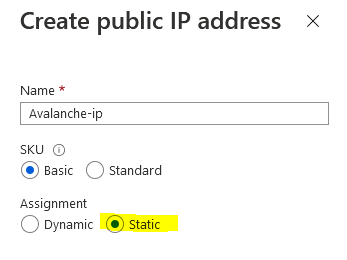
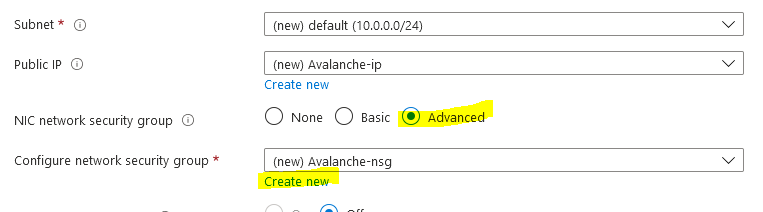
You want to use a Static IP so that the public IP assigned to the node doesn’t change in the event it stops. Under Public IP select “Create new”
Then select “Static” as the Assignment type
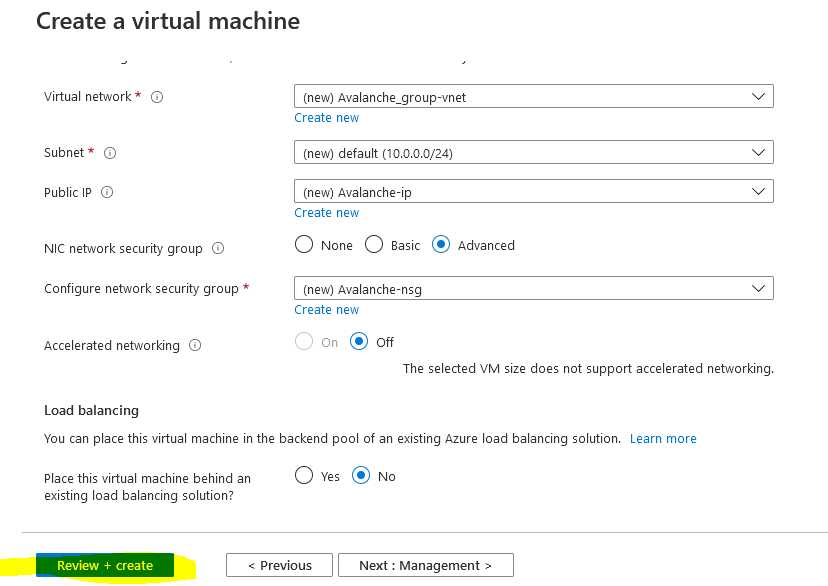
Then we need to configure the network security group to control access inbound to the Avalanche node. Select “Advanced” as the NIC network security group type and select “Create new”
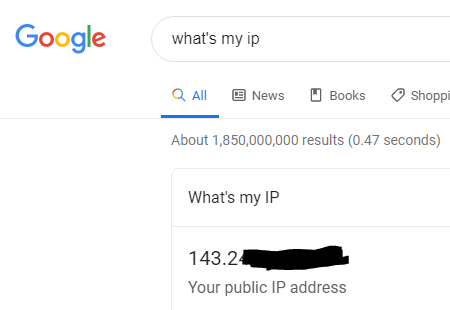
For security purposes you want to restrict who is able to remotely connect to your node. To do this you will first want to find out what your existing public IP is. This can be done by going to google and searching for “what’s my IP”
It’s likely that you have been assigned a dynamic public IP for your home, unless you have specifically requested it, and so your assigned public IP may change in the future. It’s still recommended to restrict access to your current IP though, and then in the event your home IP changes and you are no longer able to remotely connect to the VM, you can just update the network security rules with your new public IP so you are able to connect again.
NOTE: If you need to change the network security group rules after deployment if your home IP has changed, search for “avalanche-nsg” and you can modify the rule for SSH and Port 9650 with the new IP. Port 9651 needs to remain open to everyone though as that’s how it communicates with other Avalanche nodes.

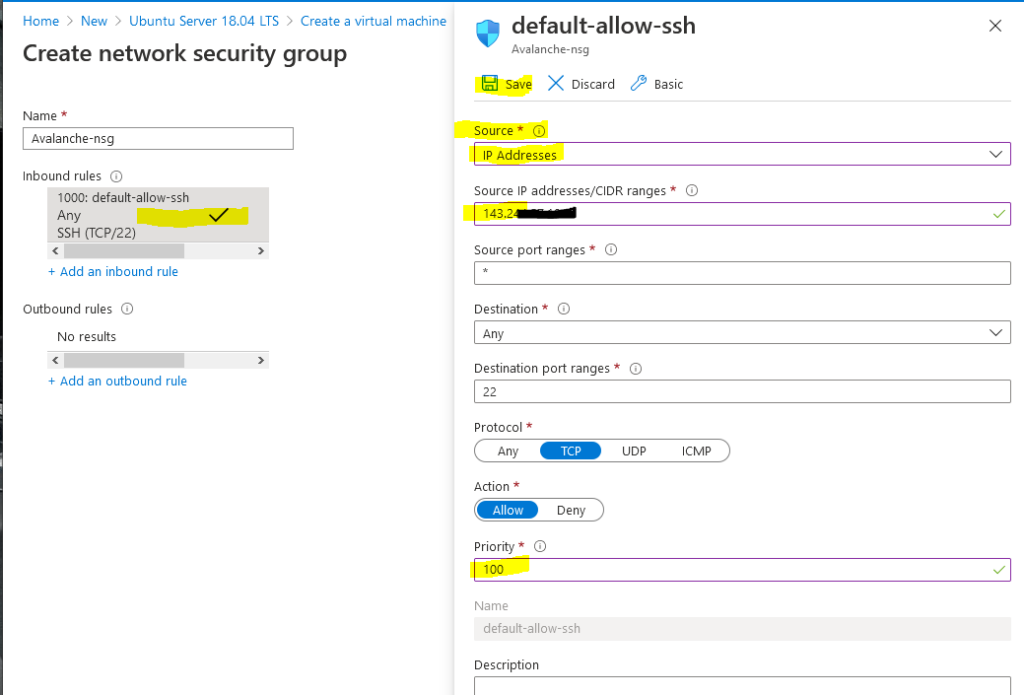
Now that you have your public IP select the default allow ssh rule on the left under inbound rules to modify it. Change Source from “Any” to “IP Addresses” and then enter in your Public IP address that you found from google in the Source IP address field. Change the Priority towards the bottom to 100 and then press Save.
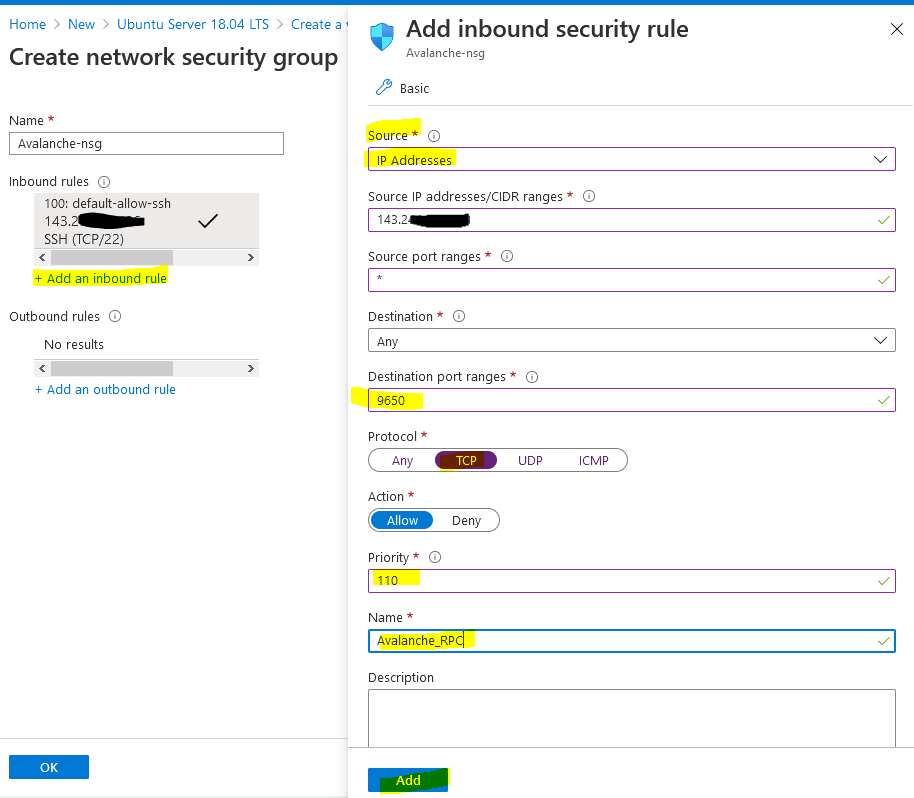
Then select “+ Add an inbound rule” to add another rule for RPC access, this should also be restricted to only your IP. Change Source to “IP Addresses” and enter in your public IP returned from google into the Source IP field. This time change the “Destination port ranges” field to 9650 and select “TCP” as the protocol. Change the priority to 110 and give it a name of “Avalanche_RPC” and press Add.
Select “+ Add an inbound rule” to add a final rule for the Avalanche Protocol so that other nodes can communicate with your node. This rule needs to be open to everyone so keep “Source” set to “Any.” Change the Destination port range to “9651” and change the protocol to “TCP.” Enter a priority of 120 and a name of Avalanche_Protocol and press Add.
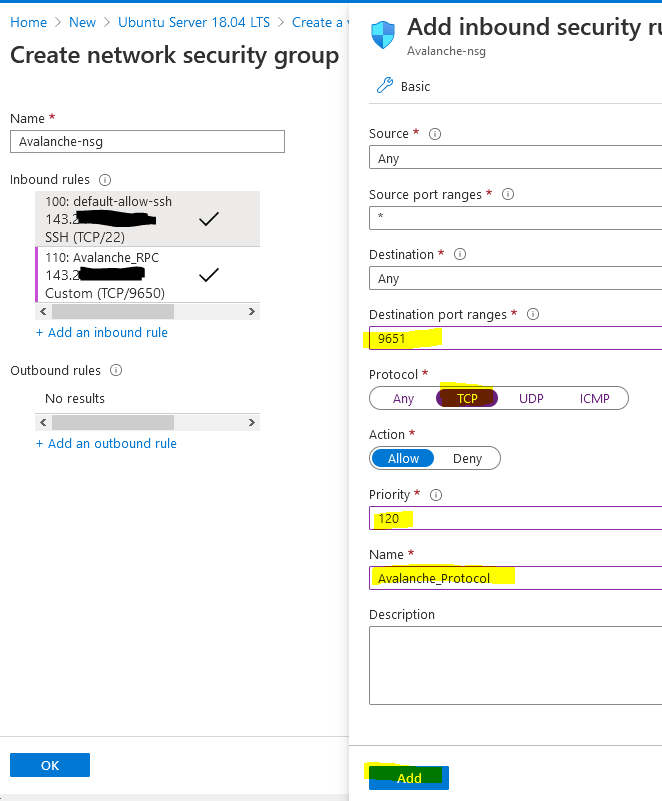
The network security group should look like the below (albeit your public IP address will be different) and press OK.

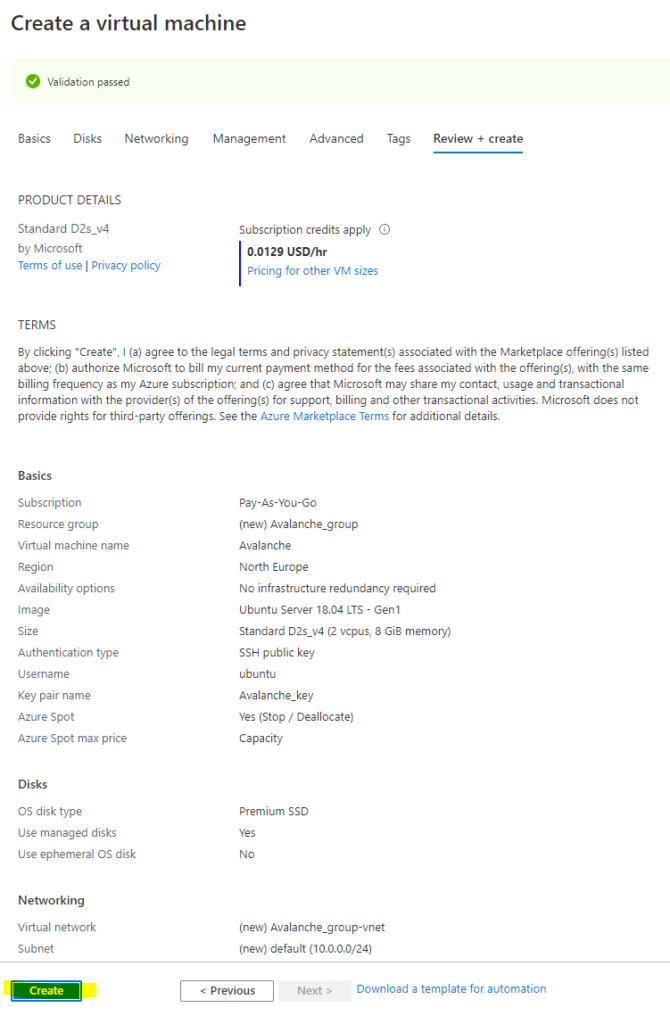
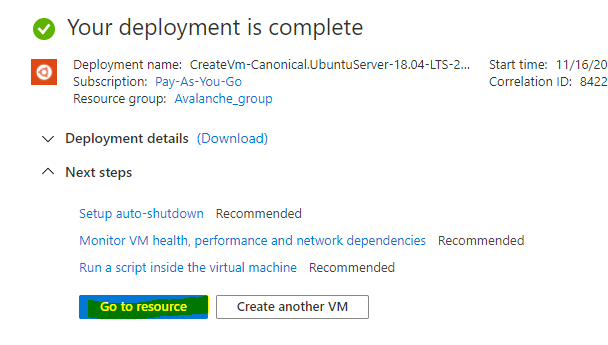
Leave the other settings as default and then press “Review + create” to create the Virtual machine.
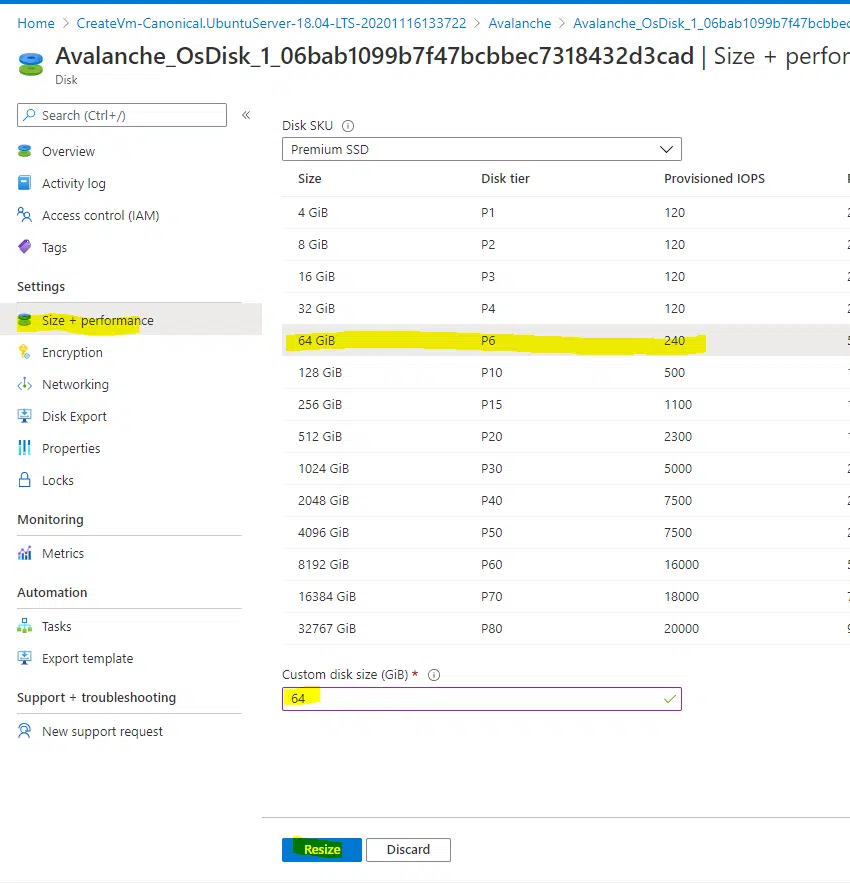
Change the Provisioned Disk Size
By default, the Ubuntu VM will be provisioned with a 30 GB Premium SSD. You should increase this to 250 GB, to allow for database growth.
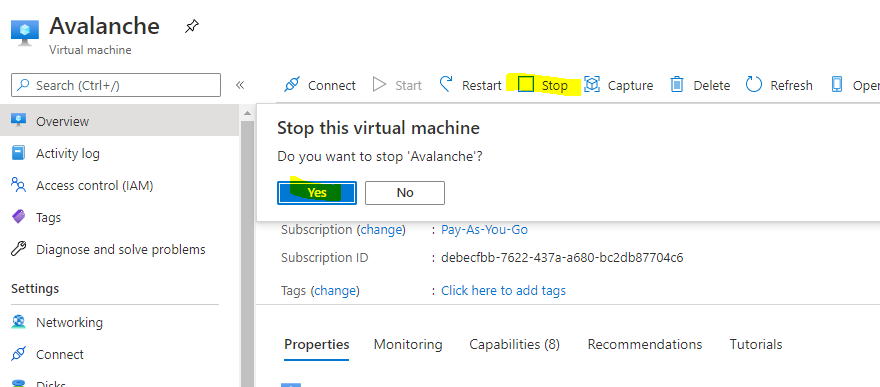
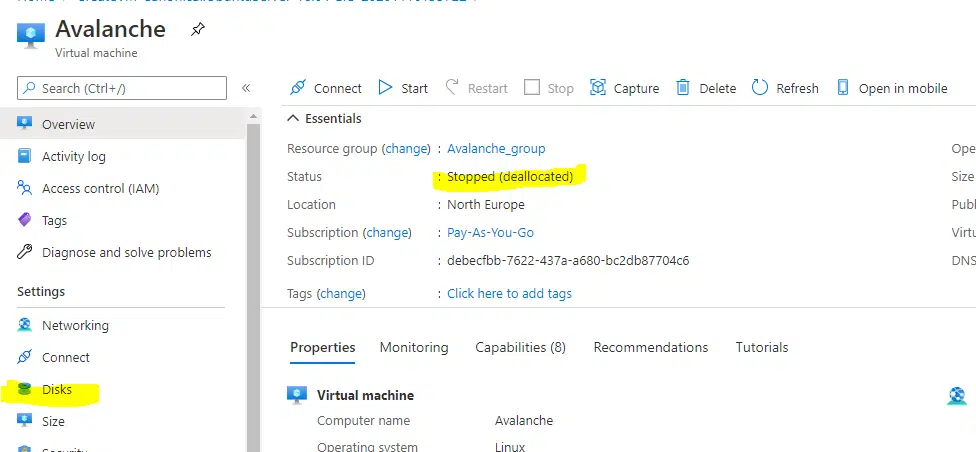
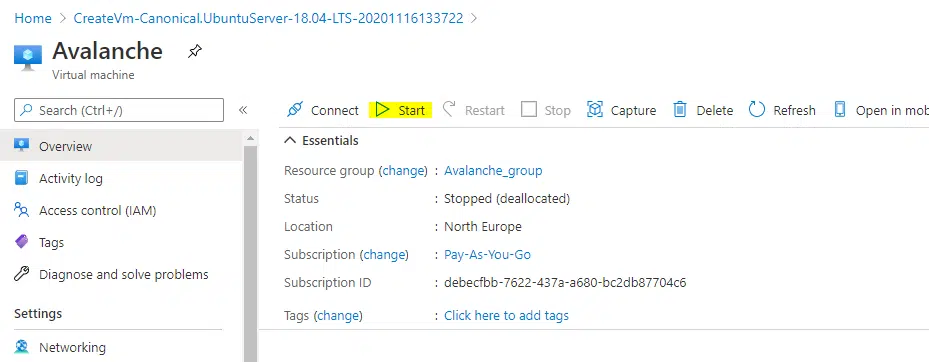
To change the Disk size, the VM needs to be stopped and deallocated. Select “Stop” and wait for the status to show deallocated. Then select “Disks” on the left.
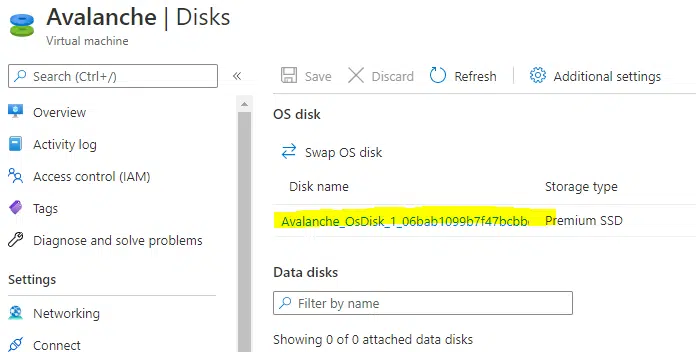
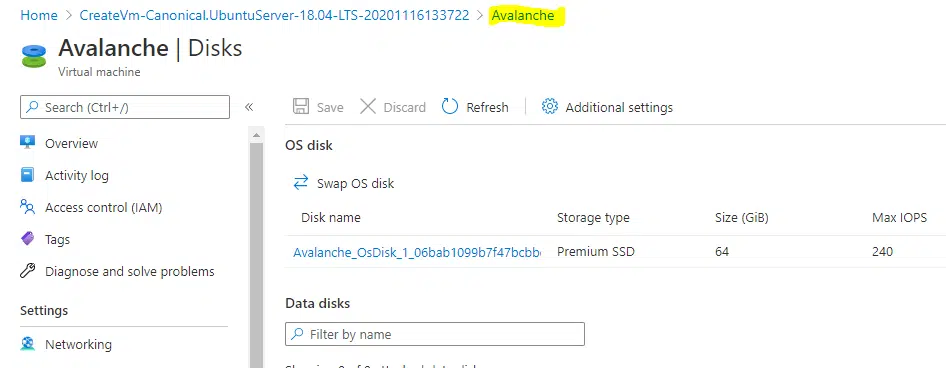
Select the Disk name that’s current provisioned to modify it
Select “Size + performance” on the left under settings and change the size to 250 GB and press “Resize”
Doing this now will also extend the partition automatically within Ubuntu. To go back to the virtual machine overview page, select Avalanche in the navigation setting.
Then start the VM
Connect to the Avalanche Node
The following instructions show how to connect to the Virtual Machine from a Windows 10 machine. For instructions on how to connect from a Ubuntu machine see the AWS tutorial.
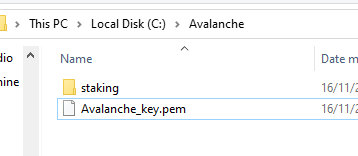
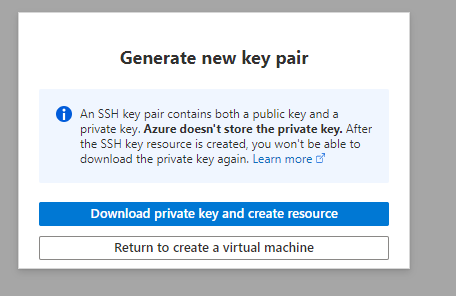
On your local PC, create a folder on the root of the C: drive called Avalanche and then move the Avalanche_key.pem file you downloaded before into the folder. Then right click the file and select Properties. Go to the security tab and select “Advanced” at the bottom
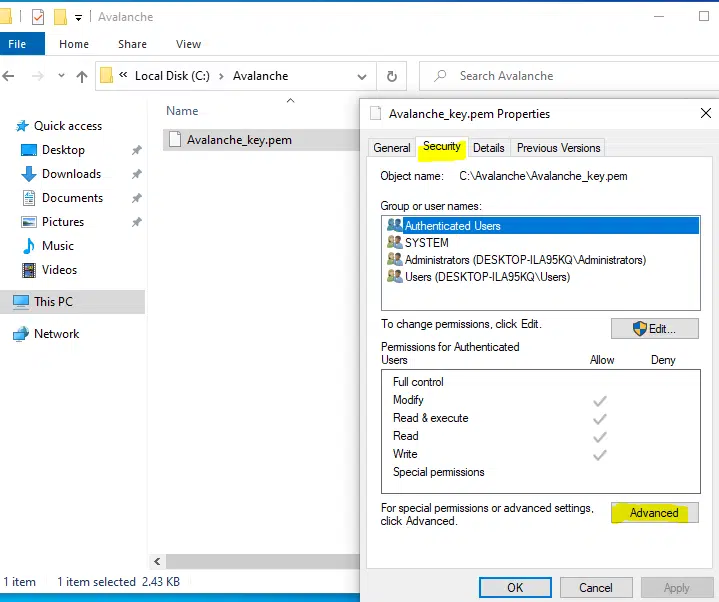
Select “Disable inheritance” and then “Remove all inherited permissions from this object” to remove all existing permissions on that file.

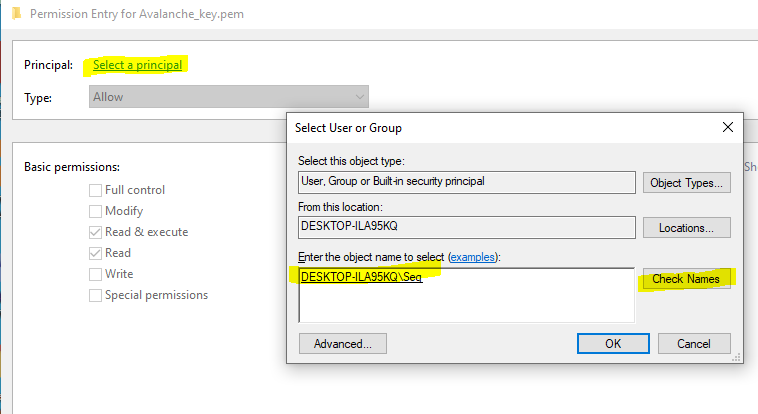
Then select “Add” to add a new permission and choose “Select a principal” at the top. From the pop-up box enter in your user account that you use to log into your machine. In this example I log on with a local user called Seq, you may have a Microsoft account that you use to log in, so use whatever account you login to your PC with and press “Check Names” and it should underline it to verify and press OK.
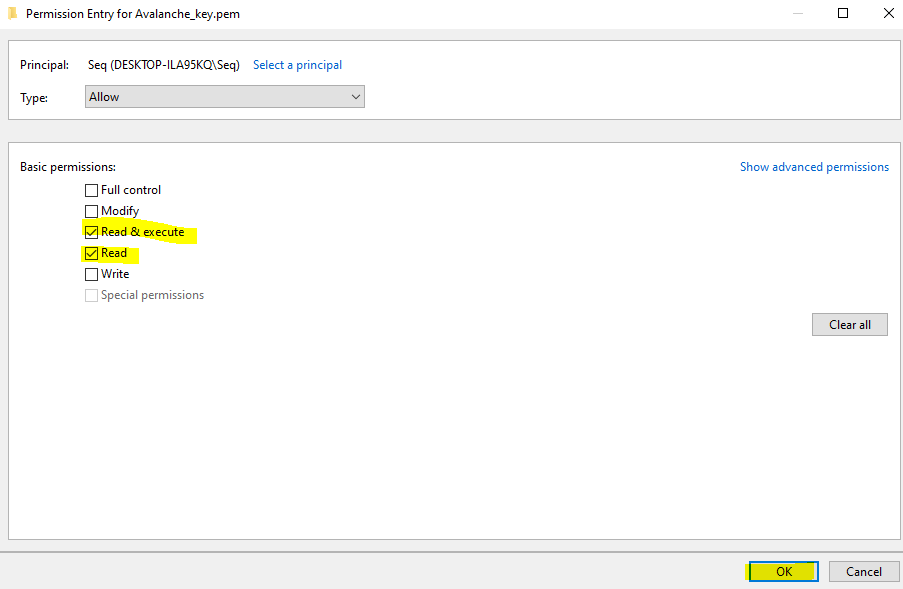
Then from the permissions section make sure only “Read & Execute” and “Read” are selected and press OK.
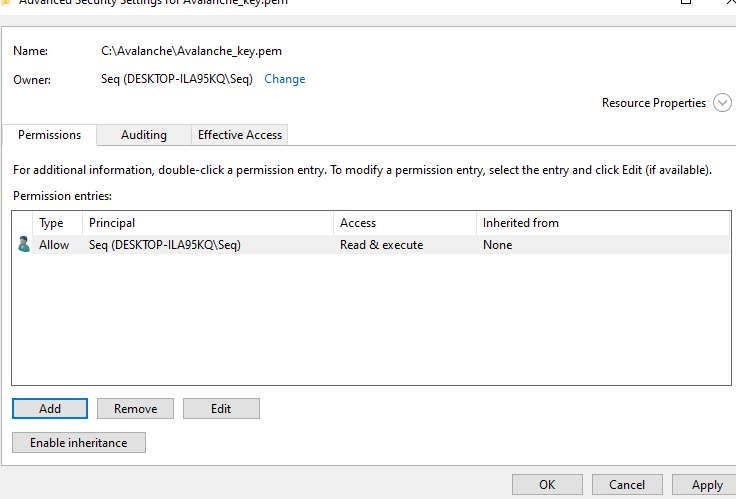
It should look something like the below, except with a different PC name / user account. This just means the key file can’t be modified or accessed by any other accounts on this machine for security purposes so they can’t access your Avalanche Node.
Find your Avalanche Node Public IP
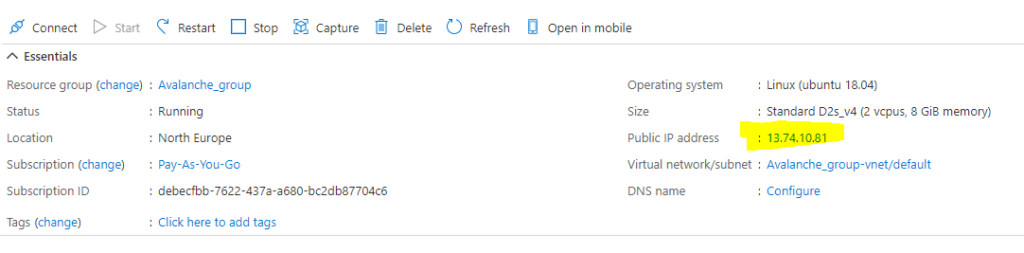
From the Azure Portal make a note of your static public IP address that has been assigned to your node.
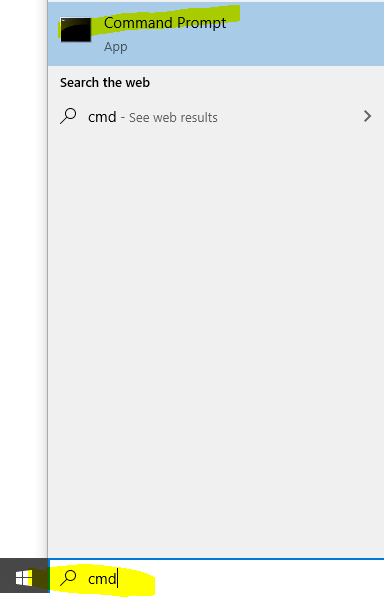
To log onto the Avalanche node, open command prompt by searching for cmd and selecting “Command Prompt” on your Windows 10 machine.
Then use the following command and replace the EnterYourAzureIPHere with the static IP address shown on the Azure portal.
ssh -i C:\Avalanche\Avalanche_key.pem ubuntu@EnterYourAzureIPHere
for my example its:
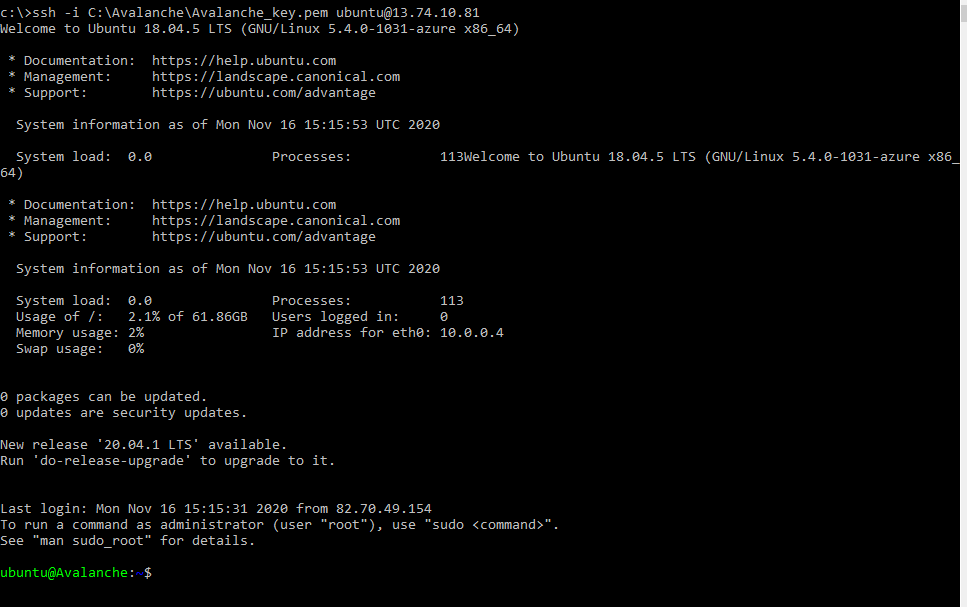
ssh -i C:\Avalanche\Avalanche_key.pem ubuntu@13.74.10.81
The first time you connect you will receive a prompt asking to continue, enter yes.

You should now be connected to your Node.
The following section is taken from Colin’s excellent tutorial for configuring an Avalanche Node on Amazon’s AWS.
Update Linux with Security Patches
Now that we are on our node, it’s a good idea to update it to the latest packages. To do this, run the following commands, one-at-a-time, in order:
sudo apt updatesudo apt upgrade -ysudo reboot
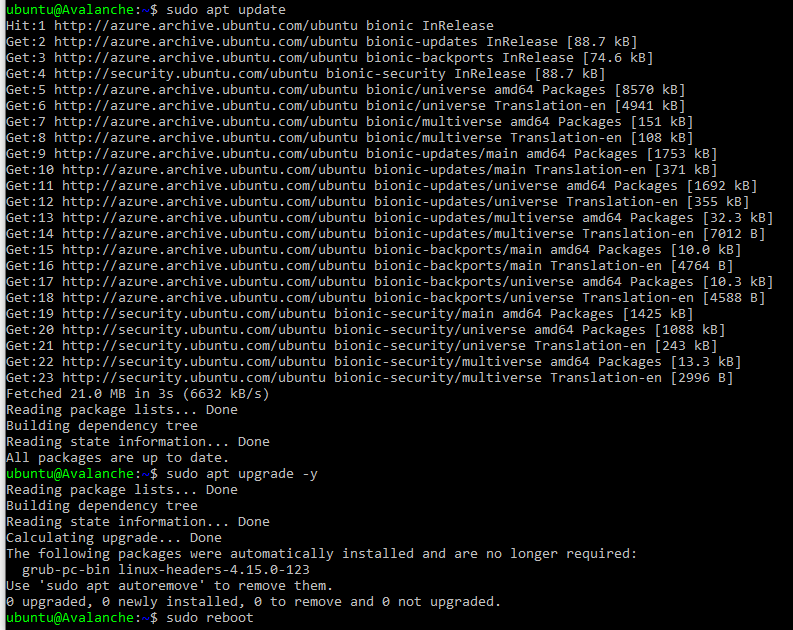
This will make our instance up to date with the latest security patches for our operating system. This will also reboot the node. We’ll give the node a minute or two to boot back up, then log in again, same as before.
Set up the Avalanche Node
Now we’ll need to set up our Avalanche node. To do this, follow the Set Up Avalanche Node With Installer tutorial which automates the installation process. You will need the “IPv4 Public IP” copied from the Azure Portal we set up earlier.
Once the installation is complete, our node should now be bootstrapping! We can run the following command to take a peek at the latest status of the AvalancheGo node:
sudo systemctl status avalanchego
To check the status of the bootstrap, we’ll need to make a request to the local RPC using curl. This request is as follows:
curl -X POST --data '{ "jsonrpc":"2.0", "id" :1, "method" :"info.isBootstrapped", "params": { "chain":"X" }}' -H 'content-type:application/json;' 127.0.0.1:9650/ext/info
The node can take some time (upward of an hour at this moment writing) to bootstrap. Bootstrapping means that the node downloads and verifies the history of the chains. Give this some time. Once the node is finished bootstrapping, the response will be:
{ "jsonrpc": "2.0", "result": { "isBootstrapped": true }, "id": 1}
We can always use sudo systemctl status avalanchego to peek at the latest status of our service as before, as well.
Get Your NodeID
We absolutely must get our NodeID if we plan to do any validating on this node. This is retrieved from the RPC as well. We call the following curl command to get our NodeID.
curl -X POST --data '{ "jsonrpc":"2.0", "id" :1, "method" :"info.getNodeID"}' -H 'content-type:application/json;' 127.0.0.1:9650/ext/info
If all is well, the response should look something like:
{"jsonrpc":"2.0","result":{"nodeID":"NodeID-Lve2PzuCvXZrqn8Stqwy9vWZux6VyGUCR"},"id":1}
That portion that says, “NodeID-Lve2PzuCvXZrqn8Stqwy9vWZux6VyGUCR” is our NodeID, the entire thing. Copy that and keep that in our notes. There’s nothing confidential or secure about this value, but it’s an absolute must for when we submit this node to be a validator.
Backup Your Staking Keys
The last thing that should be done is backing up our staking keys in the untimely event that our instance is corrupted or terminated. It’s just good practice for us to keep these keys. To back them up, we use the following command:
scp -i C:\Avalanche\avalanche_key.pem -r ubuntu@EnterYourAzureIPHere:/home/ubuntu/.avalanchego/staking C:\Avalanche
As before, we’ll need to replace “EnterYourAzureIPHere” with the appropriate value that we retrieved. This backs up our staking key and staking certificate into the C:\Avalanche folder we created before.