
Beginner
How To Use The Algorand Wallet
The Algorand wallet is a secure and straightforward application that allows users to store and manage $ALGO or other Algorand Standard Assets (ASAs). Users can download the Android, iOS, or APK version and interact with the Algorand blockchain.
Therefore, to open an Algorand wallet, users need to create an account in their wallet application, setting multiple accounts inside the application with unique addresses and seed phrases.
Therefore, the Algorand protocol offers rewards to account holders who hold a minimum of 1 $ALGO in their account. Users do not need to sign up for any service to become eligible for the rewards. It will be automatically earned by holding ALGO’s in the Algorand Wallet or Ledger accounts.
Likewise, read until the end of this article if you want to know how you can install and use the Algorand wallet mobile application.
Step 1: Installation guide (Mobile version)
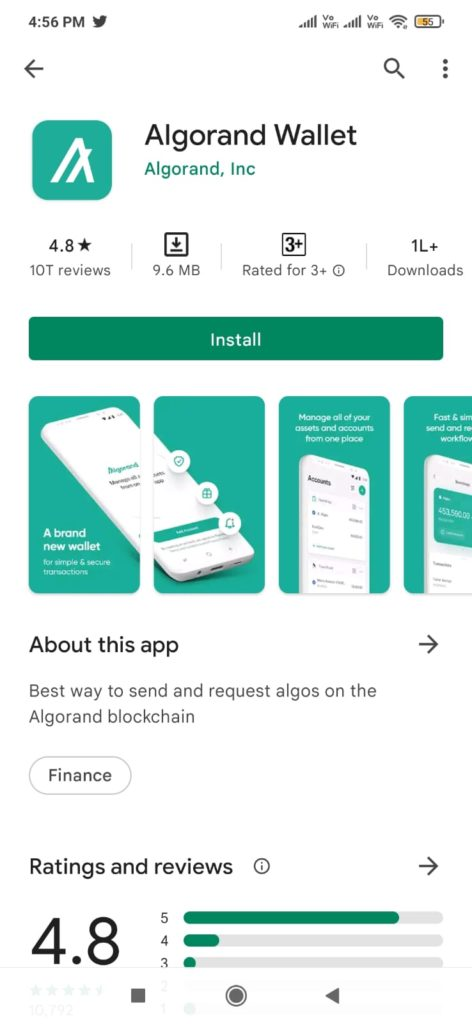
Users can install the Algorand mobile wallet application from the Google Play Store (Android Version).
Moreover, once you’ve downloaded it, the application launch page looks like this. It will give you two options for Adding an account:
-
Create A New Account
-
Import Account
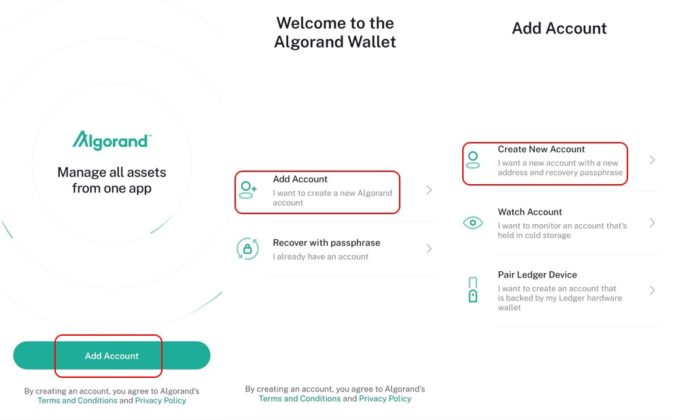
As the name implies, the “Create Account” option allows users to create a new Algorand account, and the “import wallet” option allows the users to import an existing account on some other device.
Step 2: Create A New Account
If you are a new user, click on this option.
The wallet application will show you the backup phrase. Store it safely. Next, it will ask you to verify your backup phrase, and once it is done, a new blank Algorand account will be created for you.
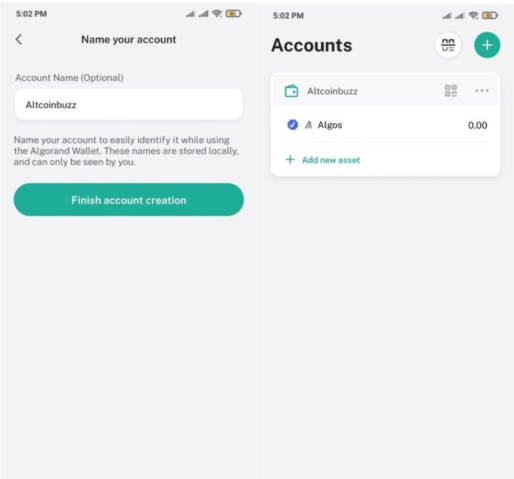
Then, you can provide an account nickname (see below screenshot), and thus, your account setup is done. You can now use your account to send/receive funds.

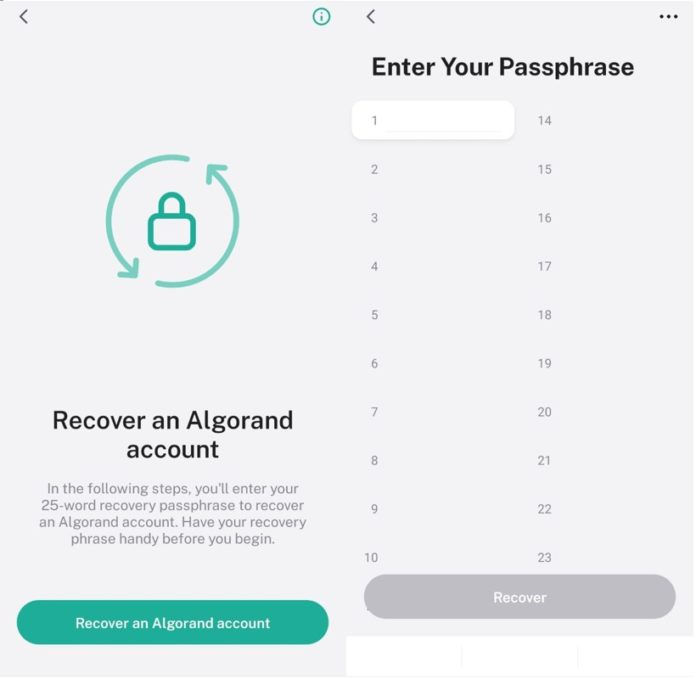
Step 3: Import/ Recover wallet
Users can choose this option if they already have a wallet and want to import it into a new device.
To import a wallet, click on “Recover an Algorand account.” The application will ask you to provide the 25-word backup phrase. Therefore, you have to enter your backup phrase correctly, and your account will be imported.
Also, you can now see your existing accounts and their associated tokens balances in the new device.
Finally, you can import and keep multiple accounts in the same wallet application to manage/watch the portfolio.
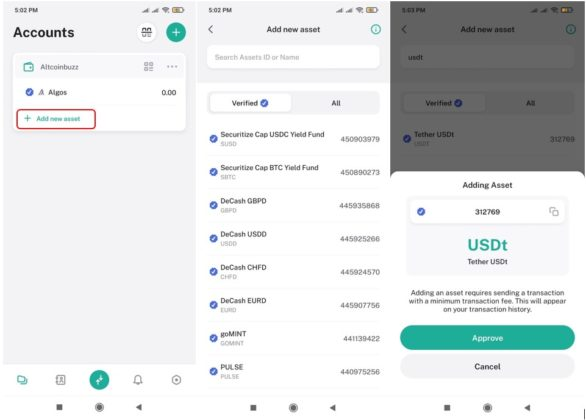
Step 4: Add Token
You can only add an $ALGO token to your wallet by default. To add any Algorand Standard Assets (ASAs), you must click on the “Add new asset” option. A window will open where you can search and select your desired token.
As a result, users need to provide approval for adding a token, and it will charge a transaction fee. See it in the picture below:
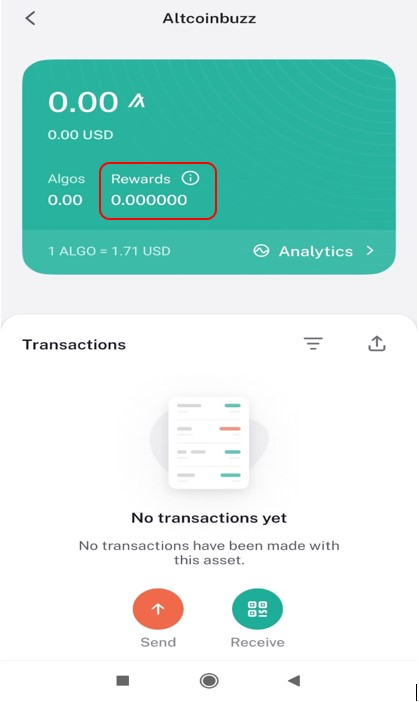
Step 5: Rewards
As we have mentioned earlier, users will receive an $ALGO token as a reward by simply holding it in their wallets. Therefore, rewards will be visible under the ALGO token balance in a separate section.
To check the reward, click on the ALGO token. You can see your earned rewards in the screenshot below.
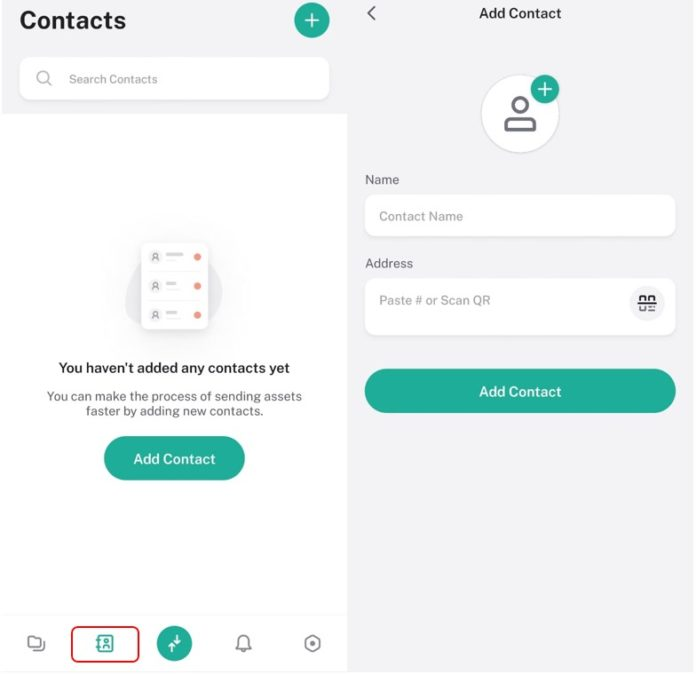
Step 6: Add Contact
The “Add Contact” option allows users to add their frequent contacts in the AddressBook for easy access.
To add a contact, you have to click on the below-highlighted icon. It will open up a window to enter the recipient’s name and their wallet addresses. Just like in the screenshot below:
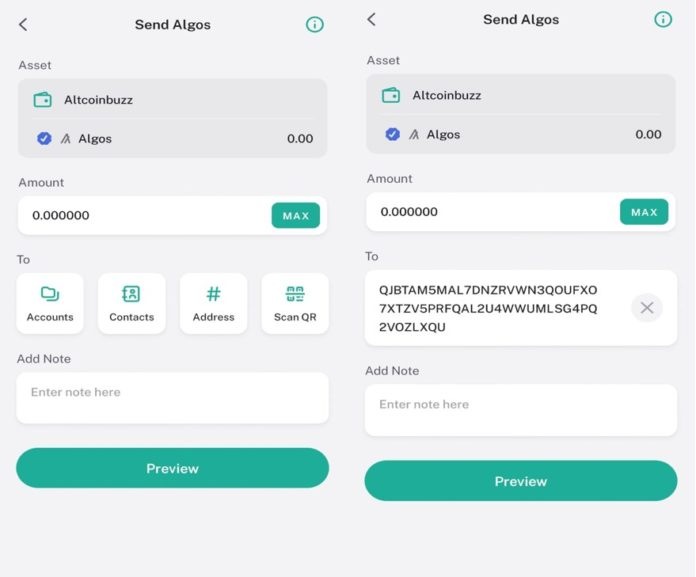
Step 7: Send
The Algorand wallet offers you multiple options:
-
Account: send funds to your other accounts
-
Contacts: transfer funds to your saved contacts
-
Address: transfer to an address
-
QR code: scan a QR and send funds
Therefore, users can select any of the above options to enter the recipient address. Next, the wallet will ask you to fill in the amount of token that you wish to transfer and a note (if any). Finally, preview your details and confirm the transactions
.

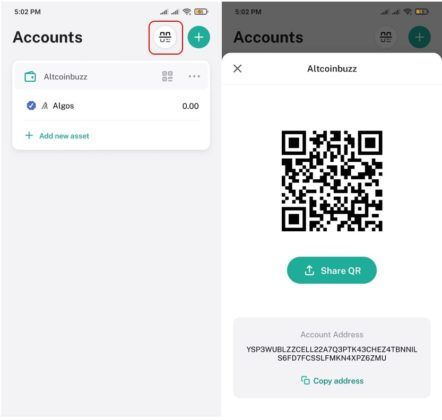
Step 8: Receive
To receive funds in your Algorand wallet, users are required to share the public address with other users.
To get the public address, click on the below-highlighted icon, and you will get your receiving address and the QR code that you can copy and share with others.
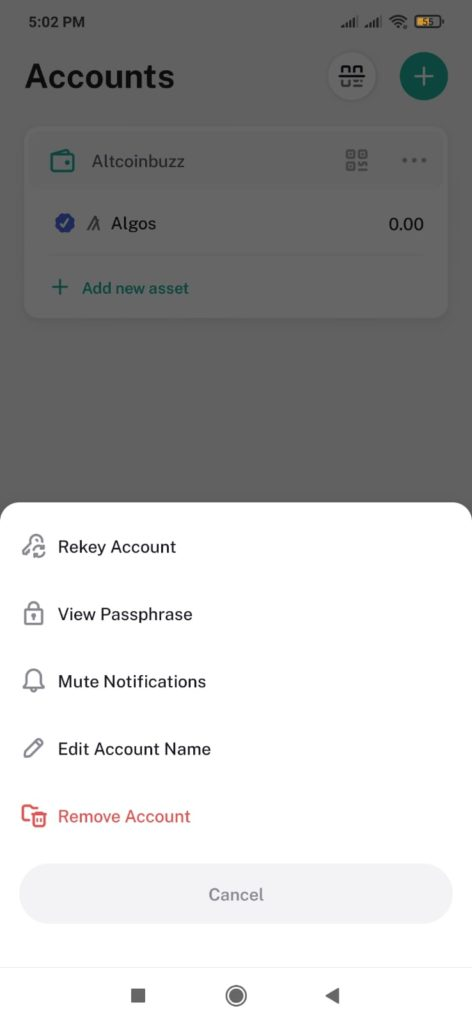
Step 9: Account Settings
The account setting option allows you to do the following things:
-
Rekey Account: A unique feature that will deactivate the associated passphrase, and you will require to sign your transactions by using the connected ledger device. Note that your public key, account balance, and other setups will not change
-
View Passphrase: Check your backup phrase
-
Mute Notifications
-
Edit Account Name
-
Remove Account
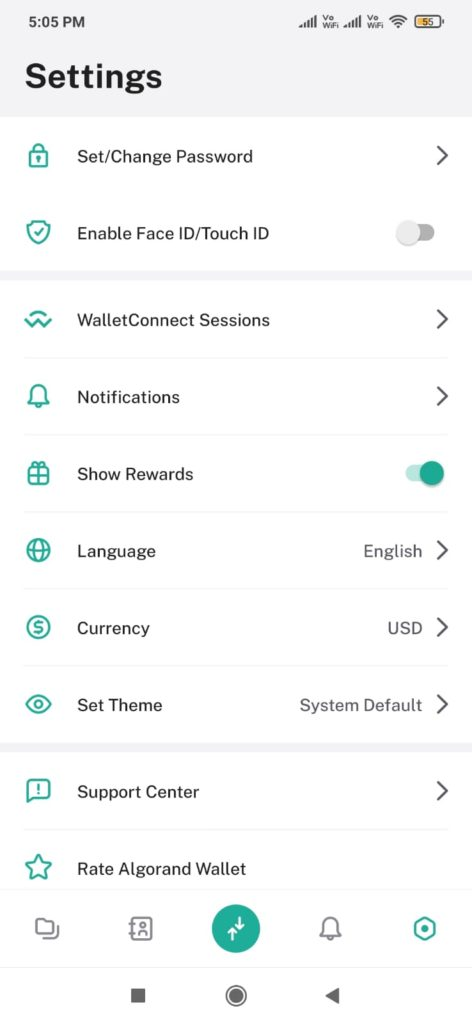
Step 10: Setting
Using the Algorand Setting tab, users can do the following wallet setup-related changes:
-
Set/Change Password- Change your wallet’s password.
-
Enable Face ID/Touch ID- Enable fingerprint authentication for enhanced security.
-
Notifications- Enable/disable notification settings.
-
Show Rewards- Enable/disable earned rewards.
-
Set Theme- Set themes for your wallet application like dark, light, or system default.
-
Developer Settings allows developers to set the node to mainnet or testnet.
-
WalletConnect- Algorand wallet supports the WalletConnect feature using which users to connect with the desktop dApps just by scanning the QR code.
-
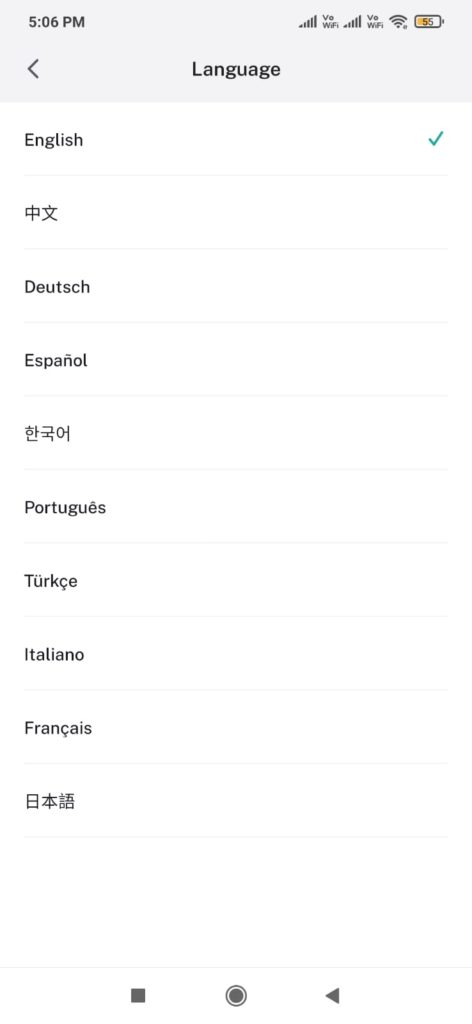
Language- Also, the wallet application supports multiple languages. Users can select any to see the wallet data in their preferred language.
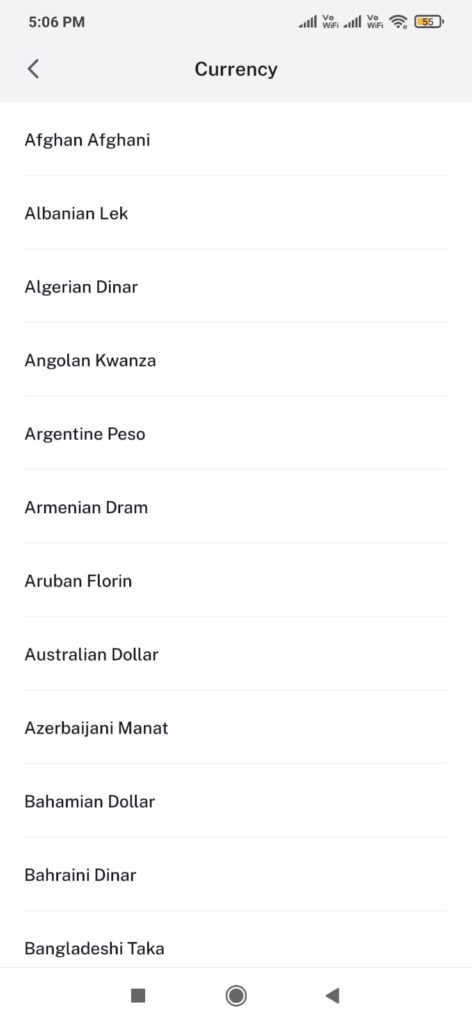
-
Currency- The Algorand wallet supports multiple local currencies. Set your currency to see your account balances in desired currency denomination.
By this, you complete this workshop successfully!!