

Intermediate
Validators – server setup requirements with cloud guides using Digital ocean and Vultr
This tutorial provides instructions for setting up a Validator and Explorer Node on Cloud providers such as Digital Ocean and Vultr, as well as on a Raspberry Pi device. The tutorial includes step-by-step instructions for launching instances on Digital Ocean and Vultr, as well as for connecting to the instances via SSH and updating the system. Additionally, the tutorial includes recommendations for the setup of the Validator and Explorer Node, such as the recommended OS and network requirements.
Validator Node: Recommendation
For Cloud
CPU: for shard 0 nodes, 8 dedicated cores are recommended such as c5d.2xlarge instance type on AWS. If you use a VPS with shared CPU, at least 8 cores with 50%+ CPU credit. For shard 1,2,3 the requirement can be halved
RAM Memory: 8GB is minimal
Storage: 3072GB for Shard 0 (as of 14/04/2022). Extra 25GB for Shard 1, 2 and 3 (because when you setup a node on Shard 1, 2 or 3, you also need to download the shard 0 database. Fast local disk is recommend, network storage may hit I/O bottleneck. SSD is the minimal requirement. NVMe drive is better.
OS: Latest Ubuntu Linux (LTS Version)
Network: 100M+ bandwidth, 5~6 TB data usage per month (preferably more if possible)
Here is a list of some cheap and reliable Cloud Providers (August, 2020):
Check Cloud Guides for instructions.
For Raspberry Pi
CPU: Raspberry Pi 4 with a good Fan and Heat sinker elements
RAM Memory: 8GB
Storage: Fast external SSD with minimum 1TB for a validator node.
OS: Latest Ubuntu Linux (LTS Version)
Network: A Modem where you have access to settings like set IP address, Port forwarding and priority settings, 100Mbit/s bandwidth, low latency and flat rate usage. Minimum category 6 Cables
Check Raspberry Pi Guide for instructions.
Explorer Node: Recommendation
Setup: AWS i3en.12xlarge or equivalent, with local disk storage
Storage: ~24TB (4x NVMe SSD) is recommended for Archival Explorer Nodes on Shard 0
OS: Latest Ubuntu Linux (LTS Version)
Network: 100M+ bandwidth
Digital Ocean
To launch your Digital Ocean instance, follow the steps below.
For new users, you can get $100 dollars free credits to run Digital Ocean services for 2 months using the link bellow
Step 1: Launching your Digital Ocean Node
Logging into Digital Ocean
Click here to register a new Digital Ocean account or login if you have an existing one.
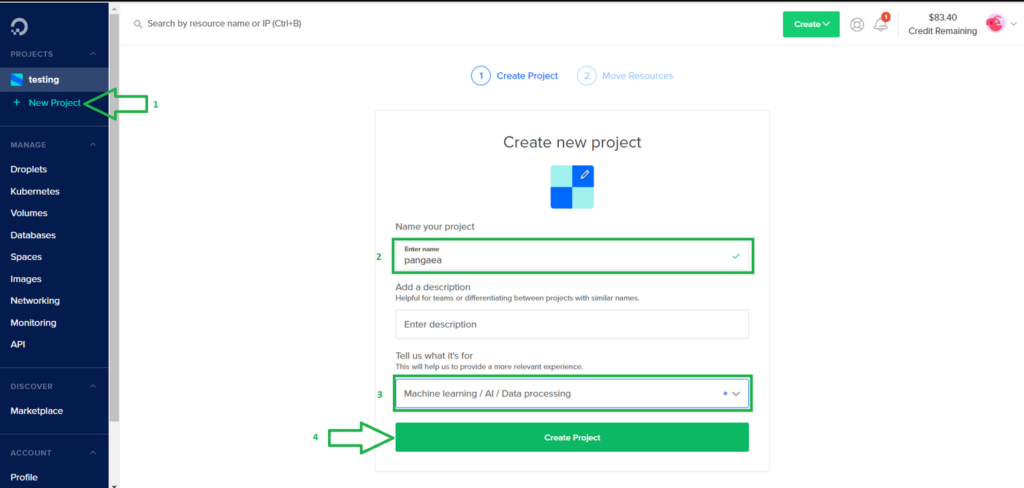
Create a new Project
Once you have set up and logged into your Digital Ocean account, click on the top left bar “Projects -> New Project”. Enter the desired project name and click on “Create Project” as shown by the image below:
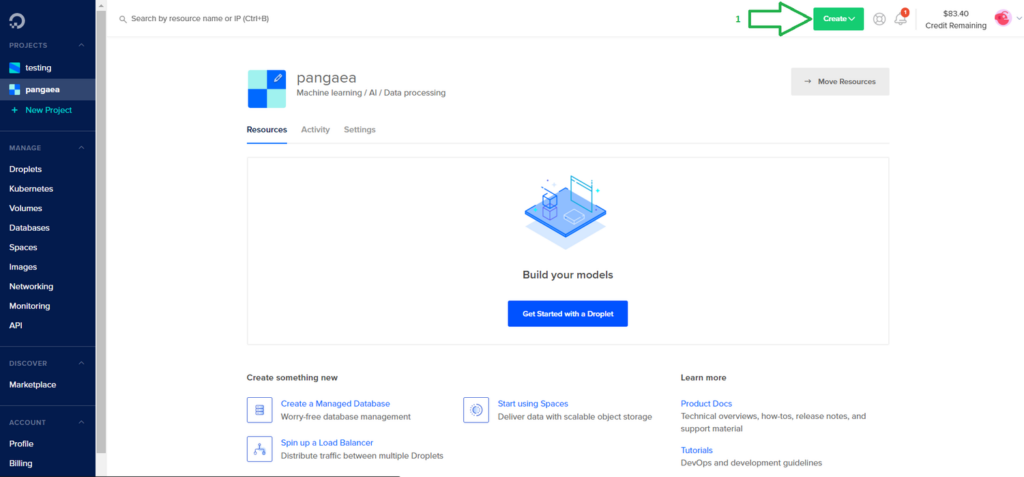
Create a new Droplet
On the top right corner click on “Create”->”Droplets”.
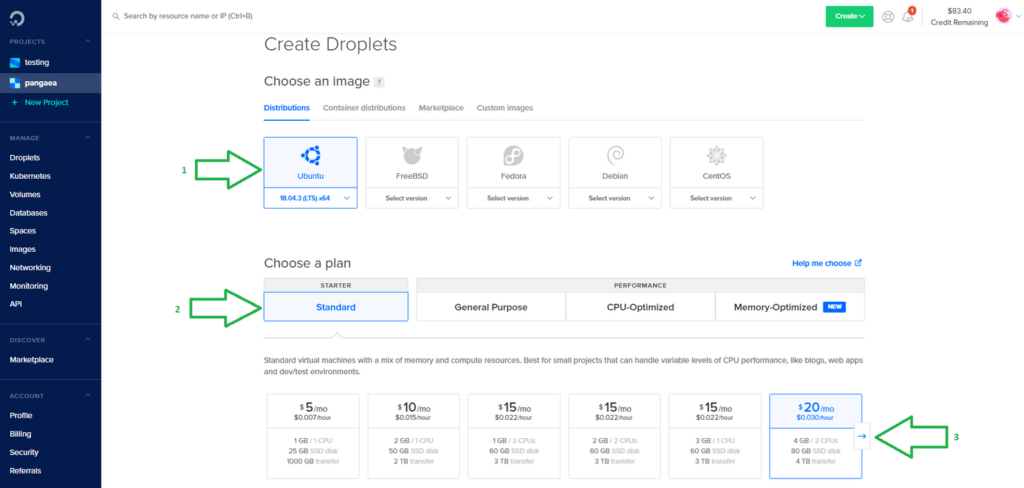
Choose now your desired Linux image. We recommend the latest LTS version of Ubuntu (18.04 as of date of now). Use the left and right arrows to navigate between the different plans available. Choose the “Standard” plan and then select a virtual machine with at least 4 CPUs, 4GB of RAM and 80GB SSD accordingly to the minimum requirements.
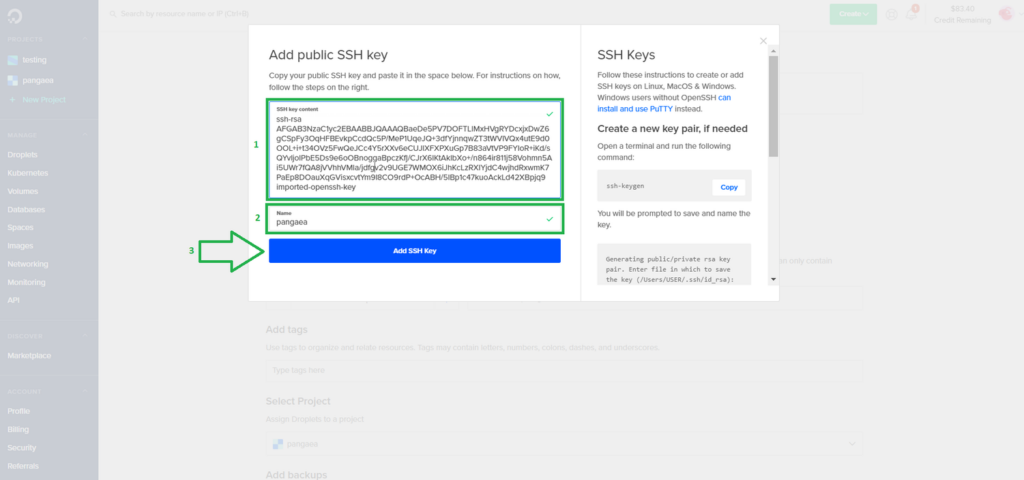
You can select the datacenter region of your choice here. We chose “Frankurt” in our example. We recommend using the “SSH Keys” as your authentication method (more secure) instead of the “One-time password” method. A button with the name “New SSH key” will appear on screen, just click on it.

To create your SSH key click here for instructions.
When you generated your public SSH key, give it a name and click on button “Add SSH key” as shown by the image below. In case you don’t have a public SSH key yet, just follow the instructions to create it.
Choose a custom hostname if you want and then click on “Create Droplet”.
Firewall Setup
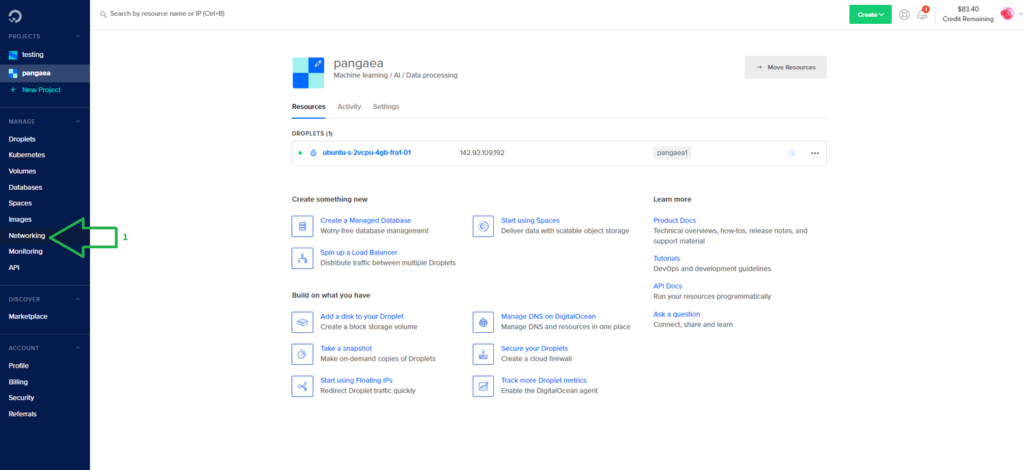
Wait a few seconds till your droplet is created and then click on “Networking” on the left bar.
Click on “Firewall” and then on “Create Firewall”.

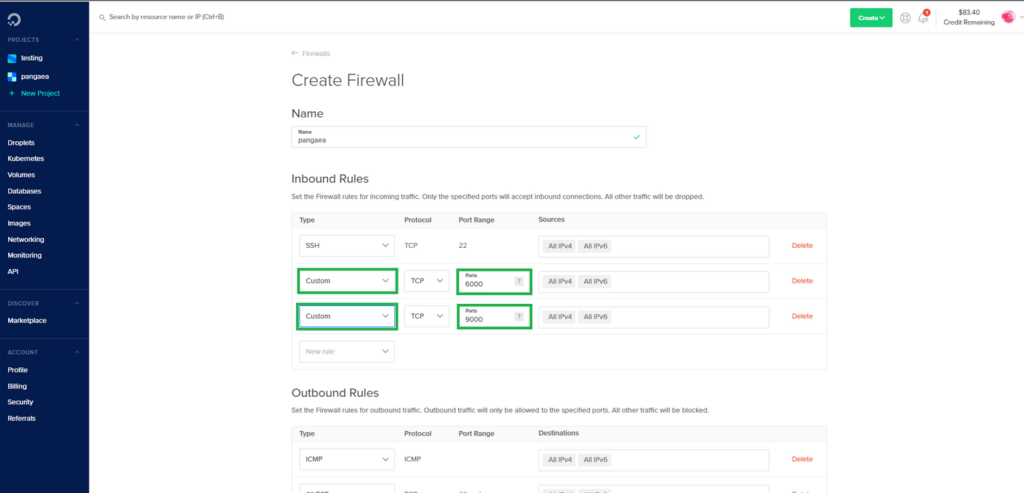
In the Inbound Rules section, click on “New rule” and select “Custom”. Leave the protocol as TCP and fill the port range field with 6000. Repeat the same procedure for port 9000. You will be left with 2 inbound rules as shown by the image below.
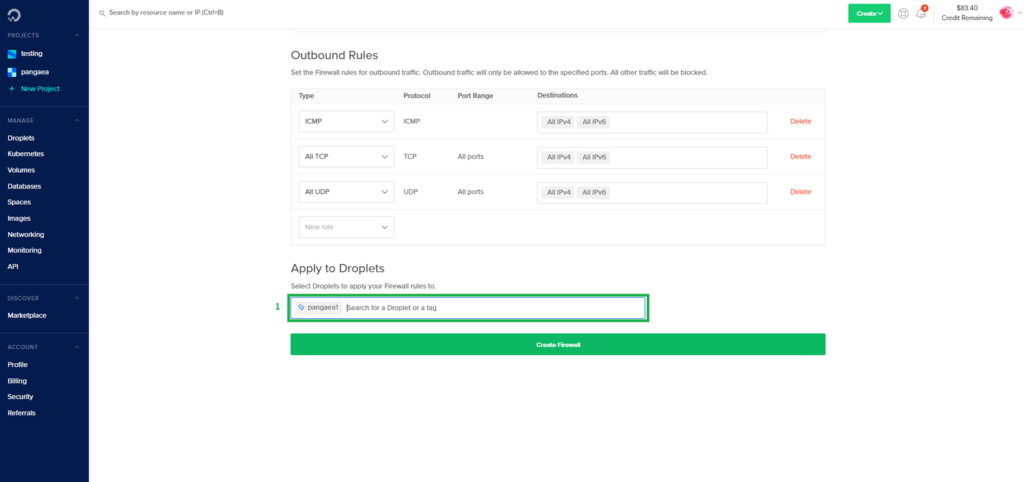
In the Outbound Rules section leave it as it is. Type the name of the droplet you want to apply your firewall rules (the droplet name is the same as your hostname you chose previously).Click now on “Create Firewall”.

Step 2: Connecting via SSH to your Instance
To connect via SSH to your Digital Ocean instance, please follow the instructions here.
Step 3: Update / upgrade your VPS
Before anything, it is recommended to update your system:
sudo apt update && apt upgrade
You will be asked to confirm if you would like to download and install these packages. Just press Y to confirm.
Vultr
To launch your Vultr instance, follow the steps below.
Step 1: Launching Your Vultr Instance
Logging into Vultr
First, go to the Vultr Main Page. If you don’t already have an Vultr account, register one by clicking on “Sign up”. Otherwise, log into your Vultr Account by clicking on “Sign in”.
Create a new instance
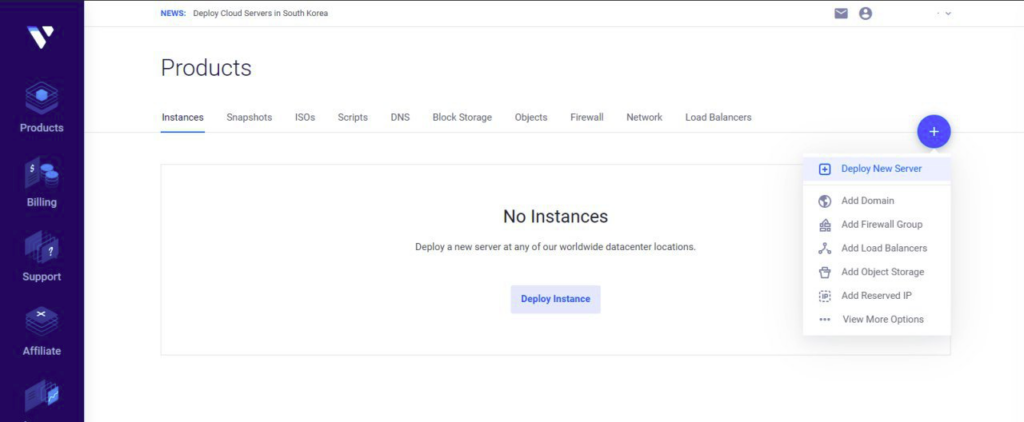
Once logged in, you’ll want to add a new instance. Depending on whether your account is new or not, you may or may not have a Products page.
-
If you already have an instance, click the “+” button to deploy a new server. You can also use this link to go to the deploy page.
-
Otherwise, your Products page will be already link you to the Deploy page.

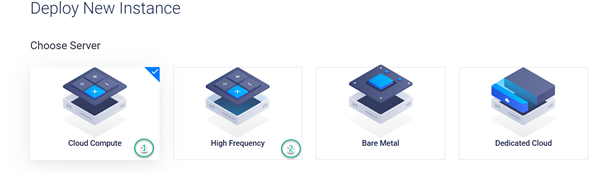
Choose Instance Type
For Harmony, two instance types would fit: Cloud Compute and High Frequency.
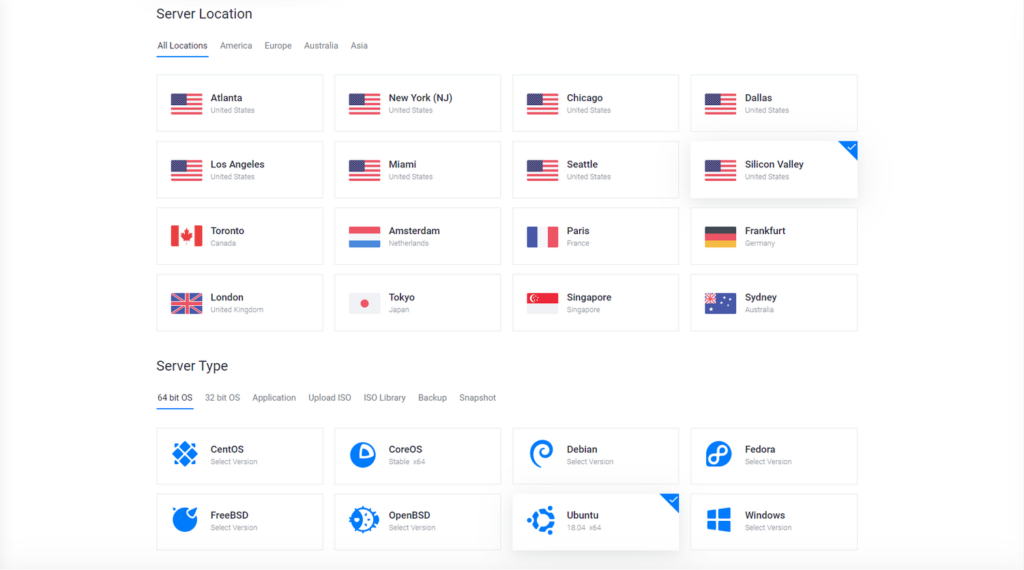
Select Server Location and Server Type
Choose now your desired server type. We recommend the latest LTS version of Ubuntu (18.04 as of date of now).
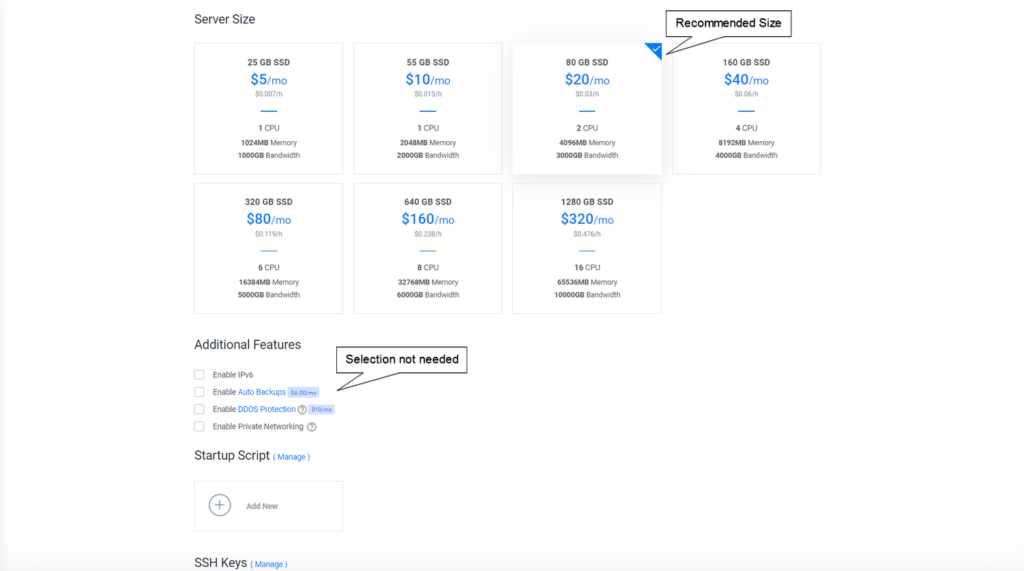
Choose Server Size
Harmony recommends one of the two following accordingly to the minimum requirements:
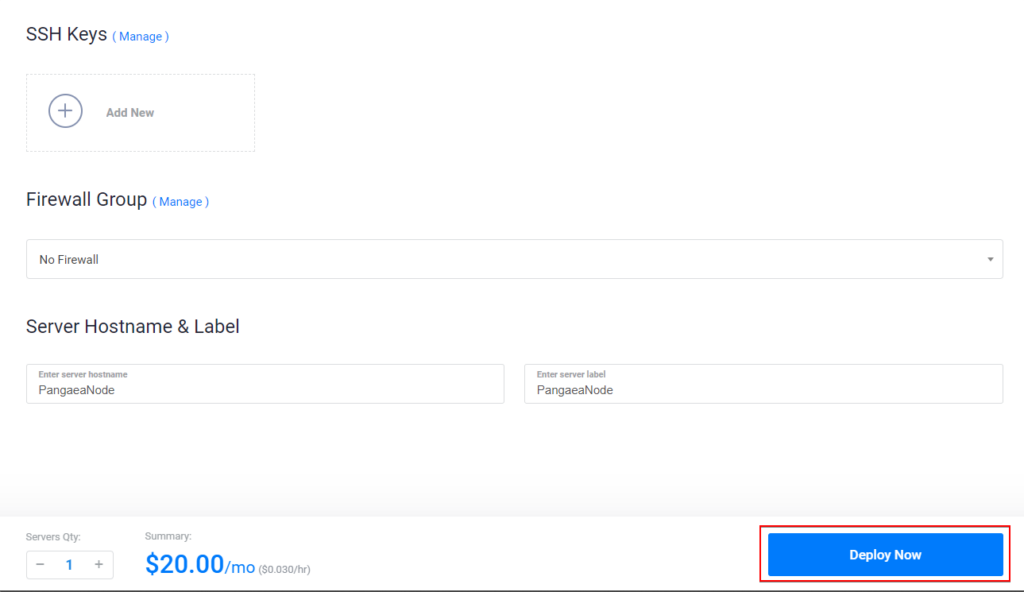
Setting Server Name
You can now set the name of your server, e.g. PangaeaNode Then you should click “Deploy Now”.
At this point you should be back on the Products page and your server should be installing. However, the setup isn’t completely done, as you need to still create a firewall.
Firewall Setup
As we want to allow other nodes to connect to yours, we have to open the correct ports.
Once you are on the Firewall page, click Add Firewall Group.
Enter a name for the firewall group, e.g. FoundationNode.
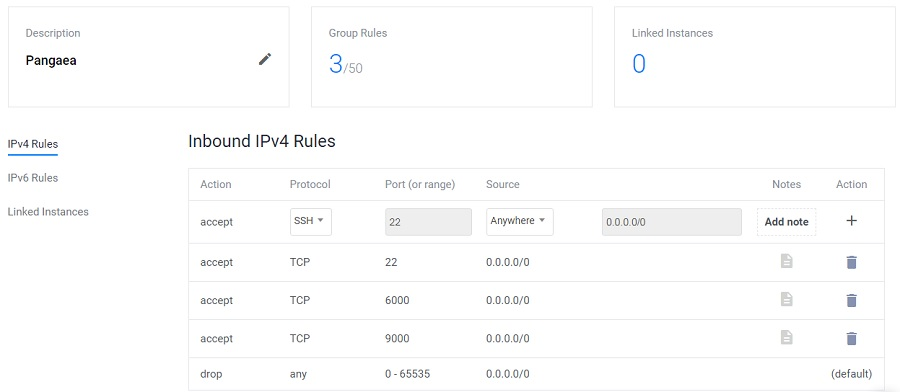
Open the following 3 ports to the public (“Anywhere” on inbound).
TCP 22 (SSH)
TCP 6000
TCP 9000
Make sure to check that 3 Group Rules have been set.

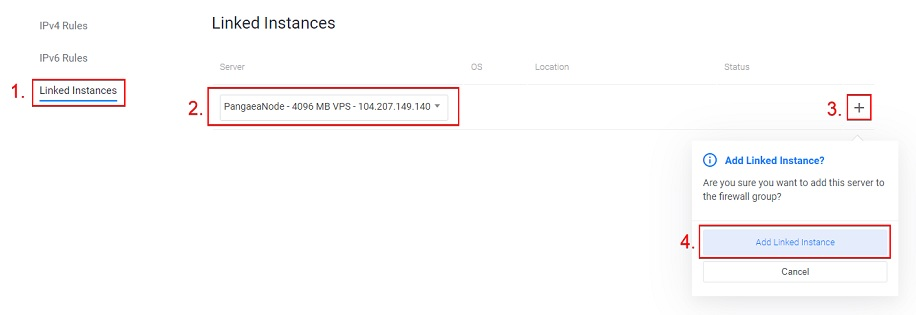
Then link the instance to the firewall group. The steps are as follows:
Click Linked Instances.
Make sure your new server is selected.
Click the + button.
Click Add Linked Instance.
Your instance should now be added to the firewall group and the number of linked instances should increment by 1.
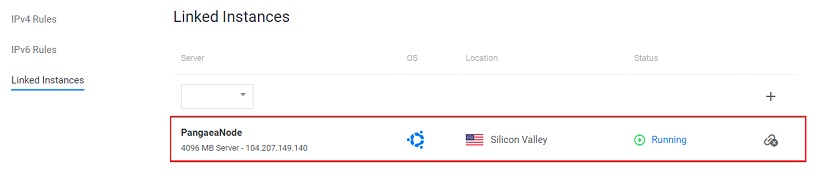
You can now go back to the Products page and your server is now successfully set up!

Step 2: Connecting via SSH to your Instance
Follow the instructions below accordingly to the operating system you are connecting from:
Windows
Linux
Step 3: Update / Upgrade your VPS
Before anything, it is recommended to update your system:
sudo apt update && apt upgrade
You will be asked to confirm if you would like to download and install these packages. Just press Y to confirm.