

Intermediate
Validators – server setup with cloud guides using AWS and Google Cloud
This tutorial provides a guide on how to set up a server using validators on AWS and Google Cloud. It includes step-by-step instructions on how to launch and connect to an AWS or Google Cloud instance, and how to install the required packages. It also mentions that Google Cloud has a free tier for new users with $300 to spend on Google Cloud Platform products during their first 12 months. The tutorial is mainly focused on how to launch and connect to instances on AWS and Google Cloud, and how to install the required packages.
AWS
To launch your AWS instance, follow the steps below.
Step 1: Launching your AWS Node
If you don’t already have an AWS account, register one at https://aws.amazon.com.
Once you have set up and logged into your AWS account, click on the top left bar “Services -> Compute-> EC2″.
Click on the blue button “Launch Instance”.
Select “Amazon Linux 2 AMI (HVM), SSD Volume Type”.
Choose instance type “m5a.xlarge” or “m5.xlarge“.
Click “Next: Configure Instance Details” at the bottom right corner of the page.
Don’t change anything. Click “Next: Add Storage” at the bottom right corner of the page.
Change the “Size (GiB)” accordingly to the minimum storage requirements.
Click “Next: Add Tags”.
Click “Add Tag.” Then, in the “Key” input box put “Name” in “Value” put “Pangaea-key”.

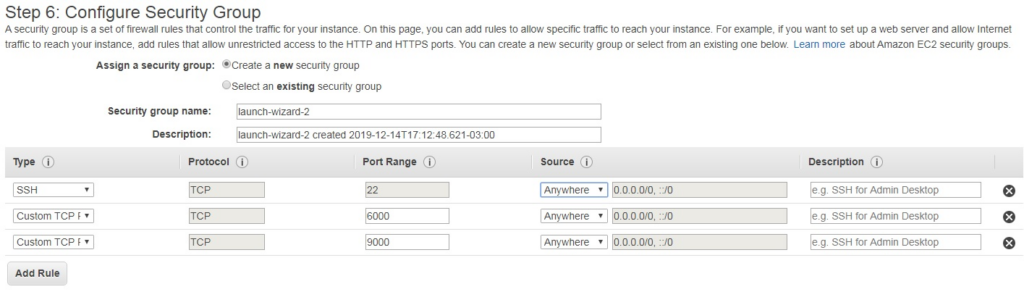
Click “Next: Configure Security Group”.
On the default SSH with port 22, change the “Source” option to “Anywhere”.
Click “Add Rule”. Under “Type” select “Custom TCP Rule”, under “Port Range” put “6000” and under “Source” select “Anywhere”.
Click “Add Rule” again. This time, under “Type” select “Custom TCP Rule”, under “Port Range” put “9000” and under “Source” select “Anywhere”.
Click “Review and Launch” and then click “Launch”. (Note: Ignore warnings such as “your security group is open to the world” or “your instance configuration is not eligible for free tier”)
In the pop-up window you will need to create a new key pair. Select “Create a new key pair” and then enter a name that you like, for example “Pangaea-key”.

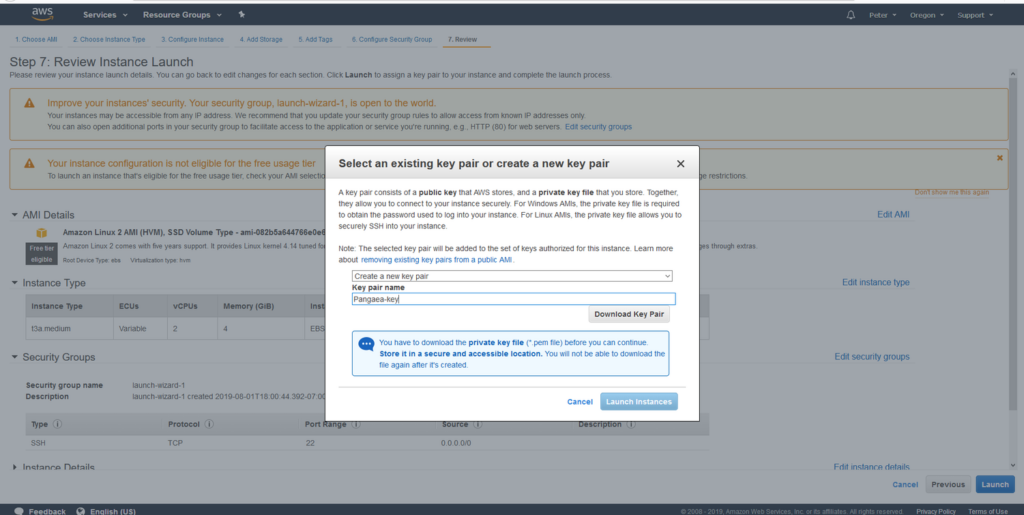
Click “Launch Instances”.
Click “View Instances” at the bottom right. Your new instance should be initializing. Wait a few moments for it to get started.
Congratulations your instance is up and running! Now it’s time to connect to your instance.
Step 2: Connecting to your AWS Instance
Open a Terminal window on your computer.
For Mac: If you can’t find Terminal, use spotlight to search for it. Or go to your “Applications’ folder, and it should be inside of “Utilities”.
For Windows: Download PuTTY to allow your computer to SSH into the AWS instance. For instructions on connecting to an EC2 instance using Putty follow these instructions from Amazon.
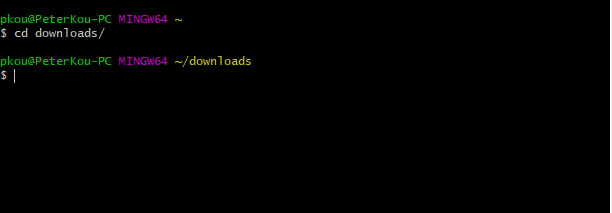
Once Terminal is open, use the cd command to change your directory to where the key pair file (Pangaea-key.pem) that you generated is. Hint it may be in your “Downloads” folder.
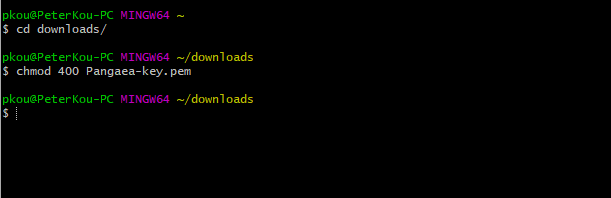
Enter the command chmod 400 Pangaea-key.pem. This command makes your key not publicly viewable.
Note: On Mac, your pem file may have been changed to a .txt file so the correct command on Mac would be: chmod 400 Pangaea-key.pem.txt

ssh -i "pangaea-key.pem" ec2-user@ec2-13-250-30-215.ap-southeast-1.compute.amazonaws.com
Now connect to your instance by running the sample command you copied from the “Connect” page in your terminal window.
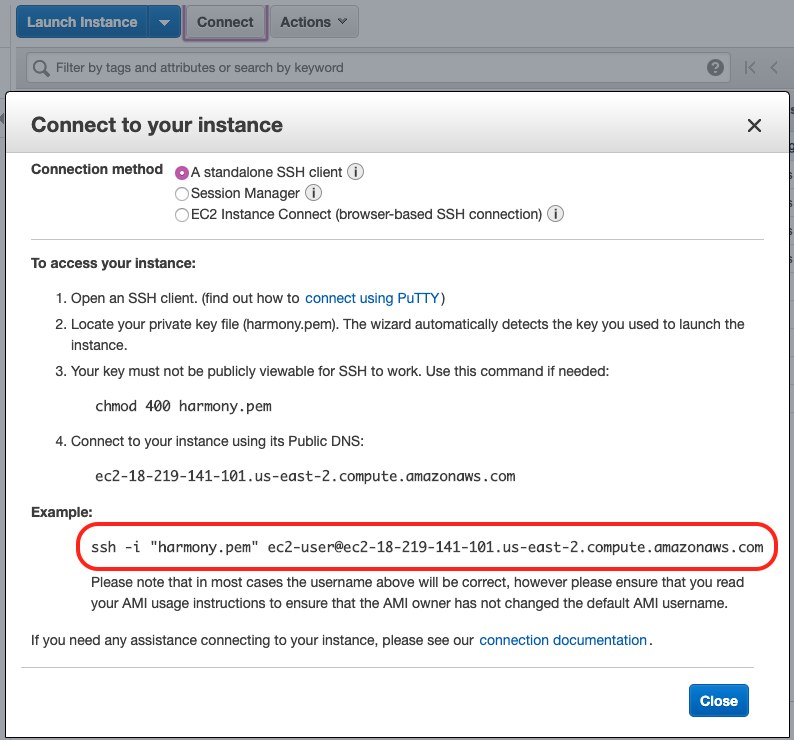
It may ask you whether or not you want to continue connecting. Type in “yes” and hit enter.
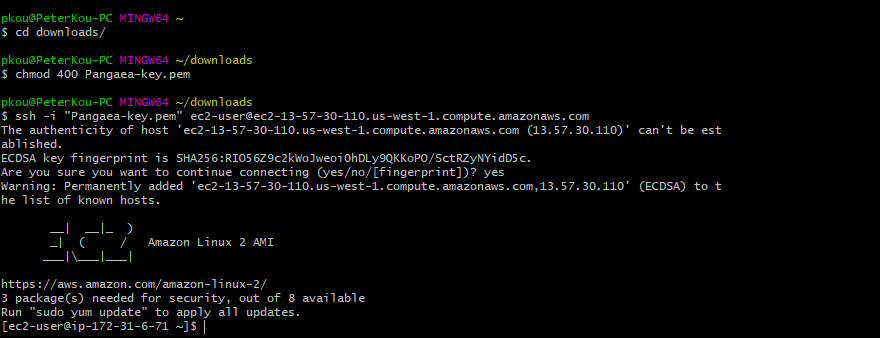
Congratulations! You should be logged into your new AWS instance!
Step 3: Installing Required Packages
Run the following command to make sure your instance is properly updated:
sudo yum update
When prompted whether or not you want to download packages, enter “y” for yes.
Google Cloud
To launch your Google Cloud instance, follow the steps below.
Google Cloud has a free tier for new users. You get $300 to spend on Google Cloud Platform products during your first 12 months
Step 1: Launching your Google Cloud Instance
Go to Free Trial and Free Tier | Google Cloud and click on “Get Started for Free”. Login using an existing account or create a new one.
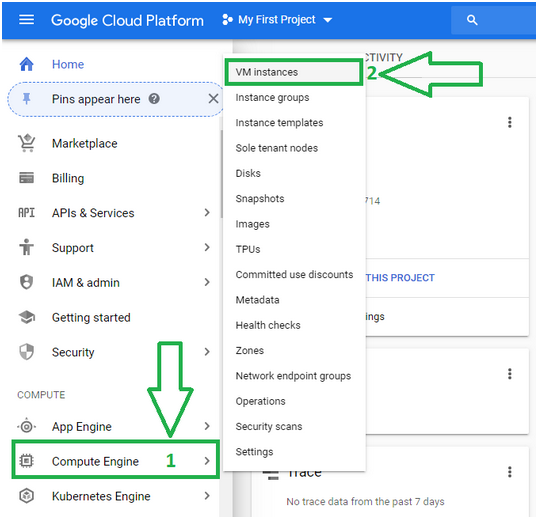
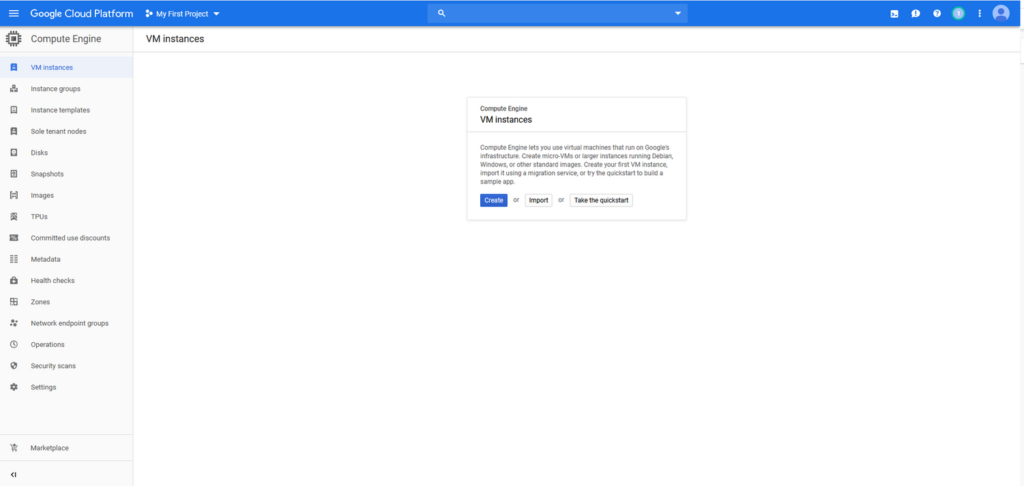
After you login and validate your credit card, you will be shown a page pretty much like this one. Click on “Compute Engine” and then in “VM Instances”.
Click on the Create button to make a new instance
We recommend to name it something like “pangaea” (the instance name cannot be changed). Select the Machine type as “Custom” and set up 4 vCPU’s and 4GB of Memory.

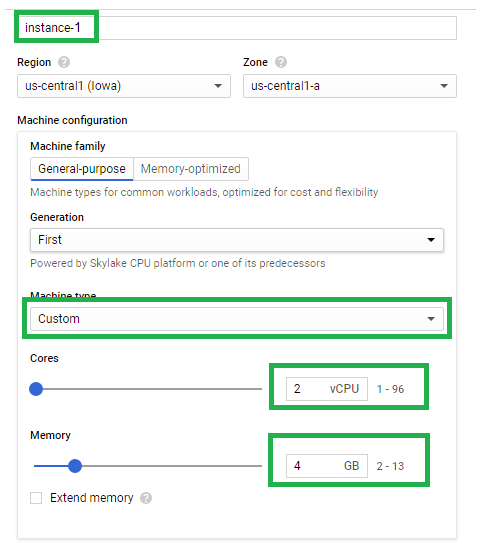
Keep everything default after you have configured the cores and memory.
For the Boot Disk, we recommend the latest LTS version of Ubuntu (18.04 as of date of now). Change the boot disk size to the minimum storage requirements.
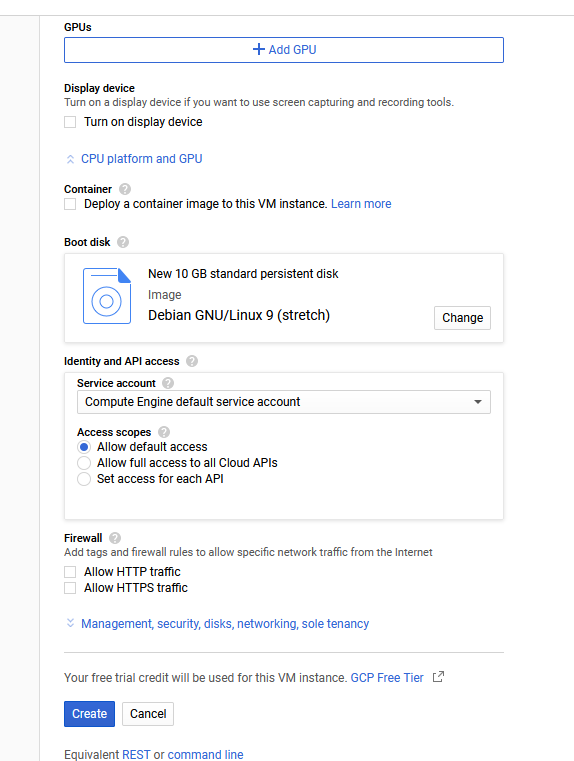
Click Create. Please wait a few minutes for your instance
Once the instance is created. We will open 4 ingoing ports. To do this click on “nic0” as shown below. In the next page click on “Firewall rules” and after that on “CREATE FIREWALL RULE”.
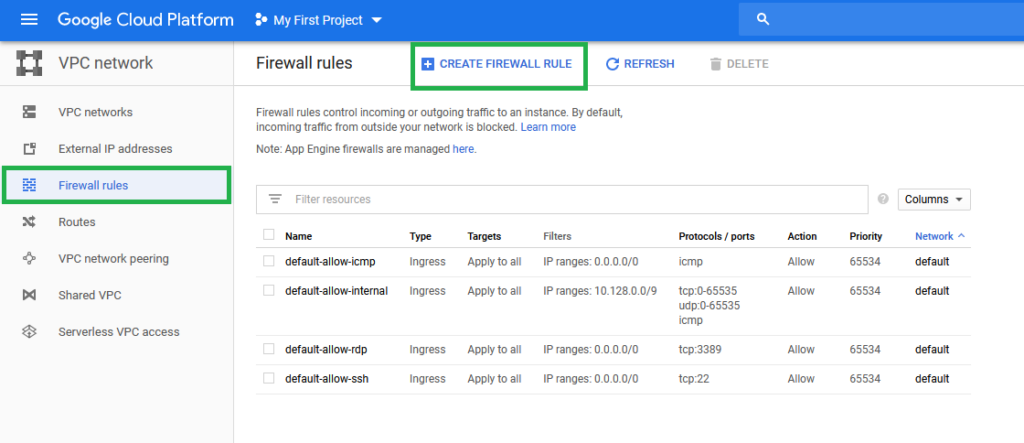

TCP 6000
TCP 9000

Step 2: Connecting via SSH to your Instance
Go back to the VM instances page and click on SSH. This will open a new window and connect via SSH to your instance:

Step 3: Update / upgrade your VPS
Before anything, it is recommended to update your system:
sudo apt update && apt upgrade
You will be asked to confirm if you would like to download and install these packages. Just press Y to confirm.