

Beginner
How to Create account on Celo network
- Metamask
MetaMask is a free web and mobile crypto wallet that allows users to store and swap cryptocurrencies, interact with the Ethereum blockchain ecosystem, and host a growing array of decentralized applications (dApps). It is one of the most widely used crypto applications in the world.
Step 1. Create a Metamask Wallet
Welcome to this tutorial on how to create a Celo account as a beginner.
-
Choose a wallet: There are different types of wallets available, so you will need to choose one that meets your needs. For this tutorial, we will be using the open-source and trusted Metamask wallet.
-
Download and install the wallet: Visit the Metamask website at The crypto wallet for Defi, Web3 Dapps and NFTs | MetaMask and find the button to download the wallet for your particular browser. Once the installation is successful, open the wallet.
- Agree to the conditions: When you open the wallet, you will be prompted to agree to the conditions. Click on the button to accept.
-
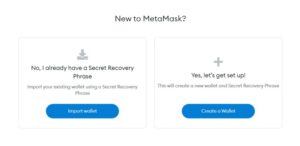
Create a new wallet: You will see a screen with the option to create a new wallet. Select this option and create a new password.
-
Watch the security video: A video will appear on your screen to guide you through the process of securing your wallet and familiarizing yourself with the security features
-
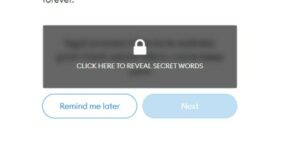
Reveal a secret recovery phrase: You will be prompted to reveal a secret recovery phrase. Click the lock button and write down the words that appear, as this will be your only way to recover your account if something happens and you lose access.
-
Verify your key: After completing the secret recovery phase, you will be taken to a verification screen. Follow the prompts to verify your key.
-
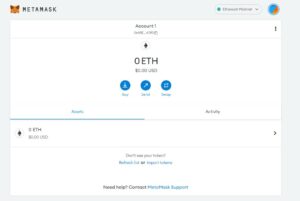
Your account is now set up: Once you have successfully verified your key, your account is now set up and ready to use.
Step 2. Add a Celo Network to Metamask
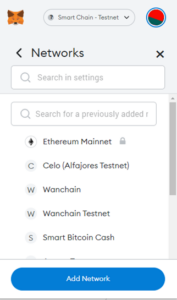
MetaMask select Settings > Networks > Add Network
-
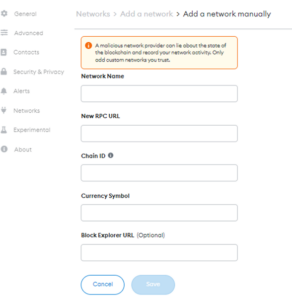
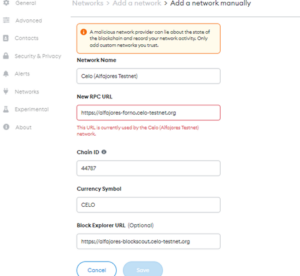
Add the Celo Network details to Metamask
.
Celo Mainnnet
Network Name: Celo (Mainnet)
New RPC URL: https://forno.celo.org
Chain ID: 42220
Currency Symbol (Optional): CELO
Block Explorer URL (Optional):
 Celo Explorer
Celo Testnet
Network Name: Celo (Alfajores Testnet)
New RPC URL: https://alfajores-forno.celo-testnet.org
Chain ID: 44787
Currency Symbol (Optional): CELO
Block Explorer URL (Optional):
 Alfajores Celo Explorer
-
After adding Celo network details select Save
-
You can view the Celo network configuration from the MetaMask Networks screen
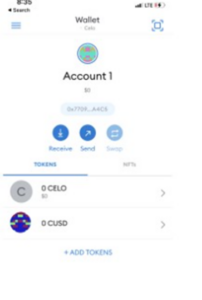
Optional: Add Celo Assets to MetaMask
-
Open MetaMask and select the Celo network
-
Select Add Token to navigate to the Custom Token tab
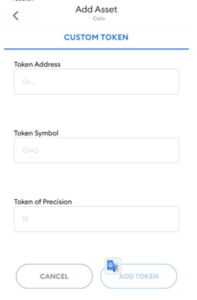
Celo Mainnet
cUSD: 0x765de816845861e75a25fca122bb6898b8b1282a
cEUR: 0xd8763cba276a3738e6de85b4b3bf5fded6d6ca73
Celo Testnet
cUSD: 0x874069fa1eb16d44d622f2e0ca25eea172369bc1
cEUR: 0x10c892a6ec43a53e45d0b916b4b7d383b1b78c0f
-
Paste the Token Address into the Token Address Field
-
This will take you to the home screen viewable under Tokens
-